Part 1 – Theme Metamorphosis
I am excited to see how two similar objects can be so different.
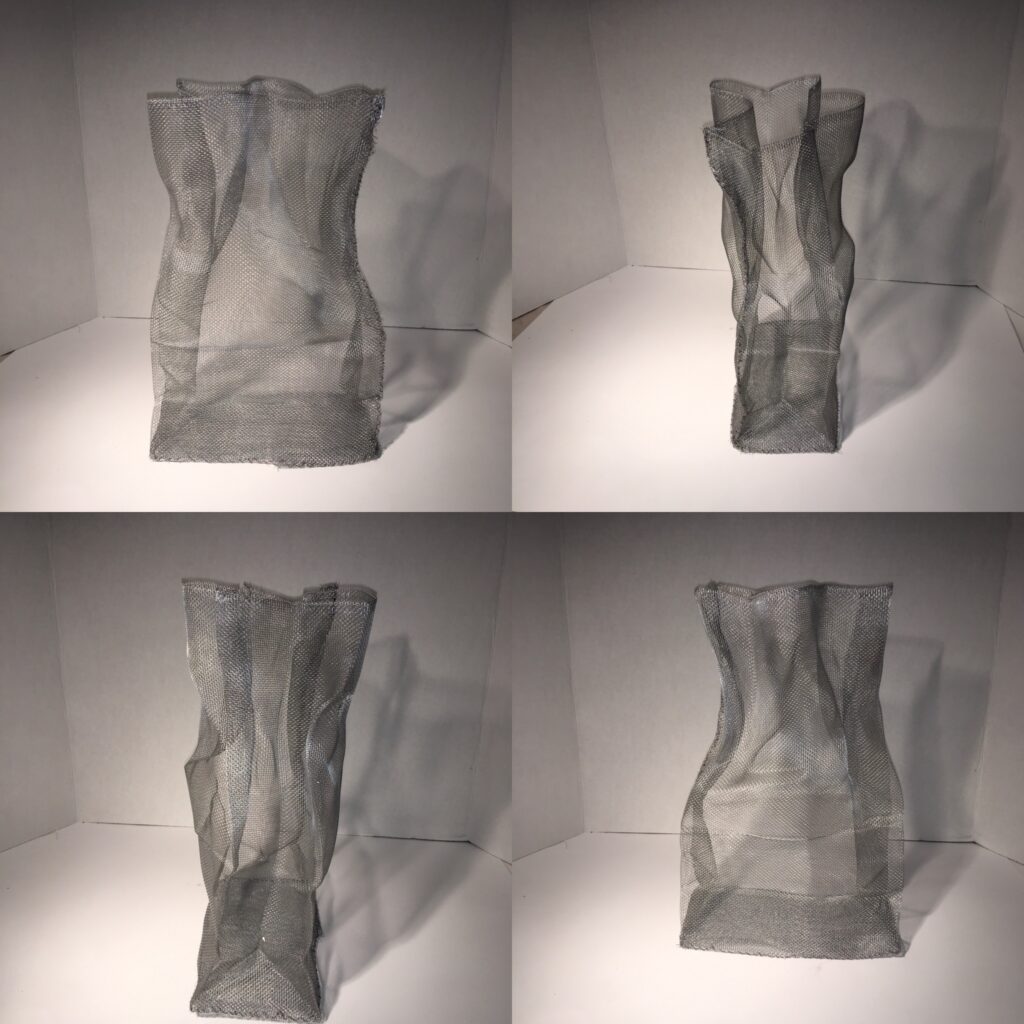
This project required us to draw a pattern with certain dimensions and use it to make 2 wire bags out of steel mesh.
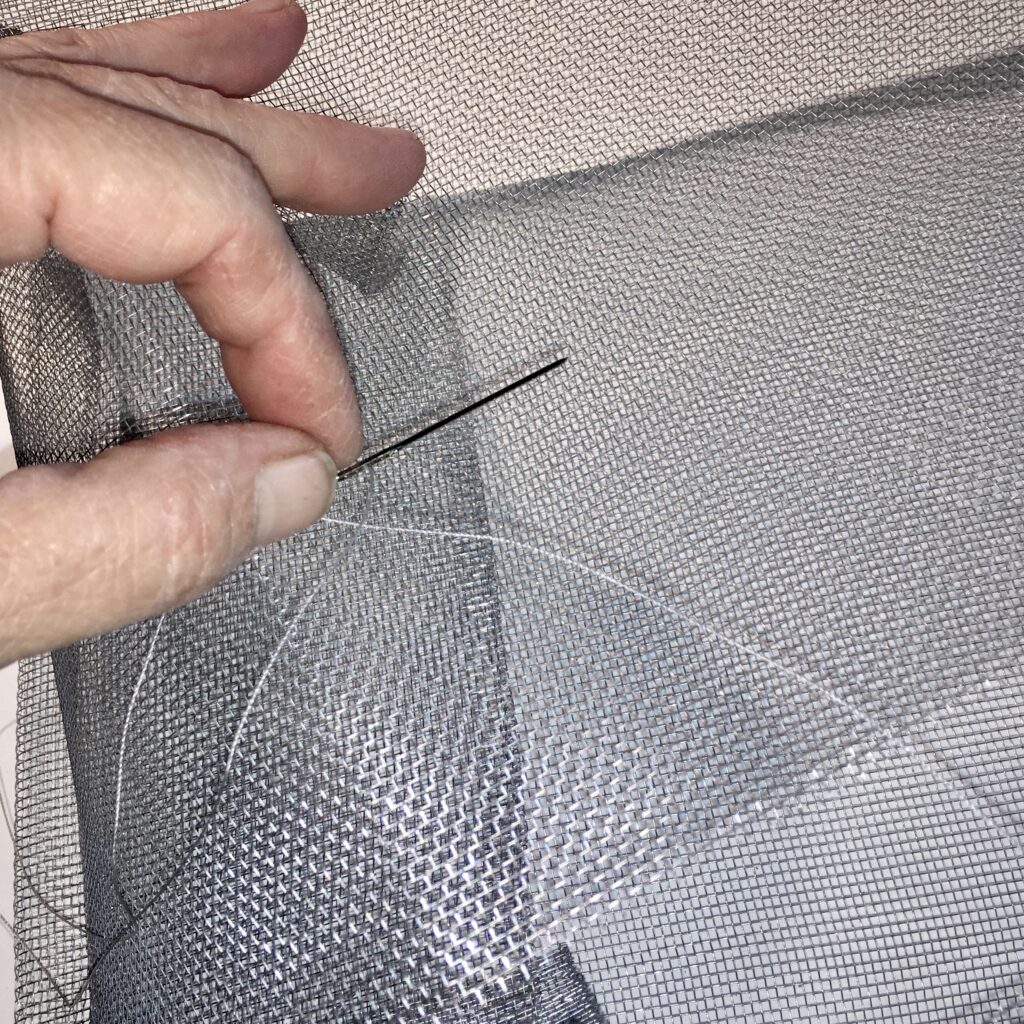
I cut the wire mesh out and pinned it just as if it was fabric. The sewing was very easy for me as I have worked with textiles for many years. I loved the way the mesh conformed and held itself rigid. I wanted to immediately make a frock coat!
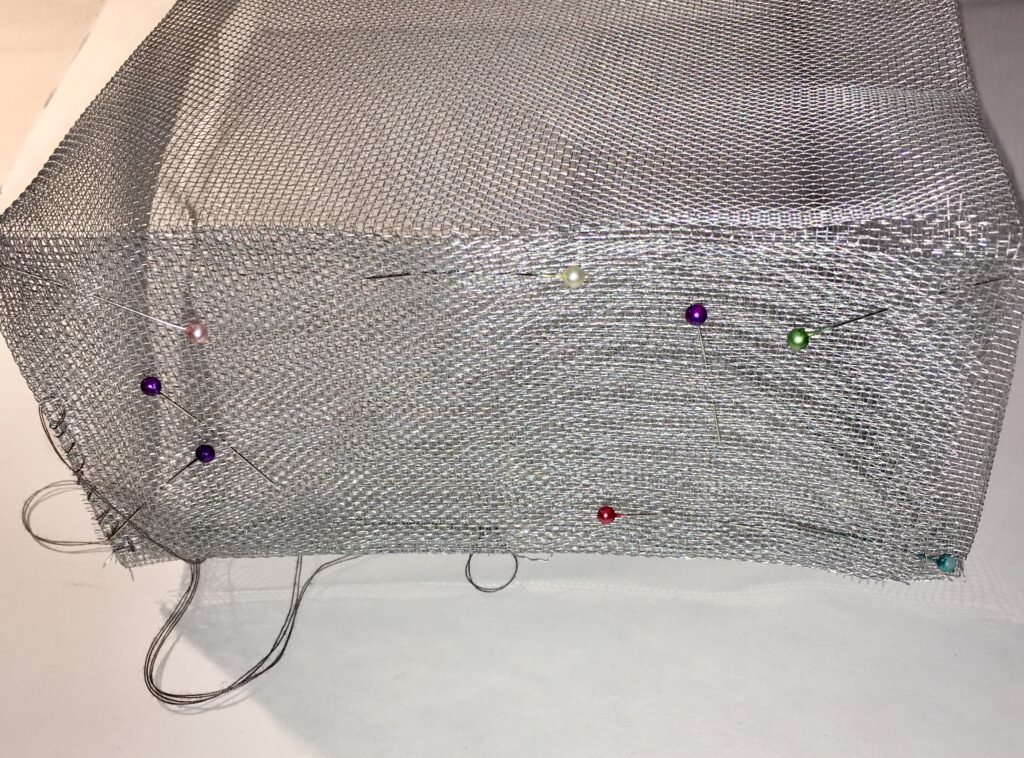
I found that just like fabric, if I pinned the corners and some key areas the sewing just zipped along.
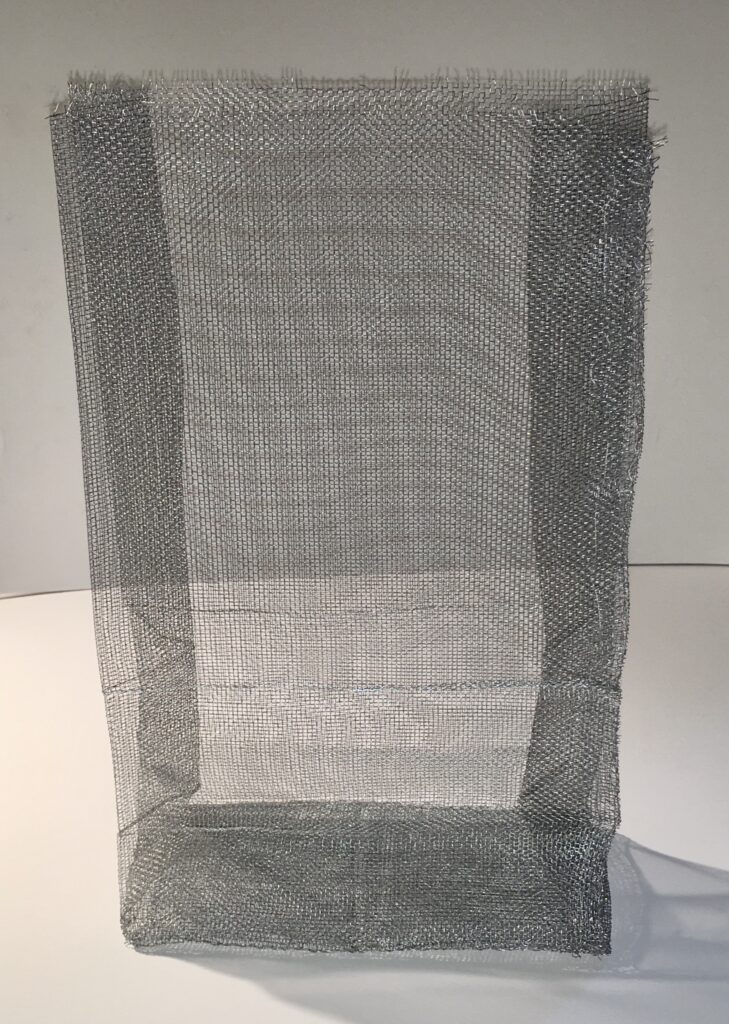
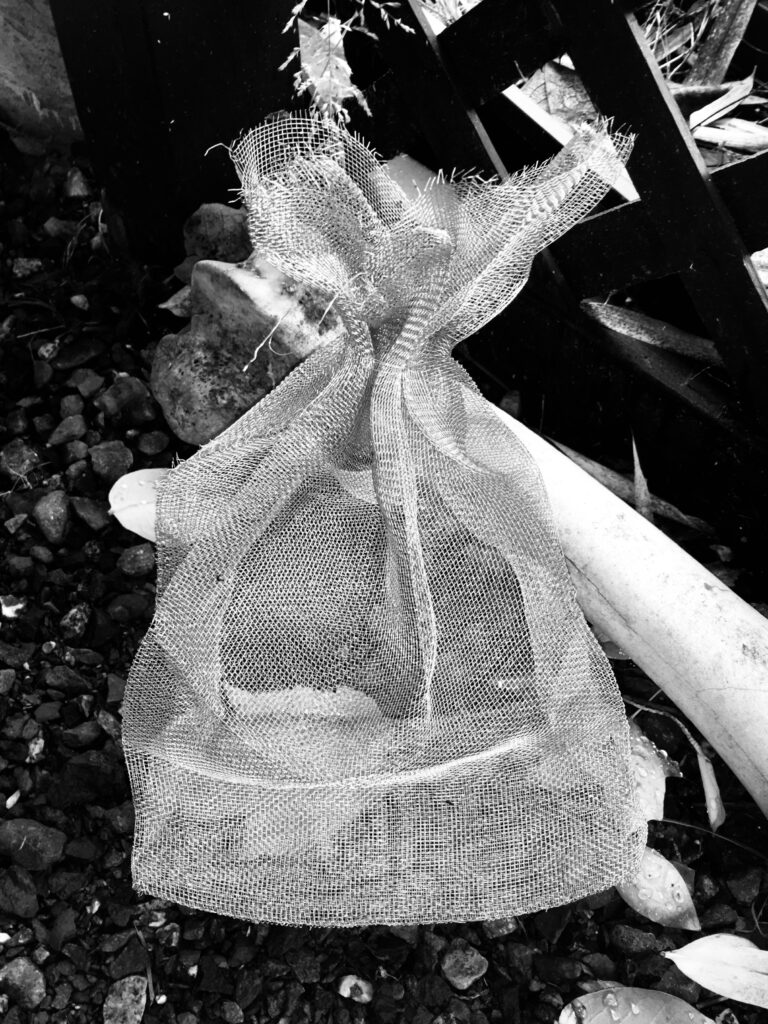
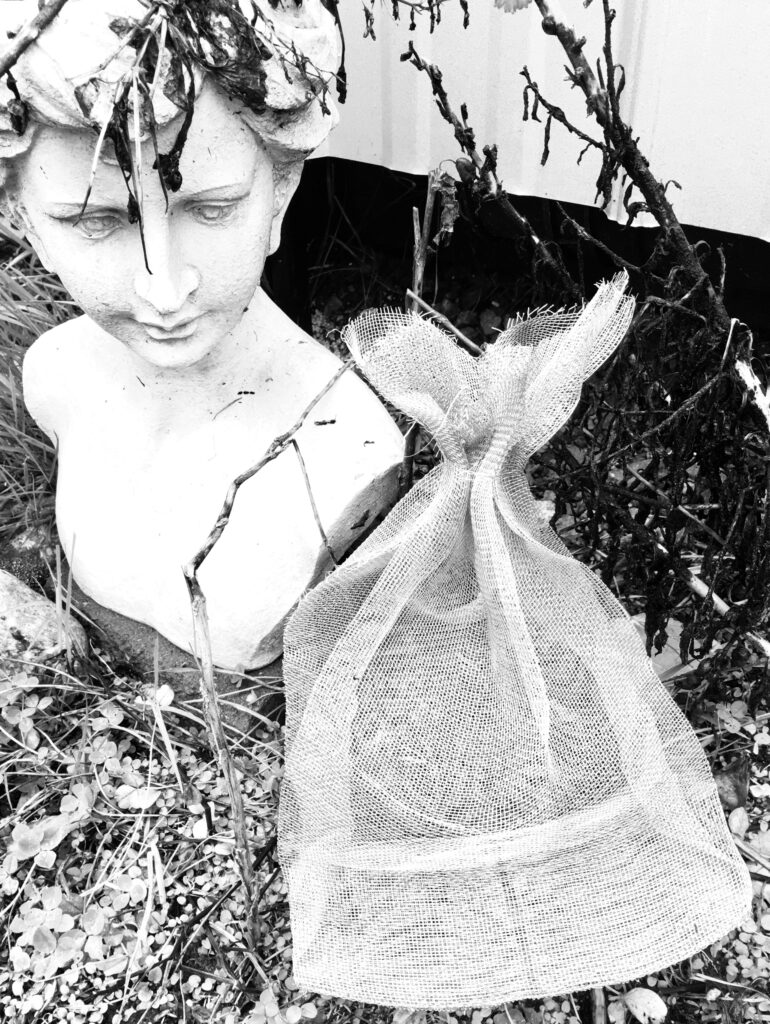
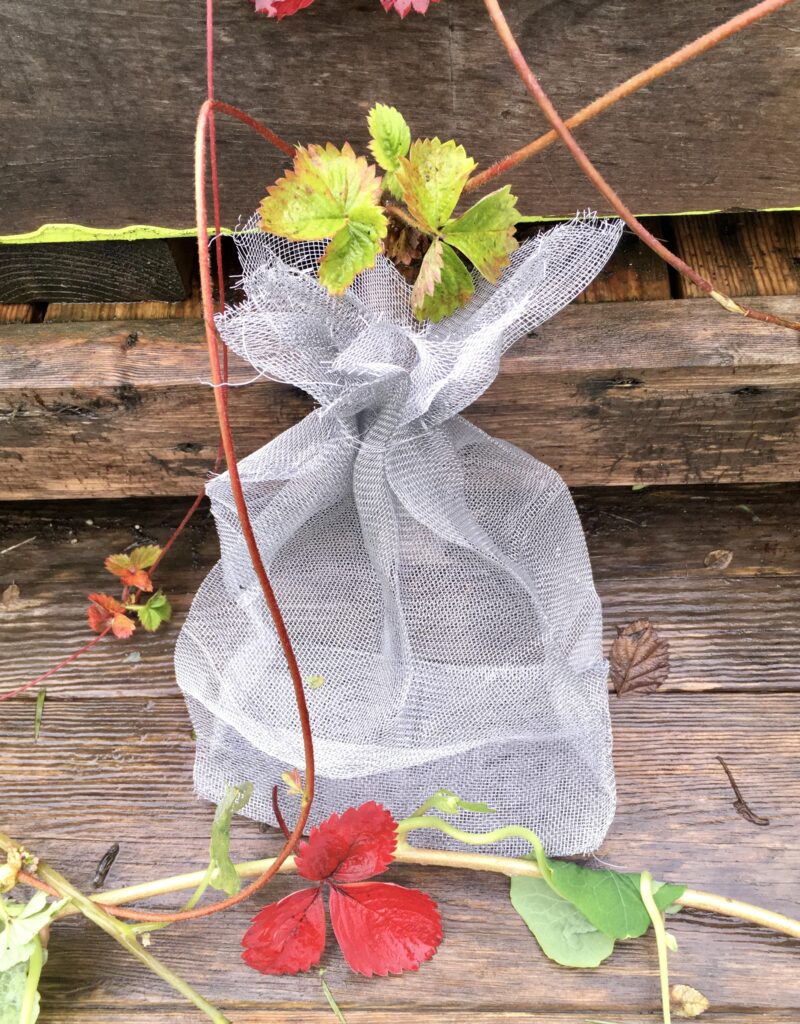
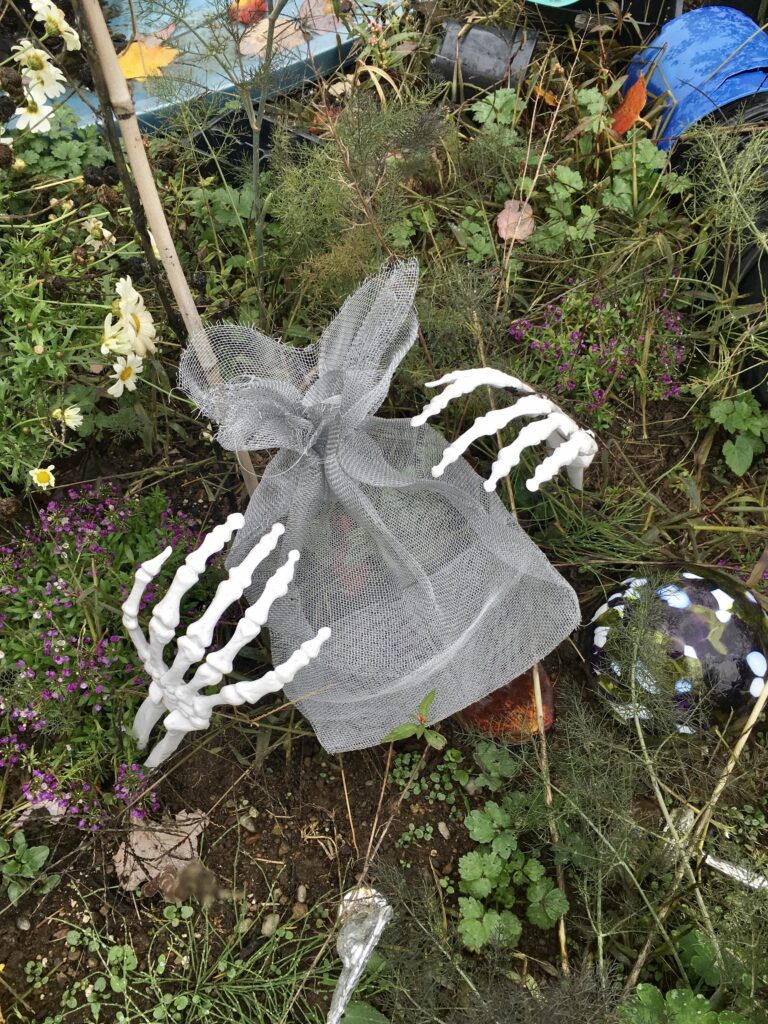
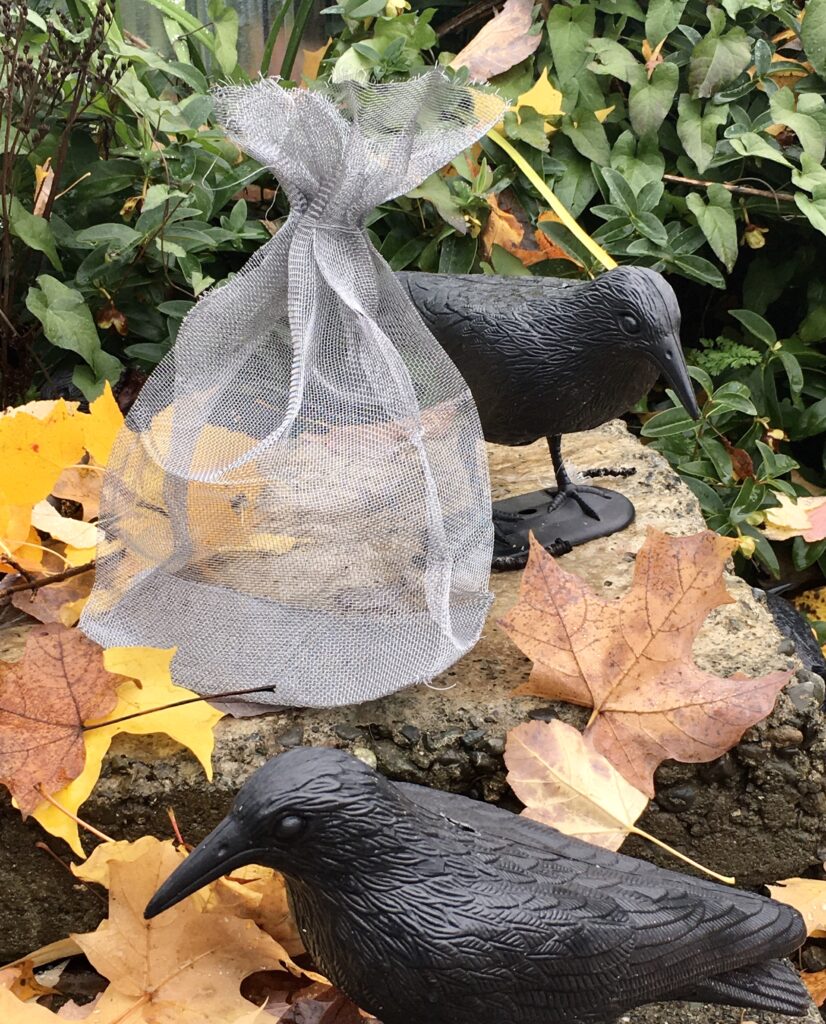
End product produced two nice clean lined wire mesh bags. I took one of the bags and had fun squishing it and looking at the different forms. I decided to make the wire mesh bag into a closed bag. Wire was wrapped around the pinched in neck. I liked the idea of a closed bag being see through. Like when you go through security at the airport and they x ray your bag and can see everything inside. Paper bags are not usually transparent.
I then took the bag outside and had fun taking some photos of it around the yard.
Part 2
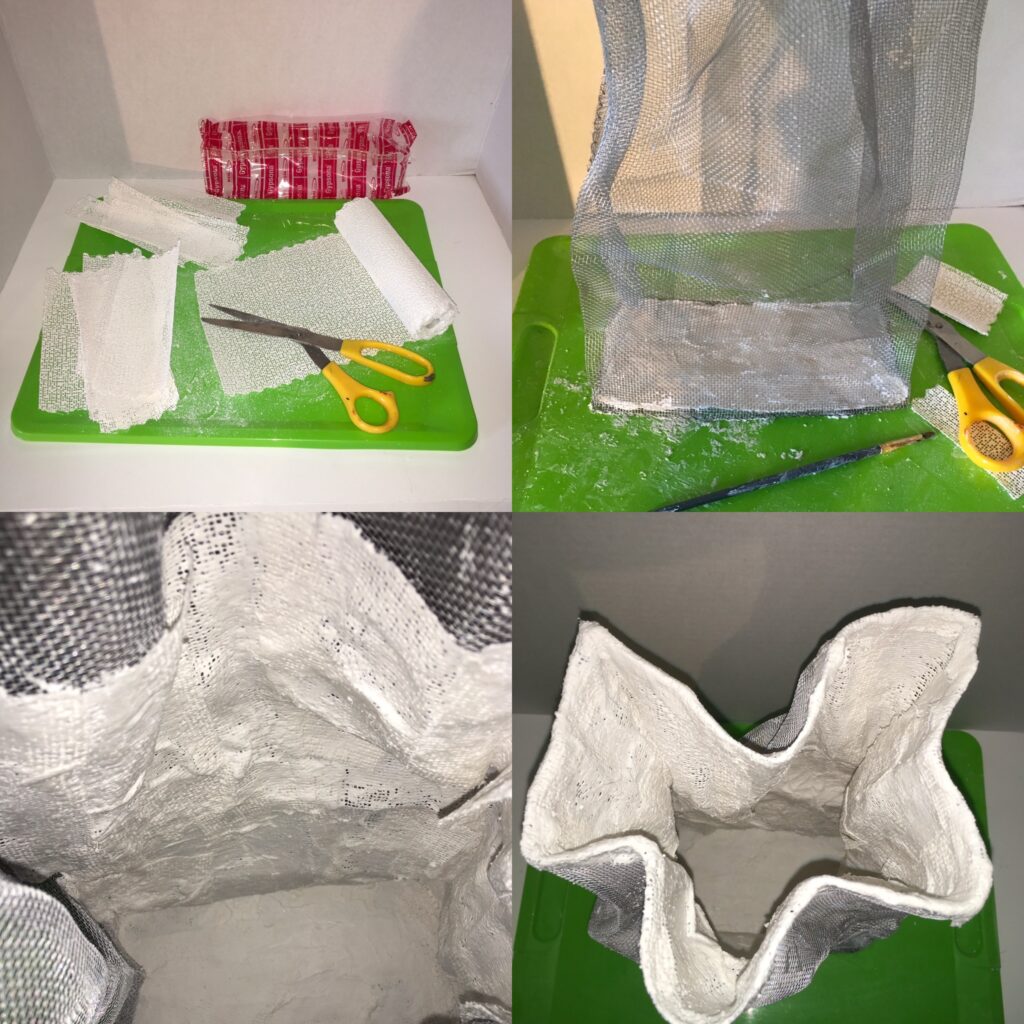
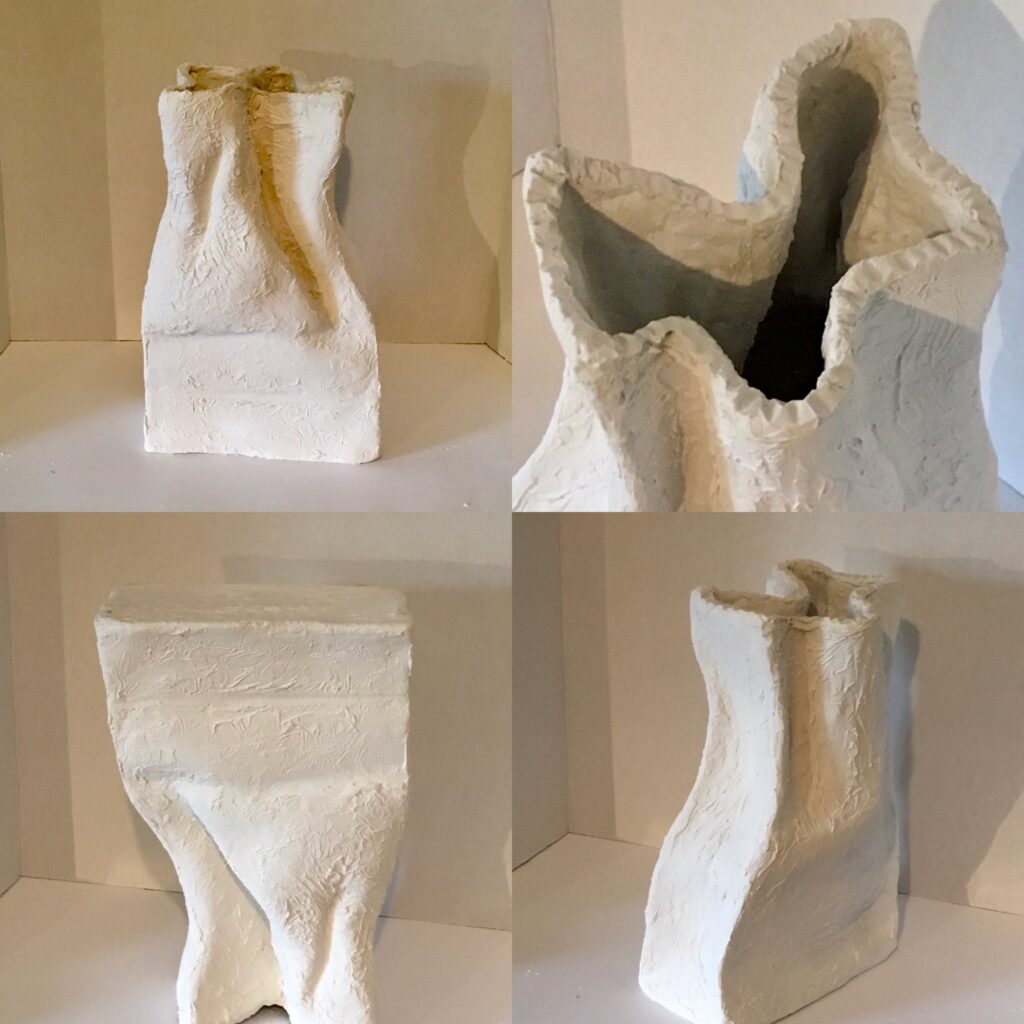
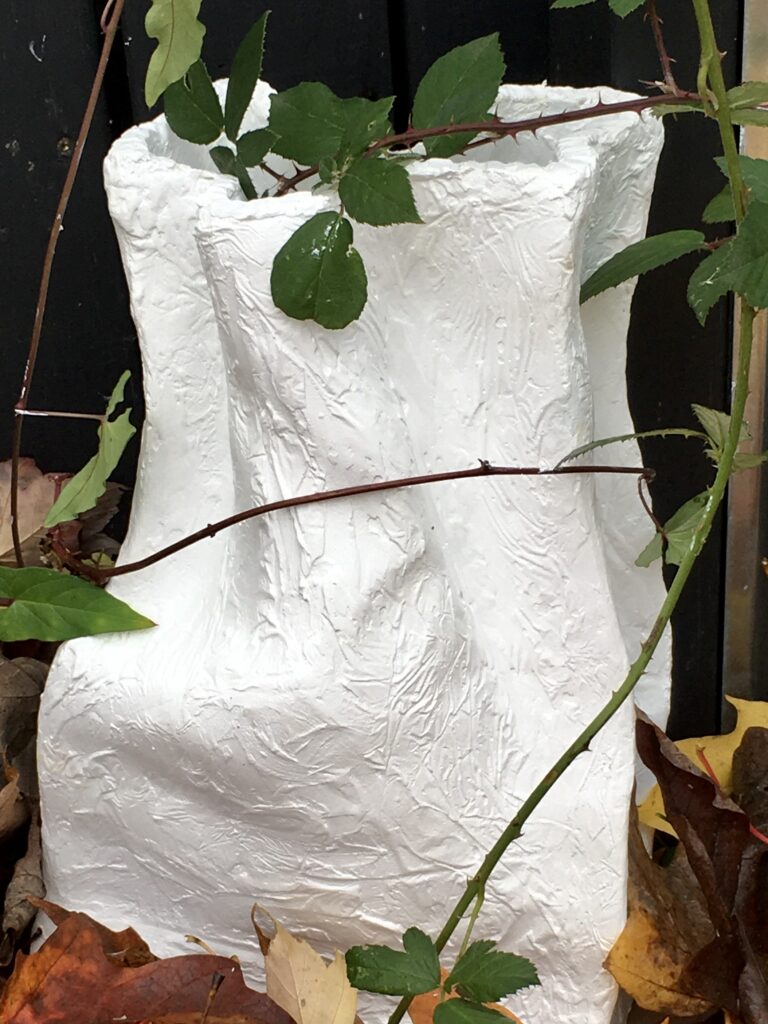
Time to move onto the second part of this production. The second wire bag will now metamorph into a solid plaster bag that will be open at the top. I shaped it into a position with a wide enough neck to get my hand inside for future applications..
The Gypsom plaster bandages were cut into squares and strips. These were immersed one by one into water and smoothed onto the mesh form. Starting on the inside, I worked from the bottom up. I covered the first 1/3 inside the bag and then set it to dry. I found if you went to fast, things would get top heavy and slump down. This resulted in a strong stable base while working upwards. Next I plastered the inner middle third and let that dry. The top 1/3 I wrapped the plaster fabric up to the rim. After the inside was completed and dry, I repeated the same process on the outside of the bag, starting at the bottom and working towards the top of the bag. As the form was now hard, I didn’t have to wait for parts of it to dry before I put the next part down. I laid the bag on its side and did the outside in record time. A sponge brush helped in some areas for applying it into the folds. I wrapped the plaster fabric over the rim and down inside to give it a finished edge.
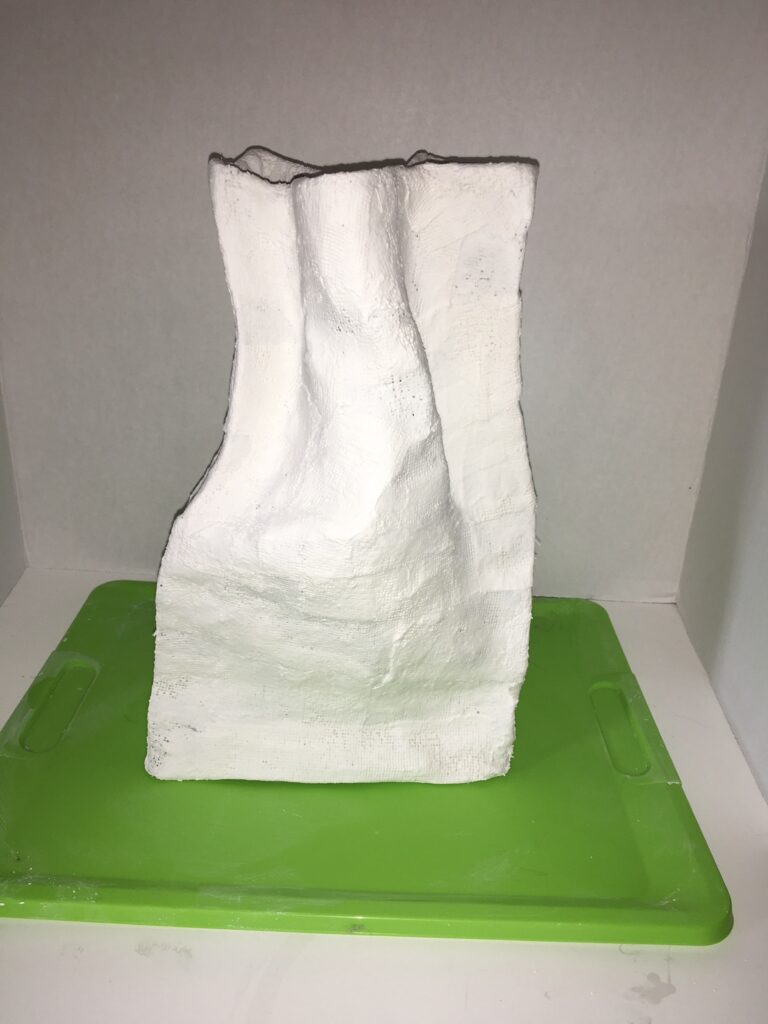
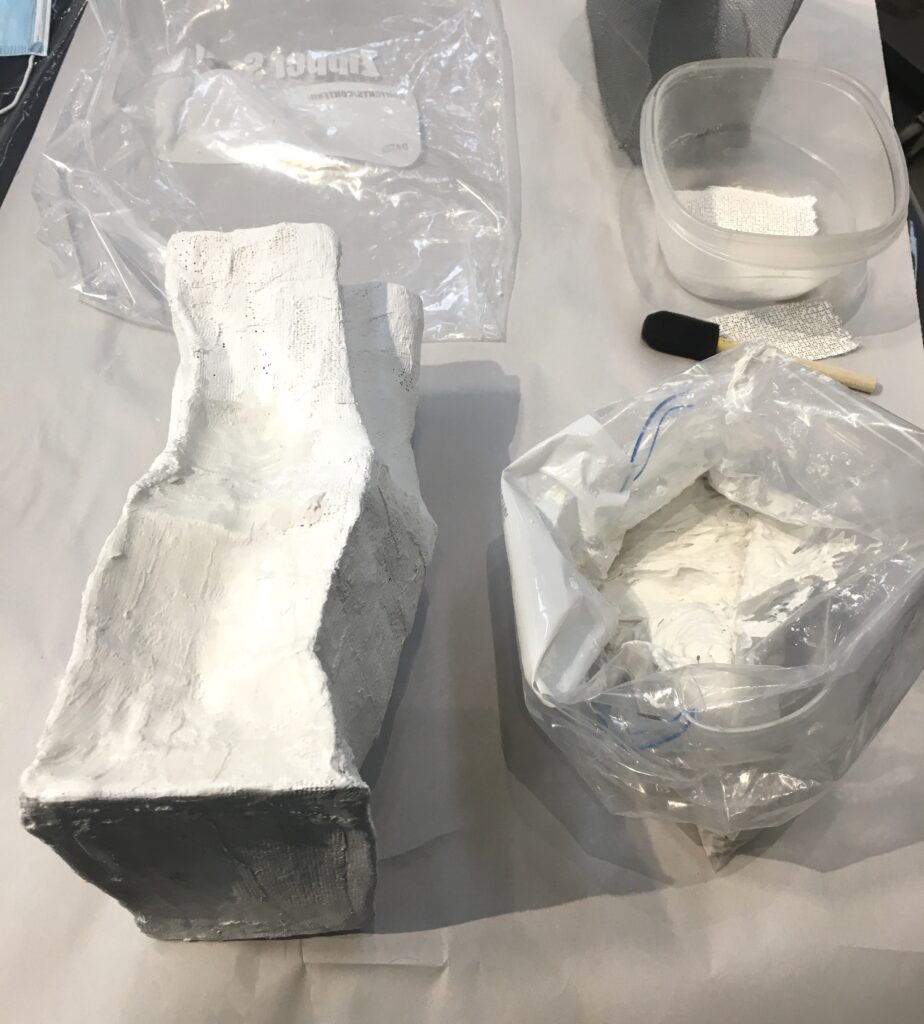
Using rubber gloves, a thin layer of drywall compound was applied to the outside and inside of the bag. I used a fine sanding sponge in-between layers to remove the uneven spots. If one sanded too vigorously the metal shows and that is not a good thing. In some areas the drywall compound cracked due to instability. I took PVA glue and mixed it with Hydrostone and poured that into the inside of my bag to give it a more internal structure.

*Trigger Warning* Childhood Trauma
This process of adding and subtracting became a full time job for me. I became Hyper Obsessive sanding down every little imperfection. Hours and hours spent worrying about the smallest flaws. My father was a carpenter and I have done many hours of drywall and painting in my life. Unfortunately, my father was also an abusive alcoholic. All those hours are not happy memories. I could hear my dad yelling at me in my head. Criticizing my actions, my work, my life. This bag was becoming a bag of Childhood Trauma. It wasn’t good, and it was OPEN.
My brain kicked into Fight or Flight mode and I checked out. I just left it. I couldn’t do it anymore. This plaster bag sculpture was so full of negativity. I had to step away and regroup my thoughts before this heavy plaster object became a flying missile out my second floor studio window!
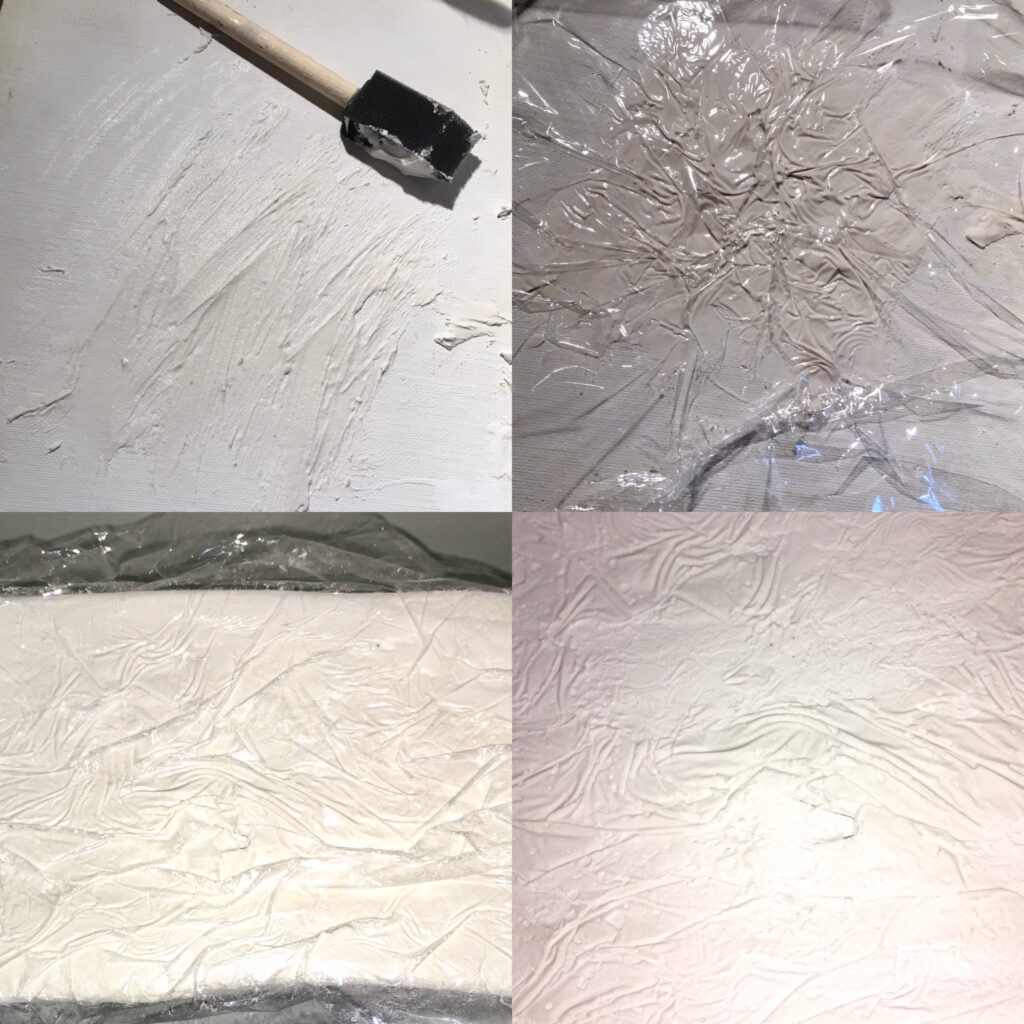
I needed to shake that all off and get this unit done. I do remember that in grade 5, I took huge pride in re using the same lunch bag as many times as I could. I would usualy make it last a month, sometimes longer. My mom would finally throw it out after it started tearing and/or getting holes. The bag would end up looking like fine wrinkled leather. To achieve the texture I wanted, I put down a heavy coat of drywall compound. I then put a piece of plastic wrap over the top. Using my fingers I squished it into a wrinkly pattern. Then it had to dry for a bit so the pattern will set. If you remove the plastic too soon, it looks like a bad textured ceiling in a 1970’s rental unit.
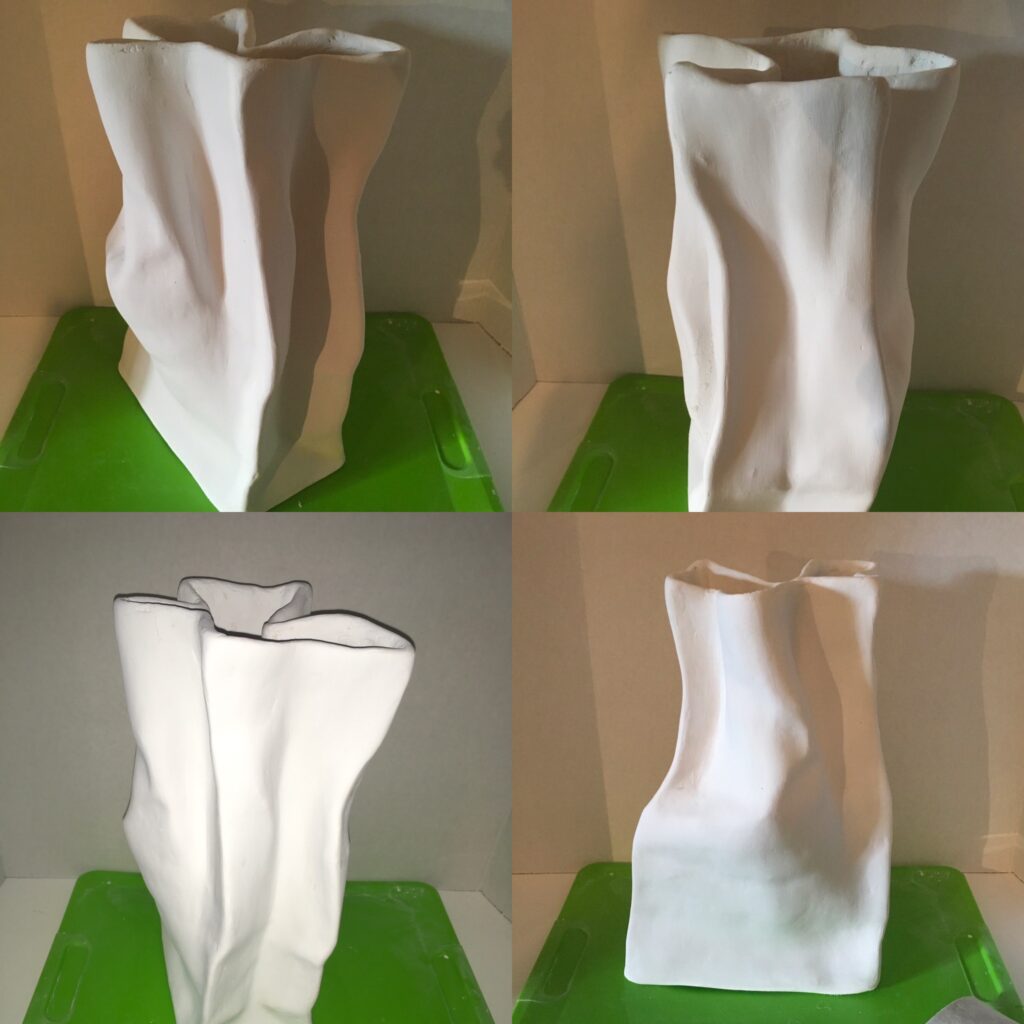
once the bag was dry, a coat of Primer was painted on. Over that went a layer of white acrylic paint. This bag is so begging for a wash of color too emphasize the texture, but that will come at a later date as we must keep it white.
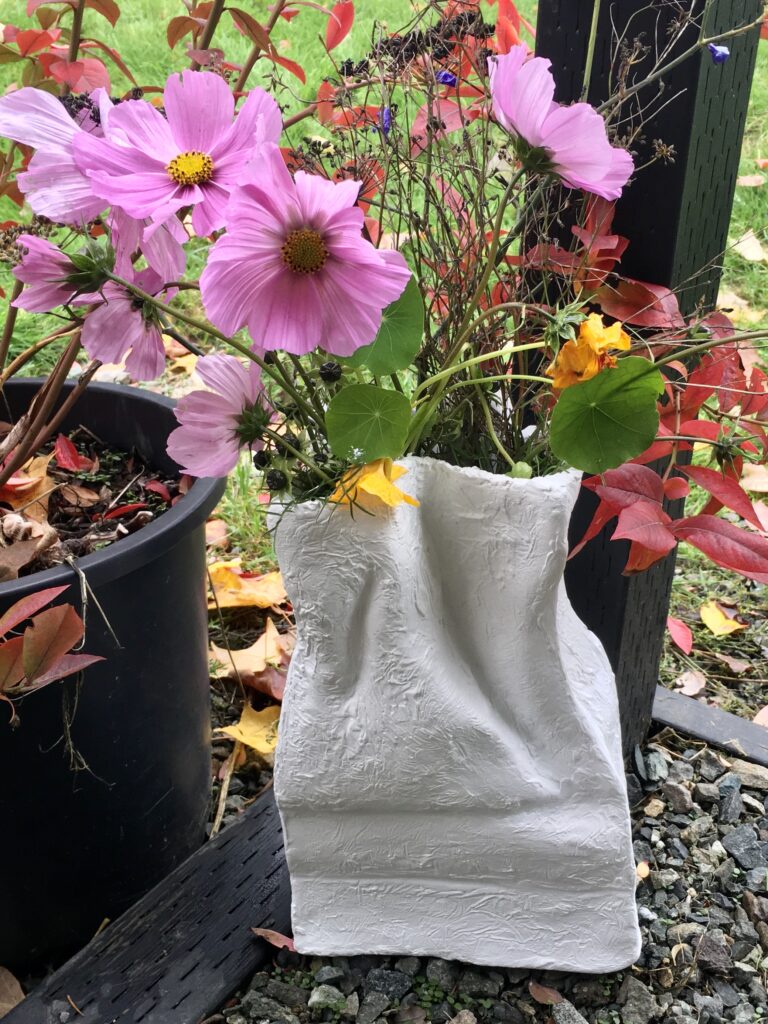
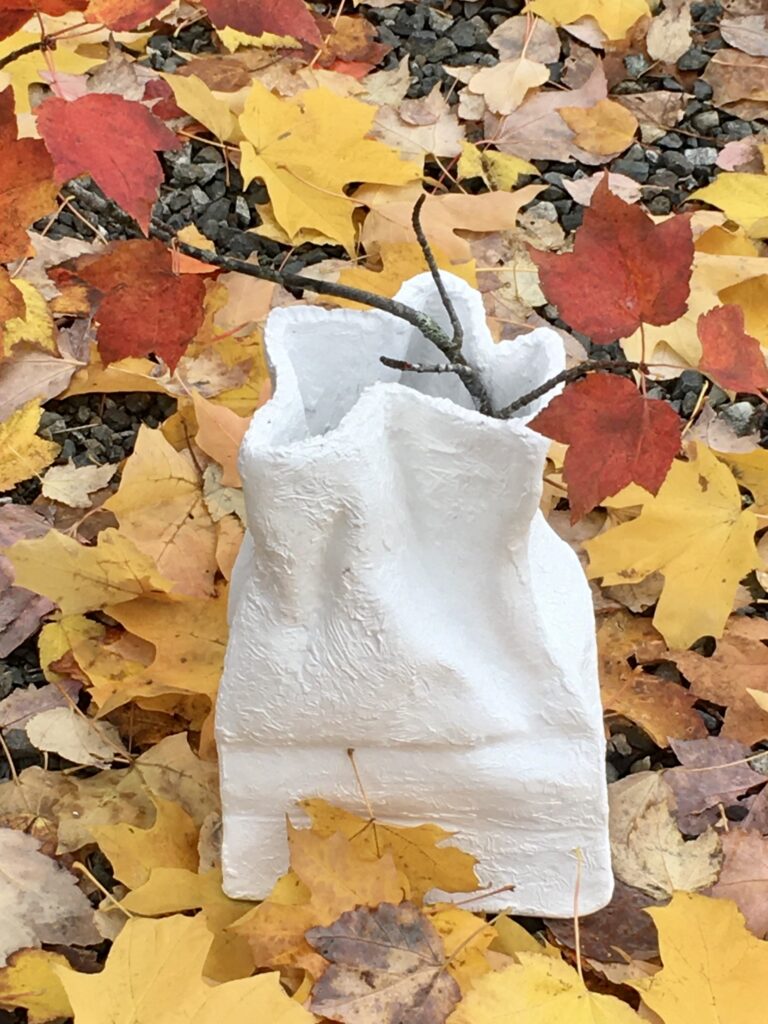
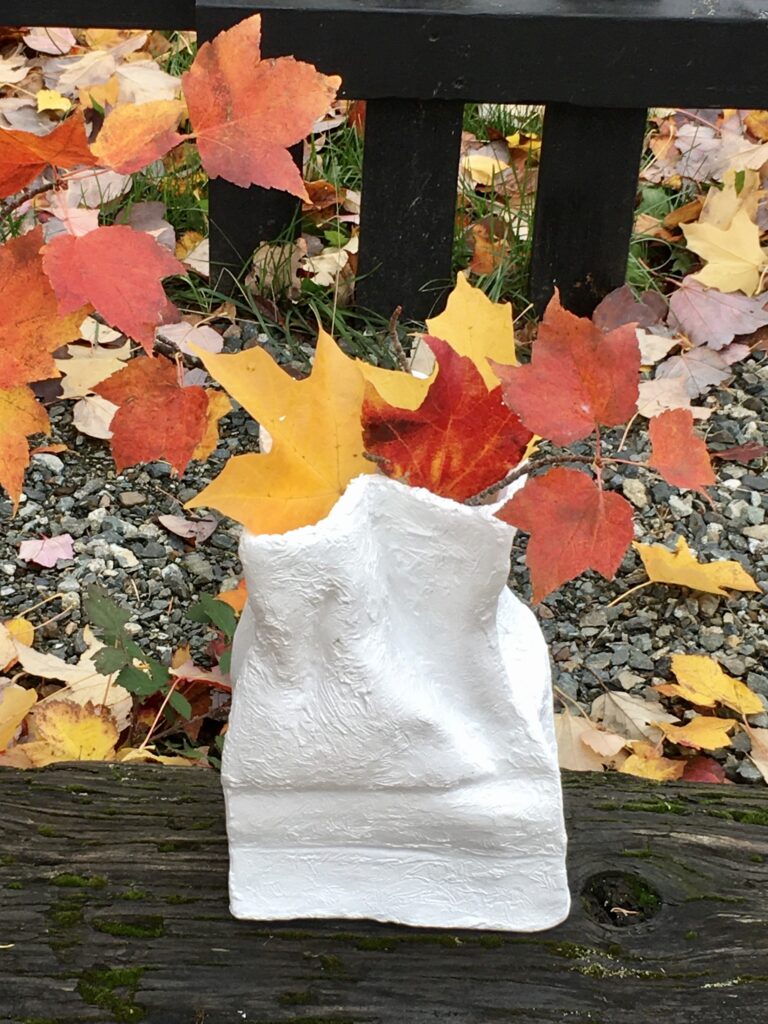
The rain has stopped so I will get the finished sculpture outside for some photos.

Part 3
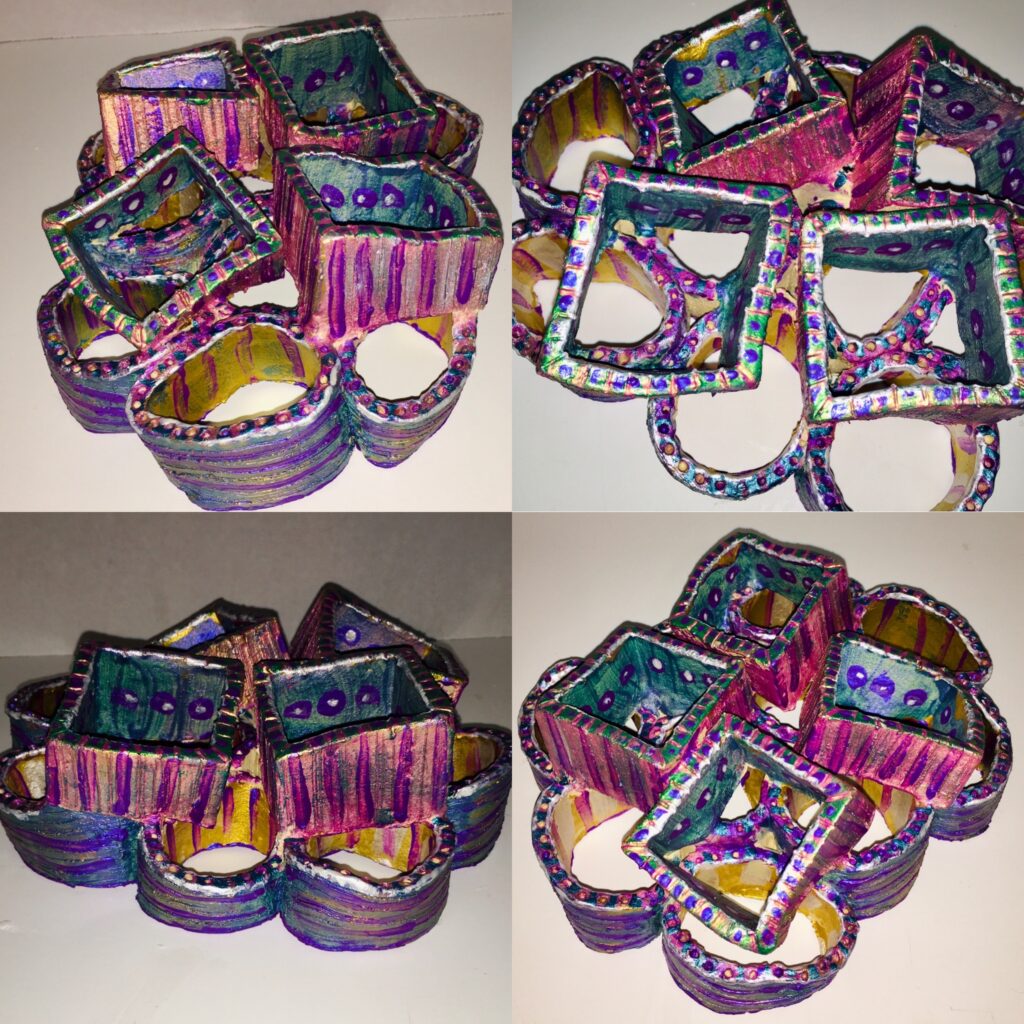
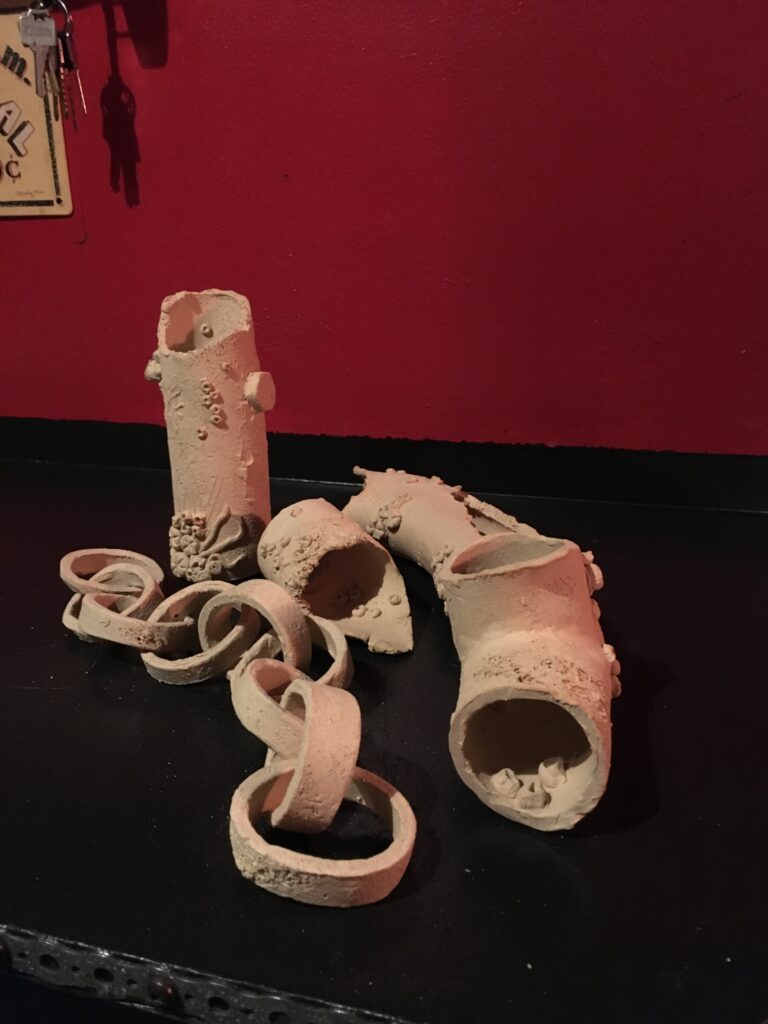
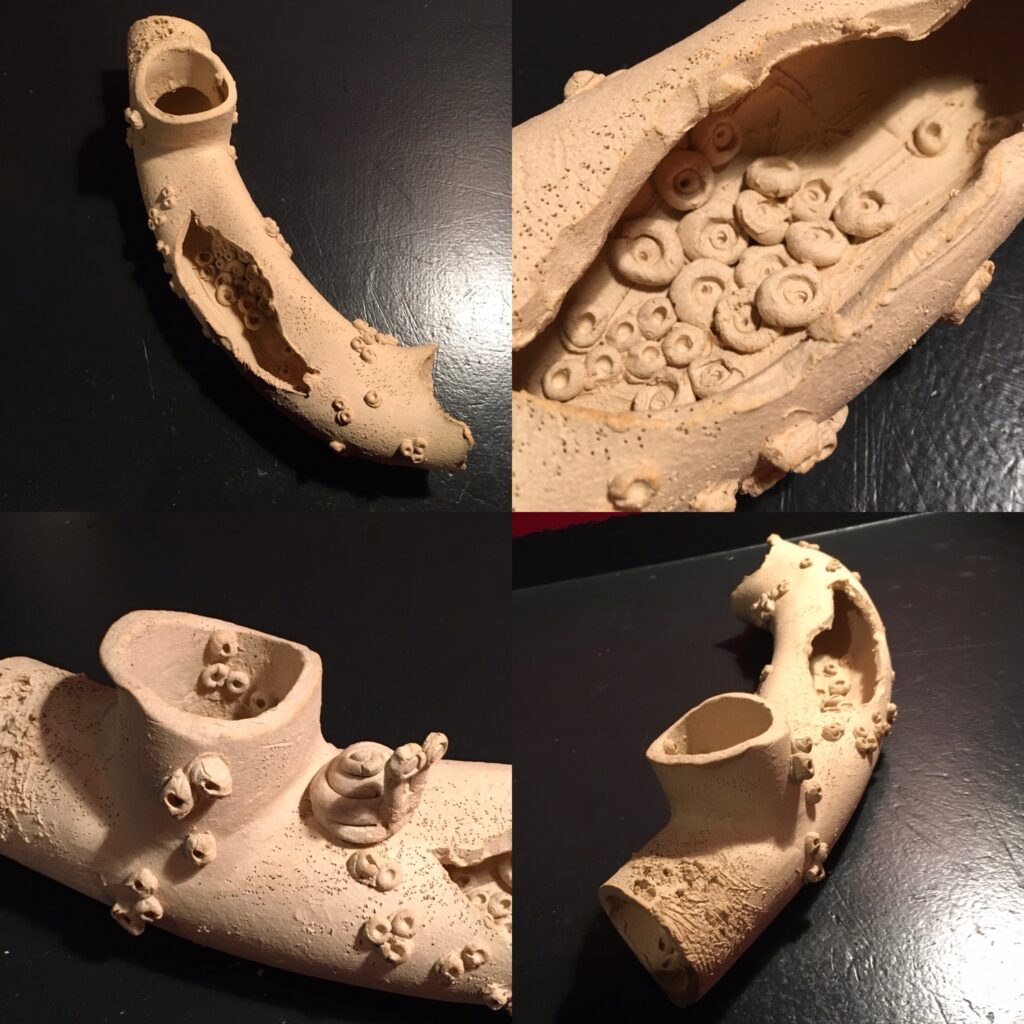
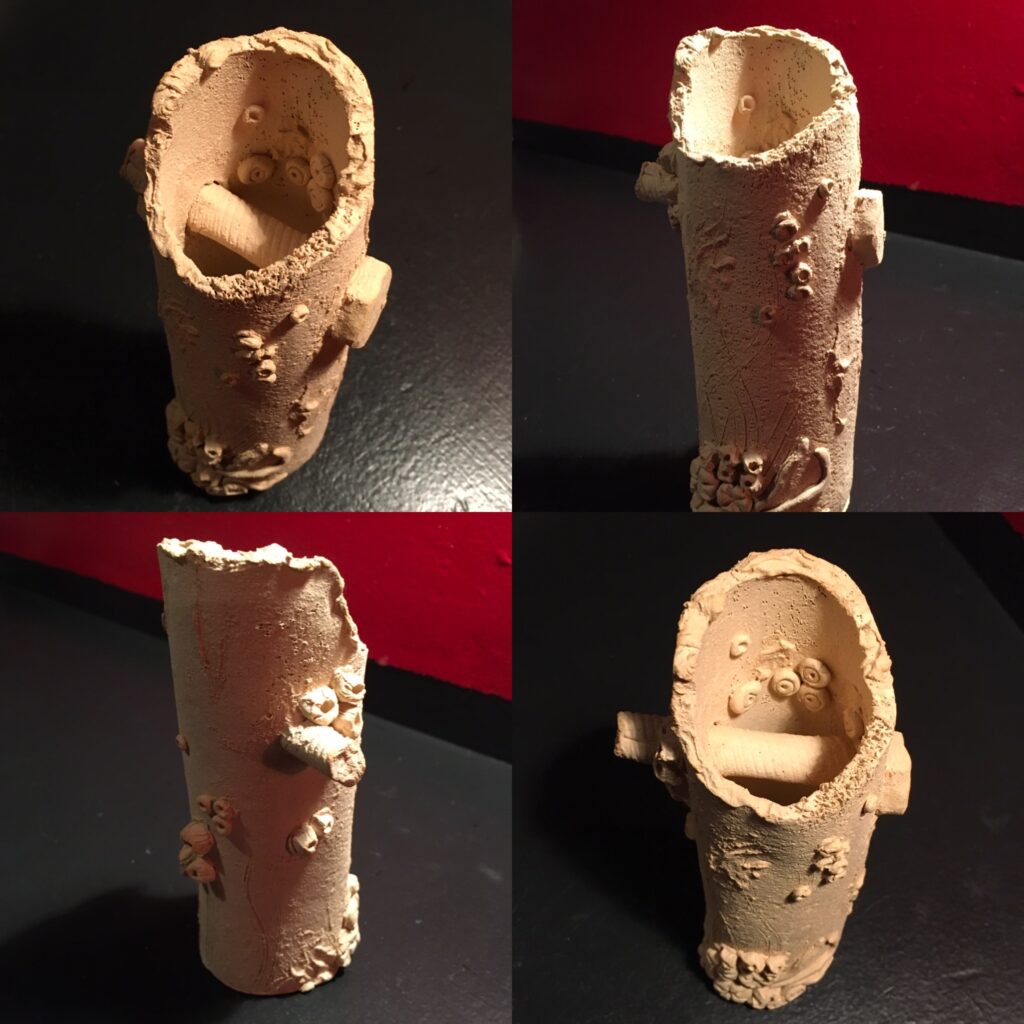
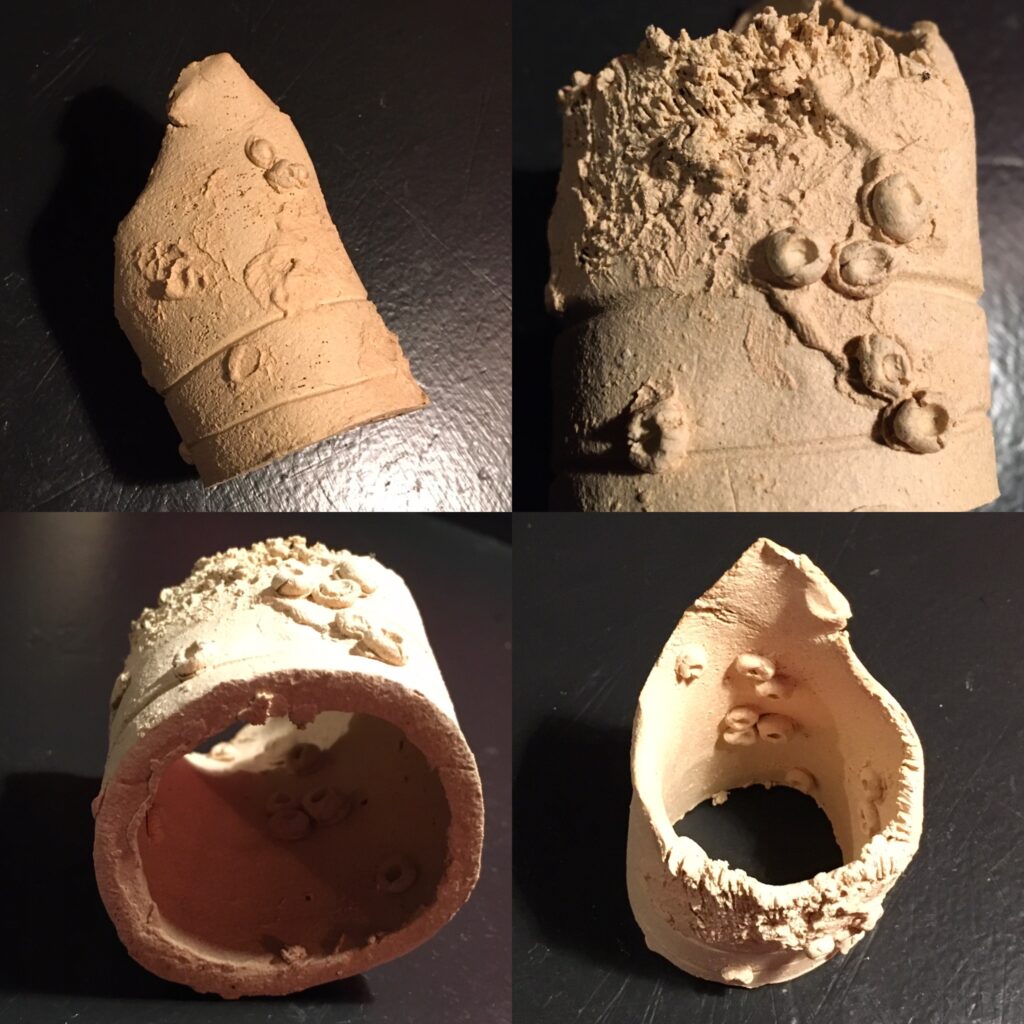
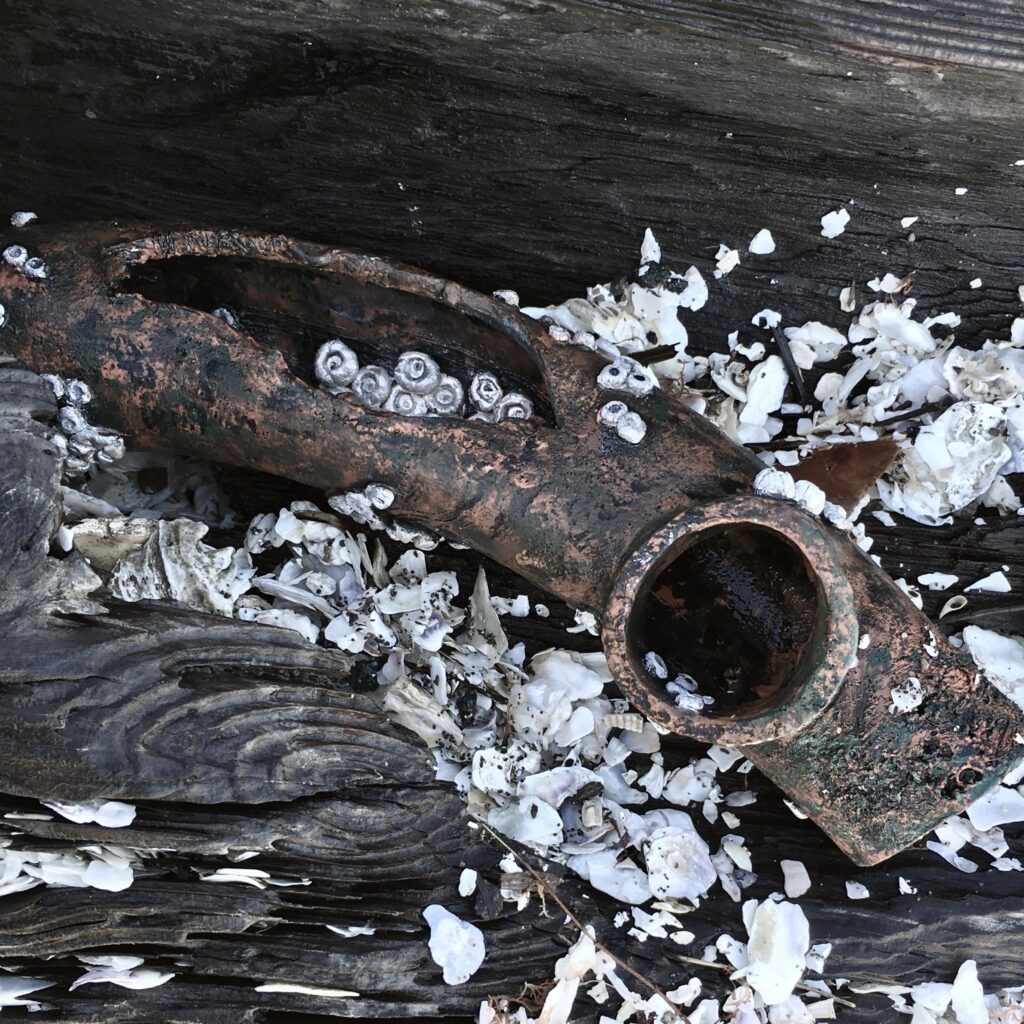
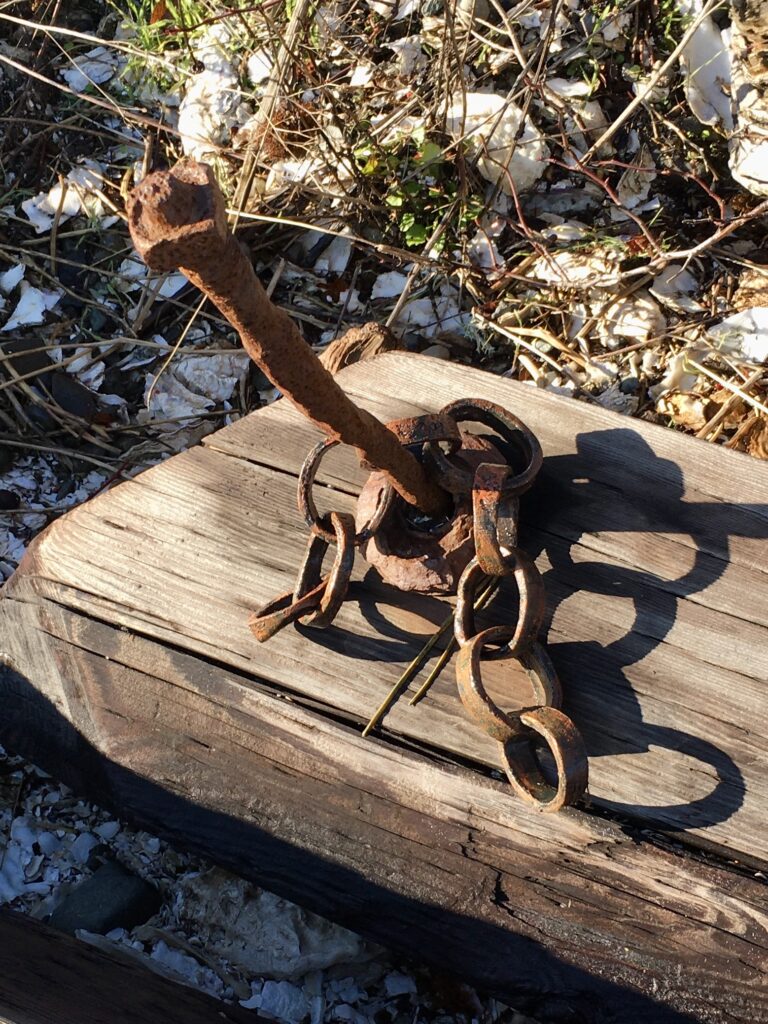
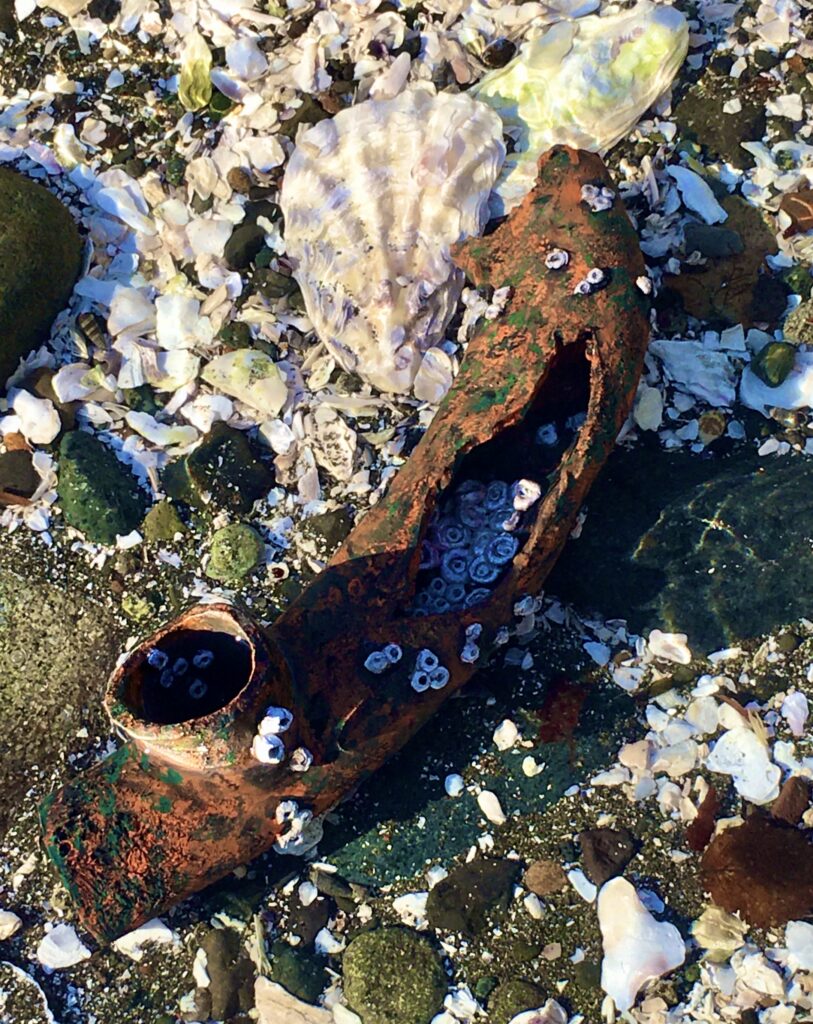
This part involved taking clay and extruding it into square and round pipe shapes. we then deconstructed and reconstructed it into new shapes. when I saw the round pipes of clay sitting on the desk, my mind immediately thought of rusty pipes on the beach. My construction became a literal translation. One of my favorite things to do is to go beach combing and see what treasures the tide has revealed. I made three rusty pipes, and a chain. They are full of corrosion and marine life. After being fired in the kiln, we were then tasked to paint color onto the pieces. I used acrylic paints to give a faux rust finish to the clay. I titled the end piece ‘Tiny Homes’ as everything gets used by the ocean dwellers. iI very much enjoy working with clay. I love manipulating it into shapes. I find clay to be forgiving. you can add and subtract until you get it where you want it to be.
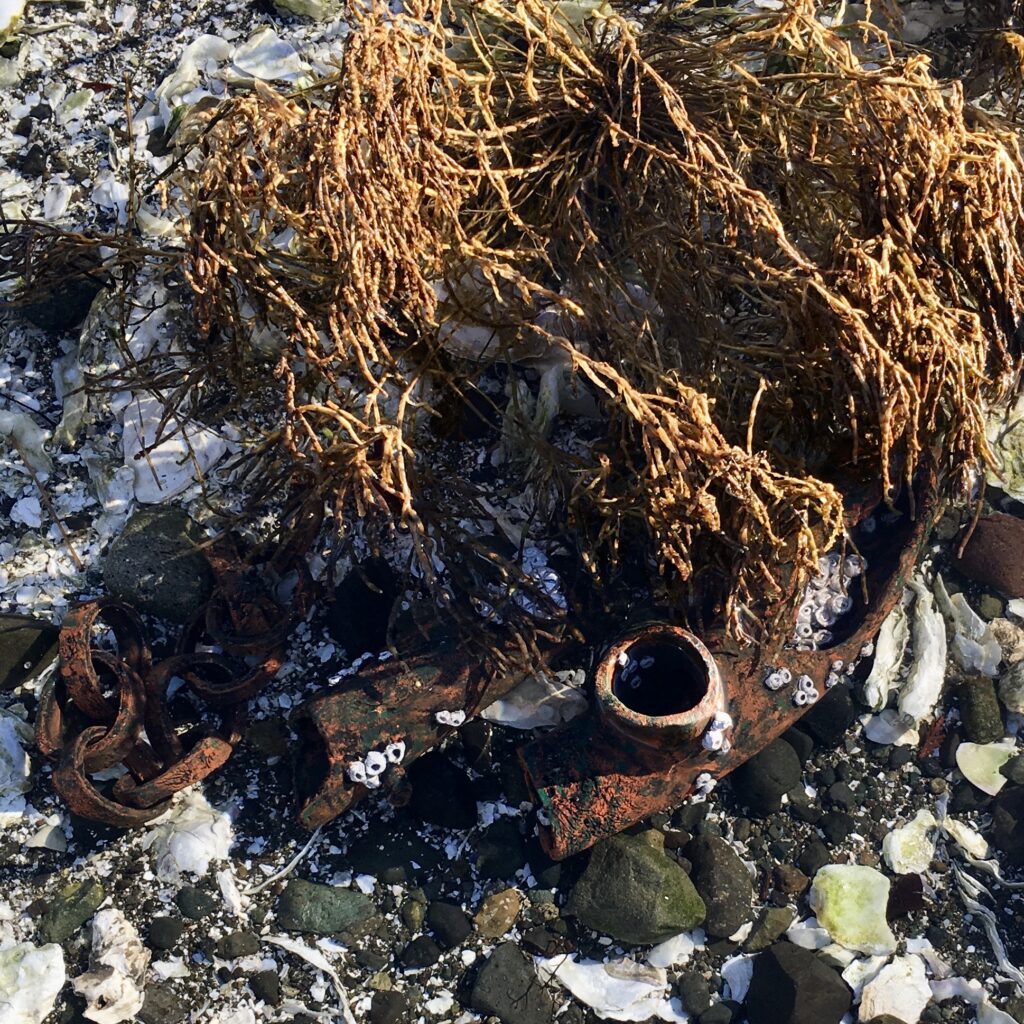
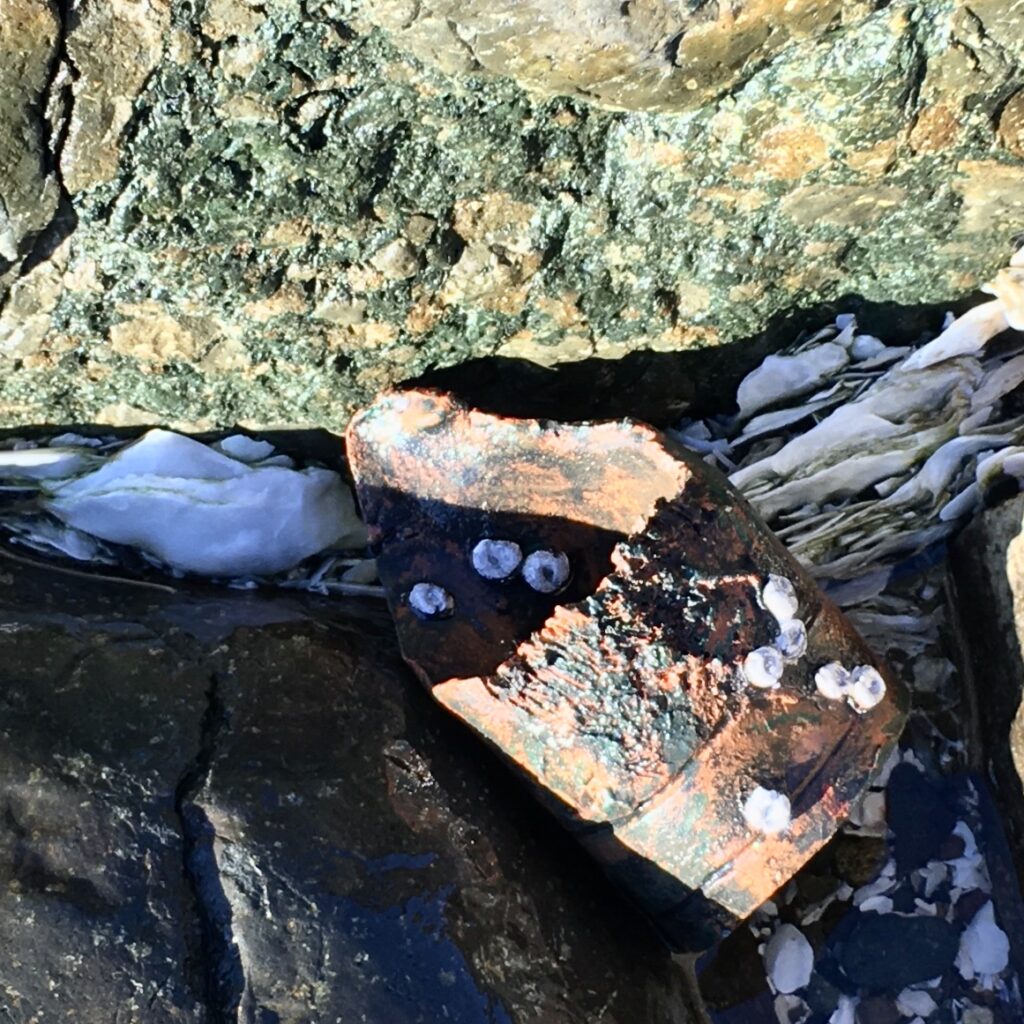
The weather has been very wet and rainy. There was a break in the eye of the storm, so I took the painted pieces down to the ocean for a photo shoot.

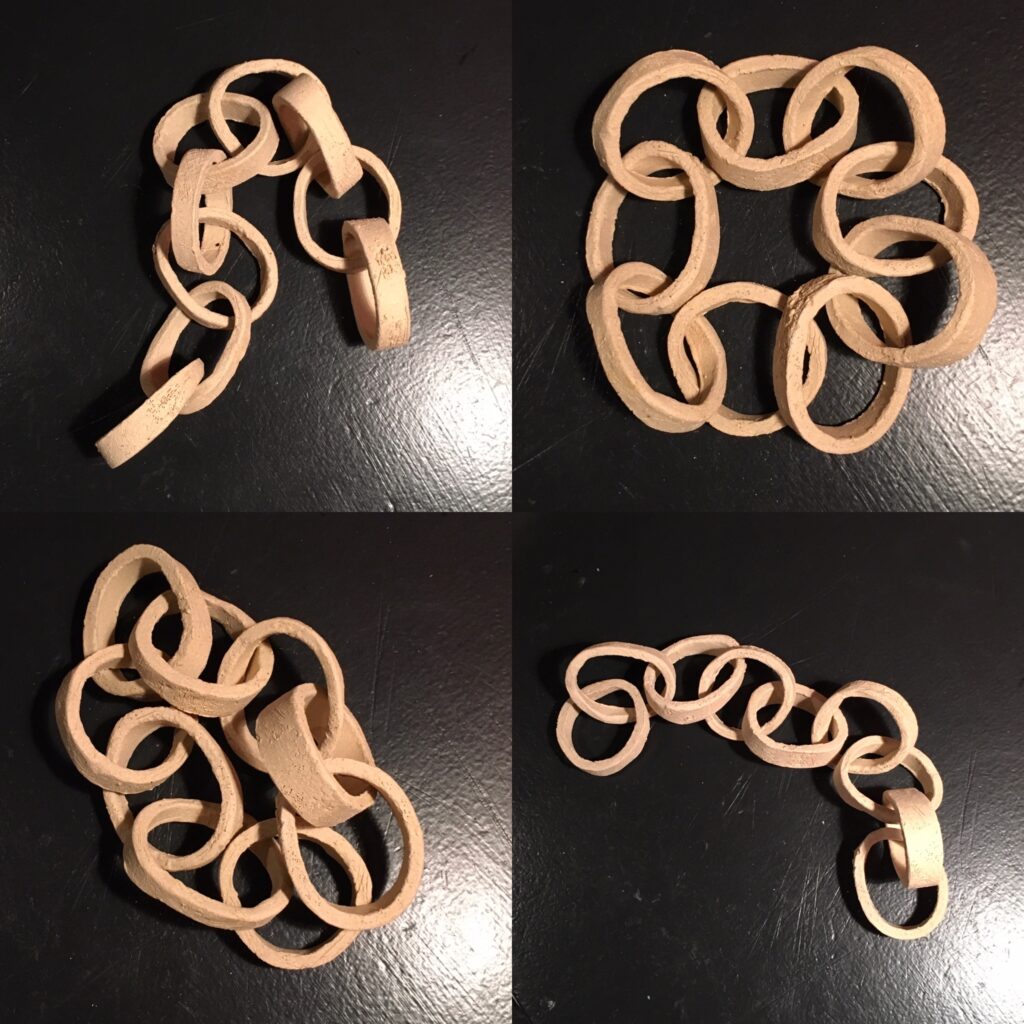
I also created another piece by breaking up the clay into segments and bonding them together. This one is completely abstract and experimental.
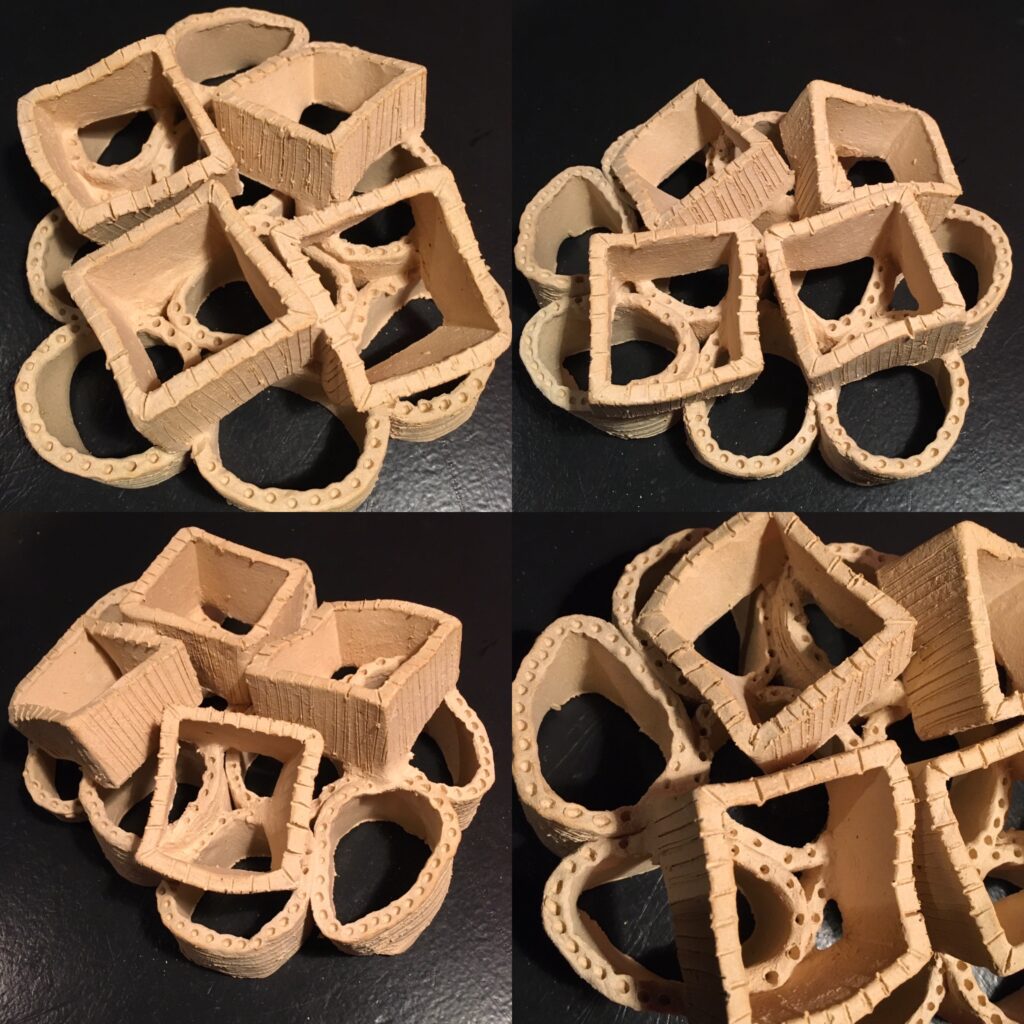
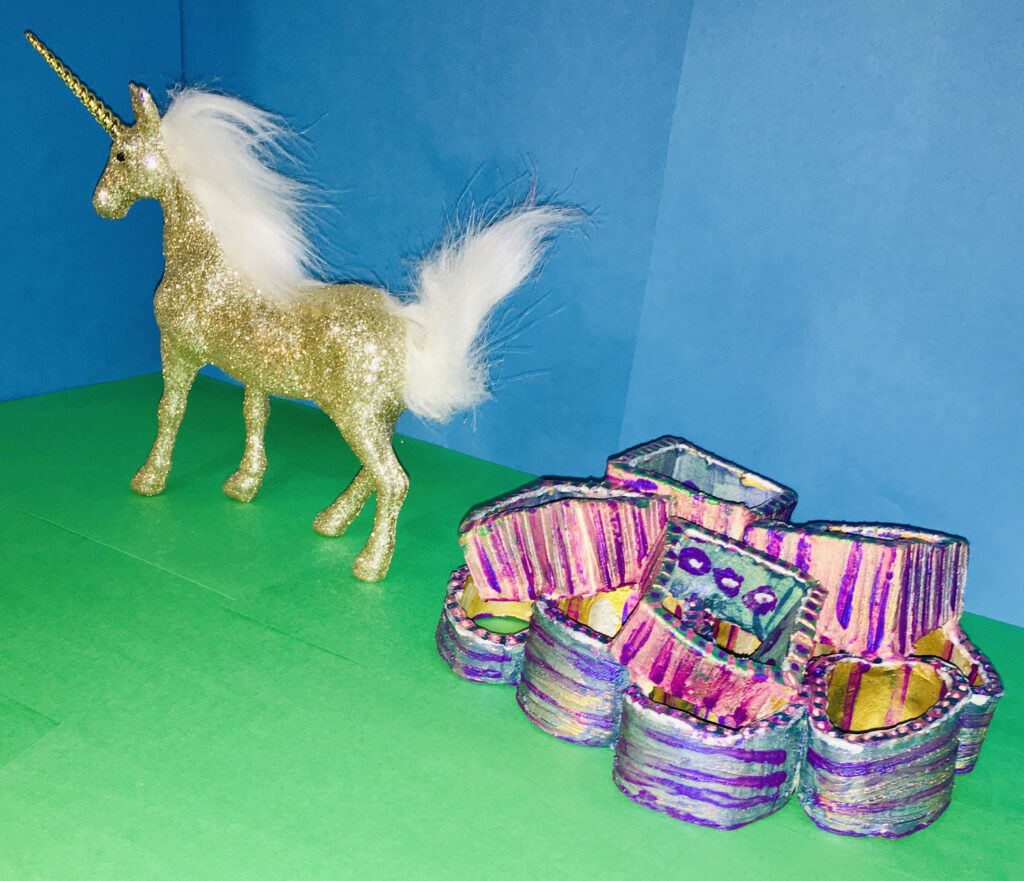
I have some new acrylic paints called color shift. They have micro pigments that shine different colors in the light. I had yet to use them so I decided to give them a try. Well that was a big mistake. This whole thing is looking like a crappy pastel nightmare. I keep painting but nothing I can do will redeem this mess. Maybe I will paint it black and start all over. What fresh new hell is this? Meanwhile… a unicorn was standing over on the corner of my desk (I tend to play with toys a lot and have a huge interior world). Well, it jumped in and became a part of this abomination and Save the Day!
The piece is titled ‘Unicorn poop’ and I release it from my mind. It is a dialogue between dreams and reality. How some dreams start off all ‘Glitter and Rainbows’ and somehow end up a pile of excrement after being processed by the realities of life.