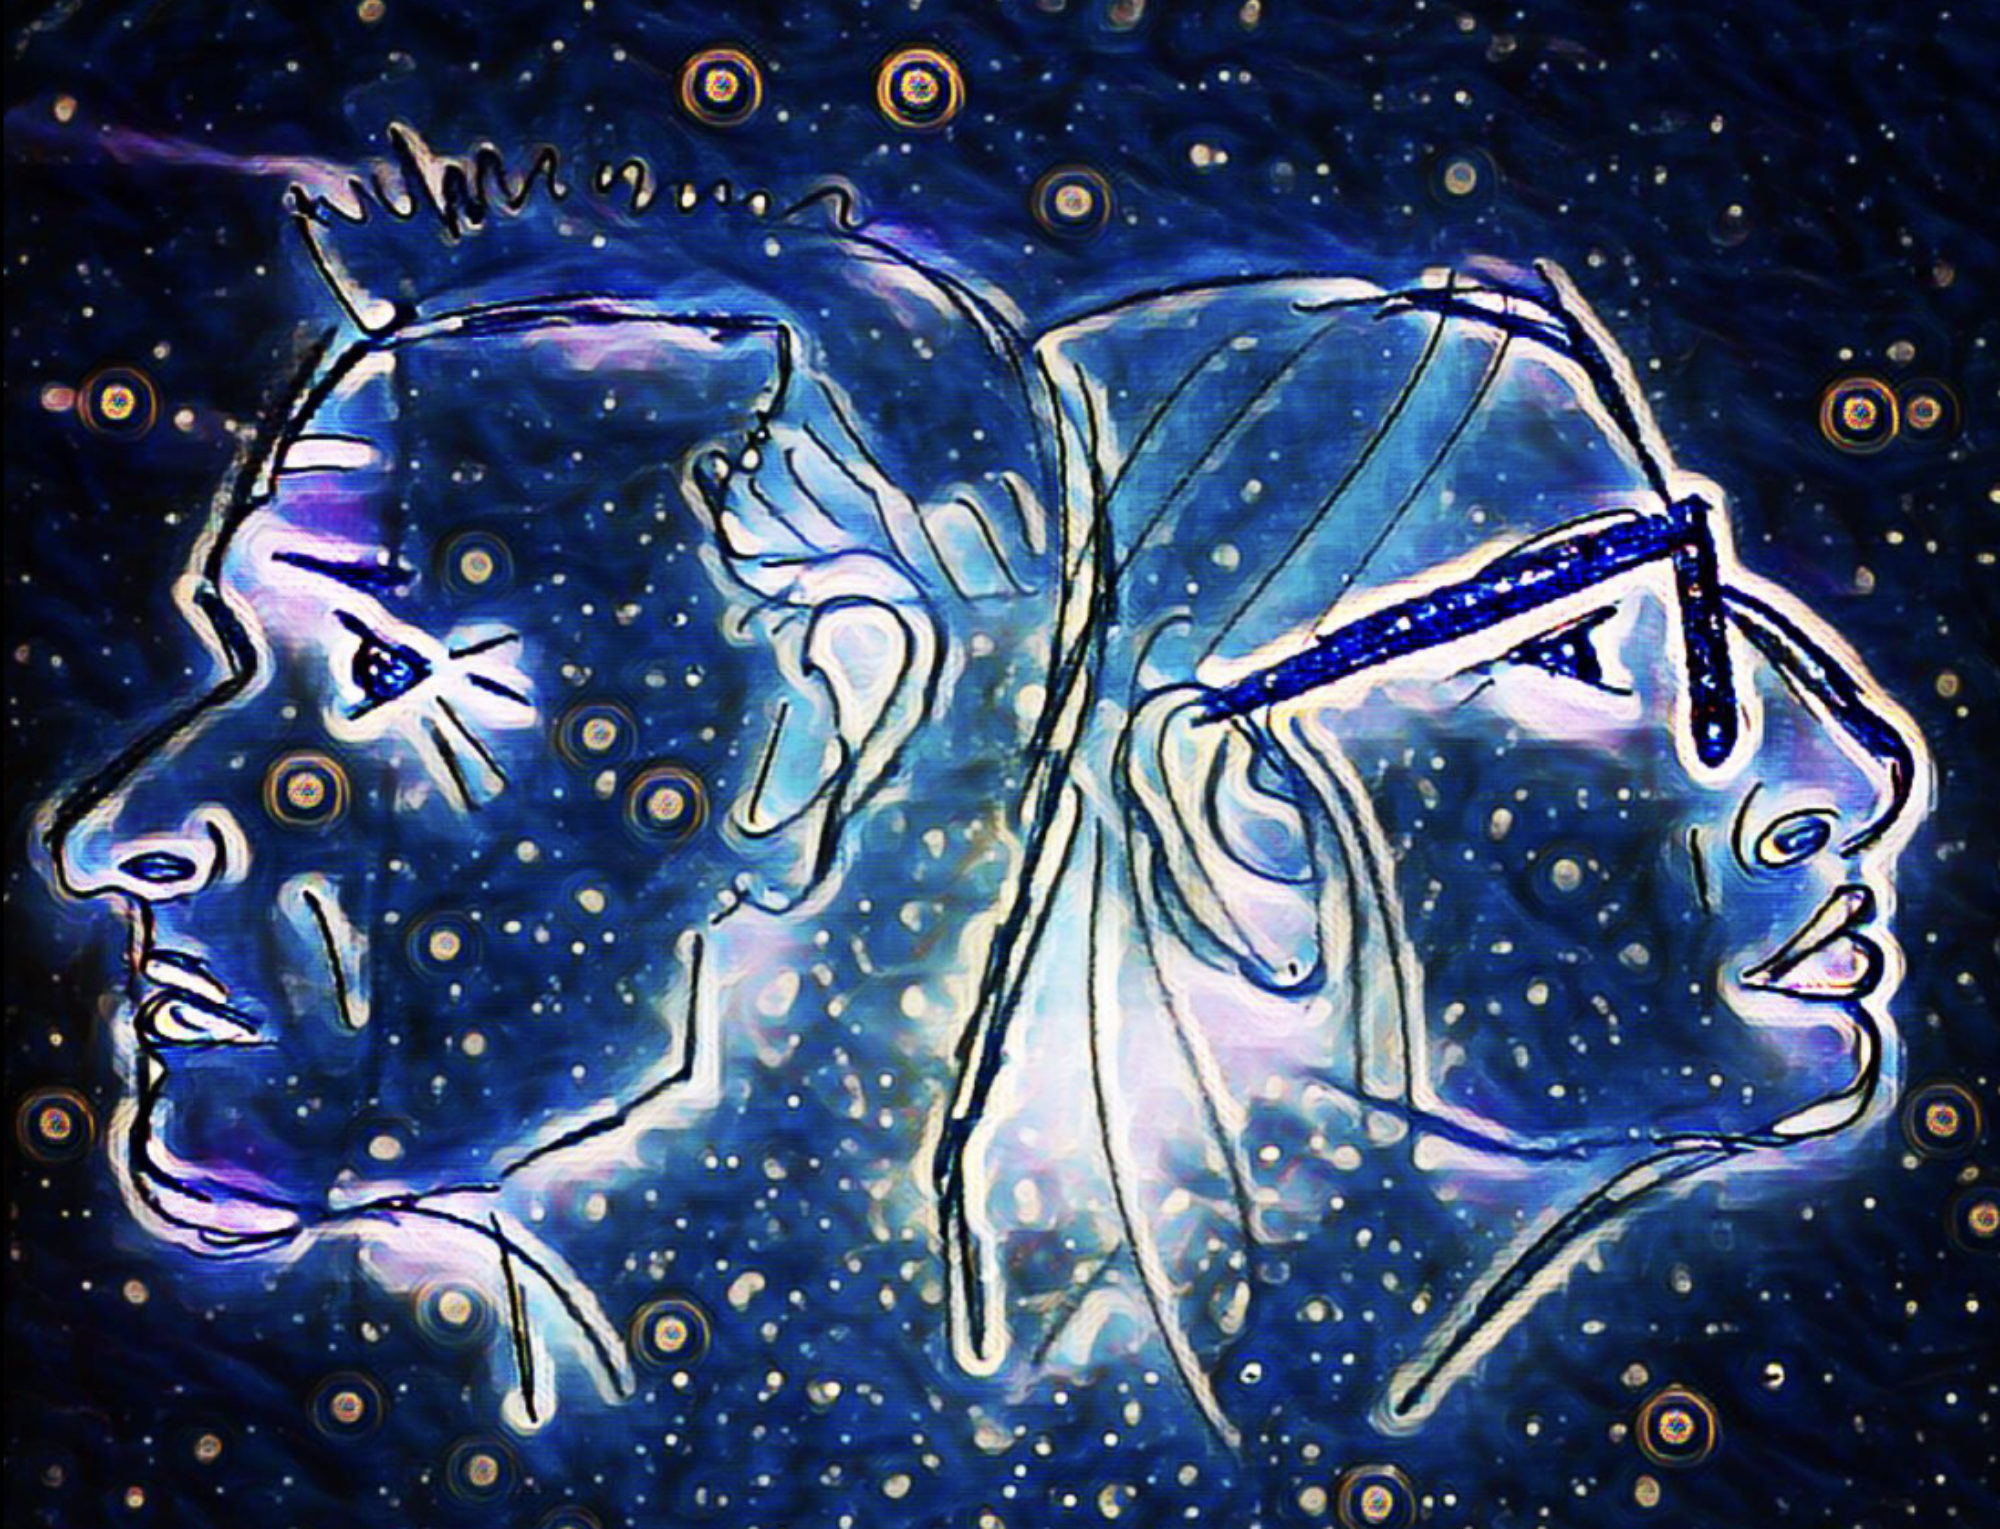
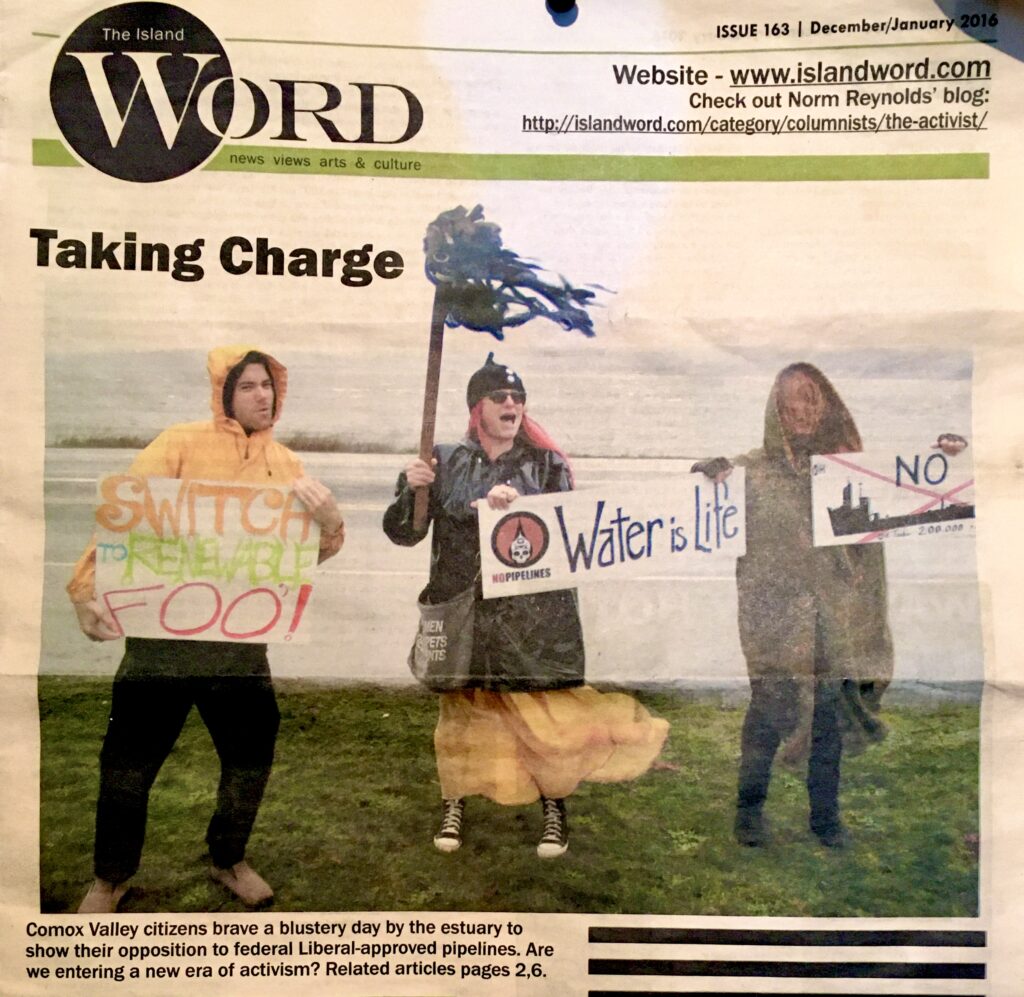
The theme “Return to Water” is very relevent in my life. I Have protested many a time for our sacred mother. Water is Life!
Me in the middle. 2016 The Island Word
In 2017 I had a horrific workplace incident that created PTSD and dramatically changed my world. I went from outgoing, to staying in my house and not leaving for over a year. I am a Pisces and the call to water helped me rehabilitate and get my life back. Every month I swam naked in the Sacred Waters of the Tsolum River with some girlfriends. Known as “The Goddess Swim” it was the event of our month! PTSD and Childhood Trauma were explored and healed over 3 years. Covid removed people from the population, and Karen Day emerged slowly.
Now I am here at North Island College making art to glorify Water and The Return to Myself. It is a lifelong journey and the Waters of the Mother love and support me.
Be in the flow, Be in the now, Be…
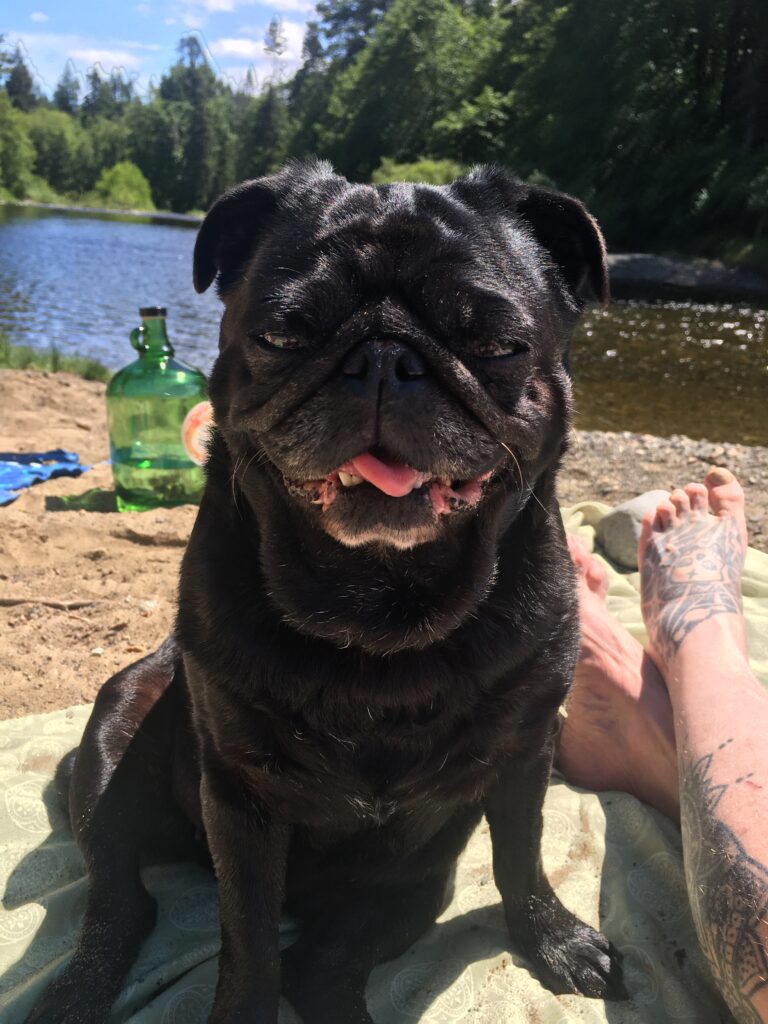
Baby Eve my therapy dog was very supportive during every Goddess Swim.
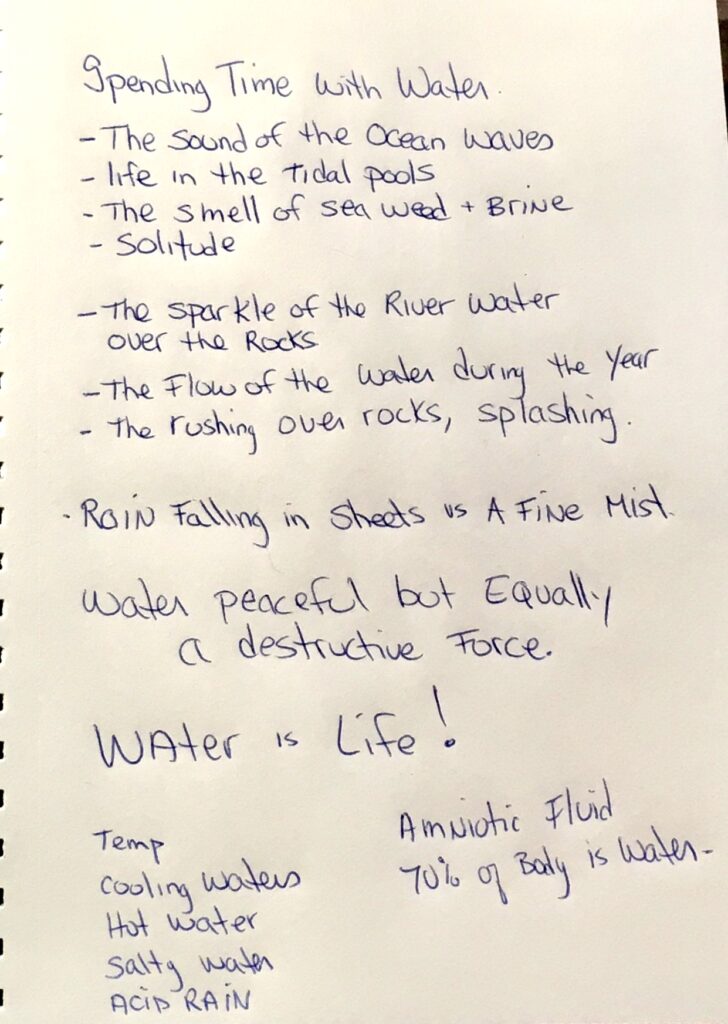
We were asked to spend some time observing water directly. I visited the ocean, river, and got wet in the rain. Every day I take 2 baths and even recorded thought about them.
Thoughts about water from my sketchbook.
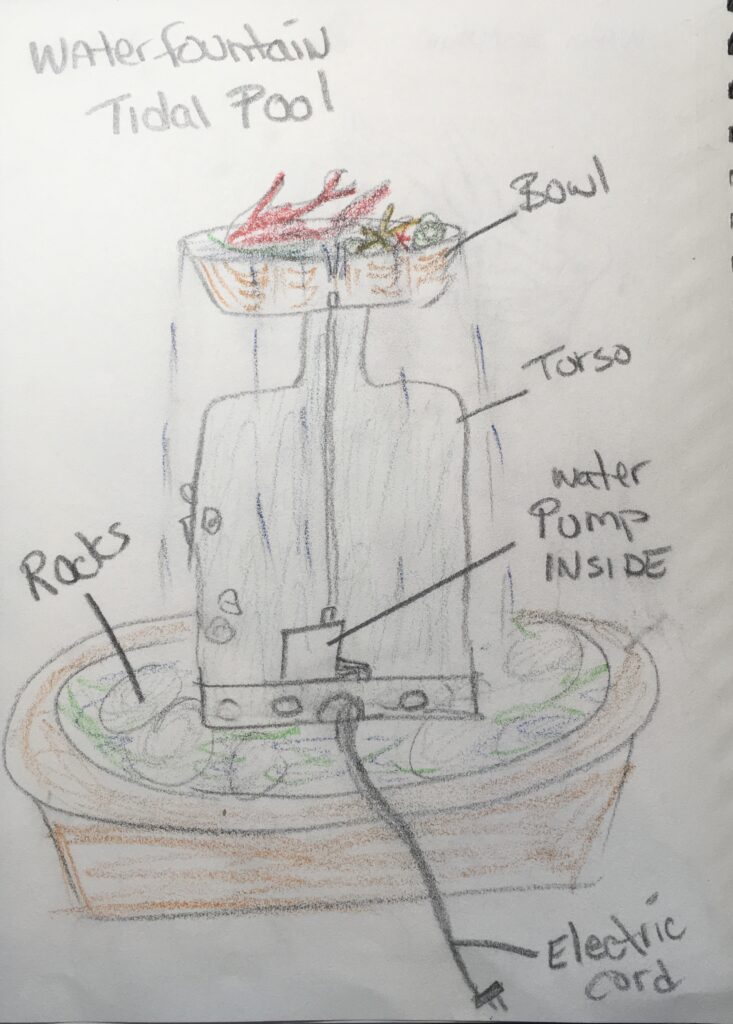
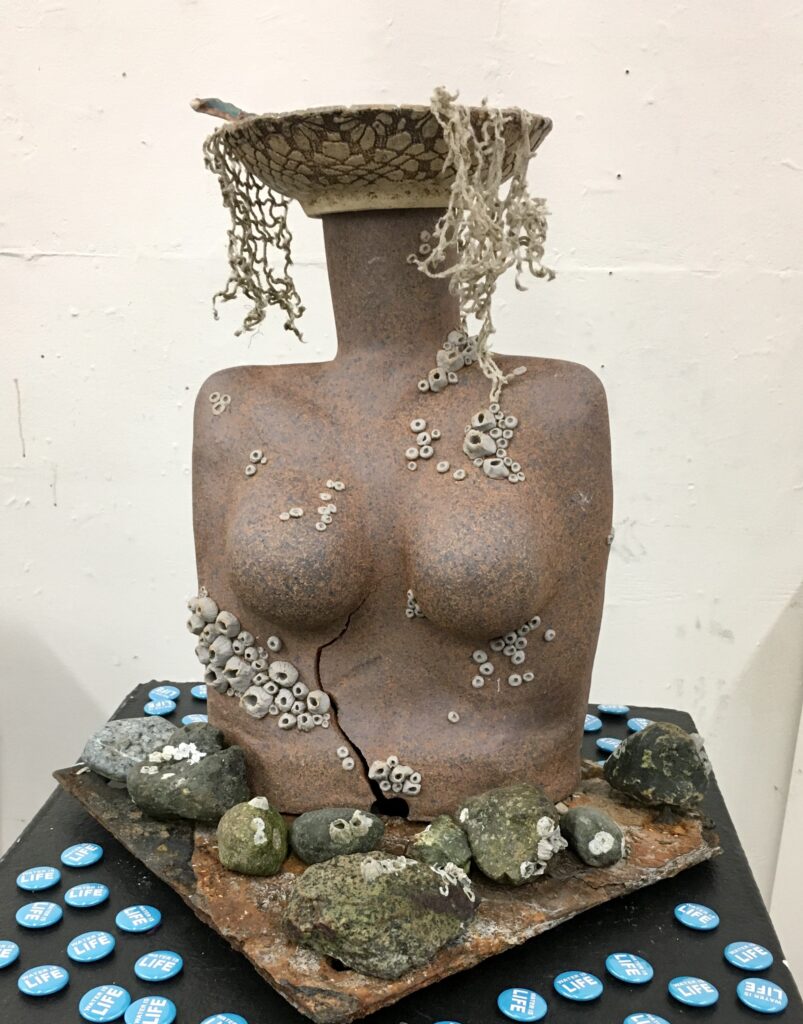
I had zero desire to work in the metal shop. I decided to use clay as my vehicle instead. I imagined a clay torso in a bowl. On its neck rests another bowl that is filled with tidal treasures. a water pump moves water up through the centre to drip down onto the body. That was my vision to start.
Sketchbook Idea of making a tidal pool water sculpture
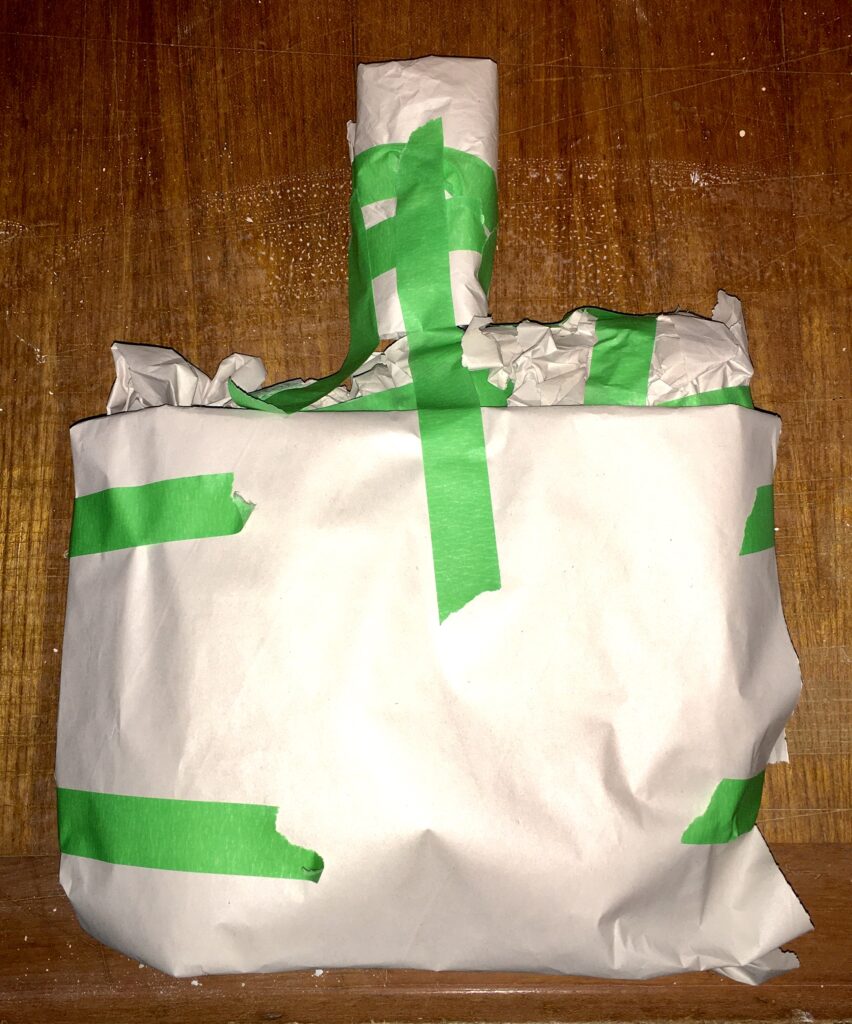
This build will be the largest clay build to date. I needed to create an armature to hold the basic shape. As this will be fired at a high temperature no metal can be used inside to hold the internal shape. I scrunched up paper and used green tape to make the torso and neck.
Creating a paper form to build on.
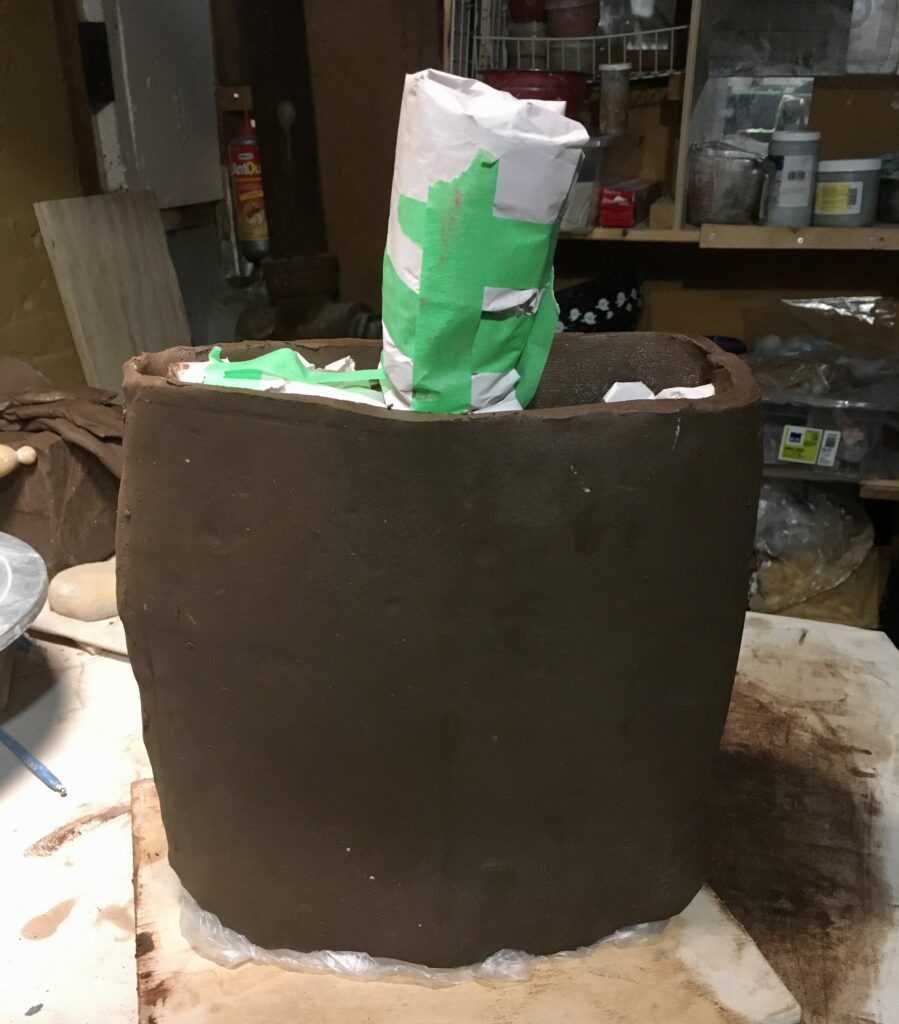
I rolled a large slab of clay and draped it over the front and back. the paper helped hold the basic shape. Another slab of clay rolled around the neck, and I added some on top of the shoulders to fill in that area as well.
Slab of clay rolled out thin and draped over form to create body.
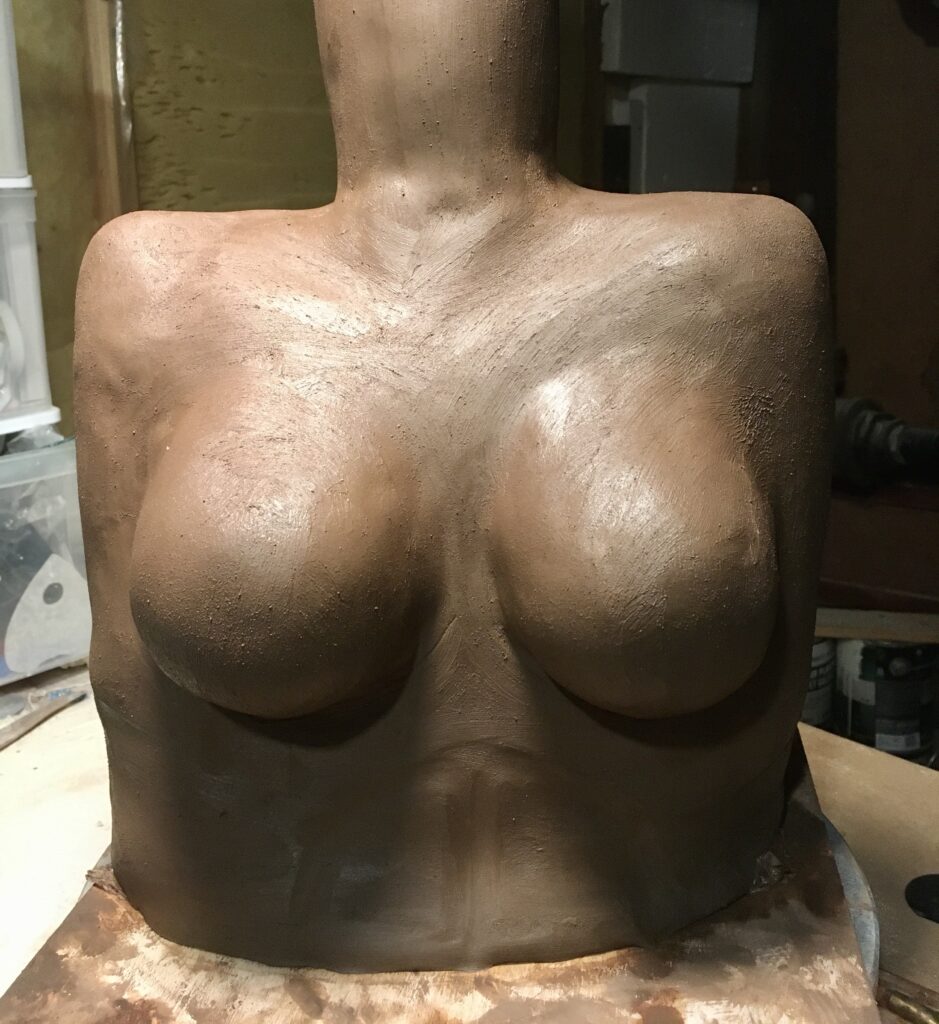
Once the form was covered in clay I let it sit over night to firm up a bit. I made two pinch bowls and attached them onto the chest area. Smooth down and blended, they became the bosom. I imagine body physiology and start shaping things.
Breasts added to clay form that has been shaped into a female torso.
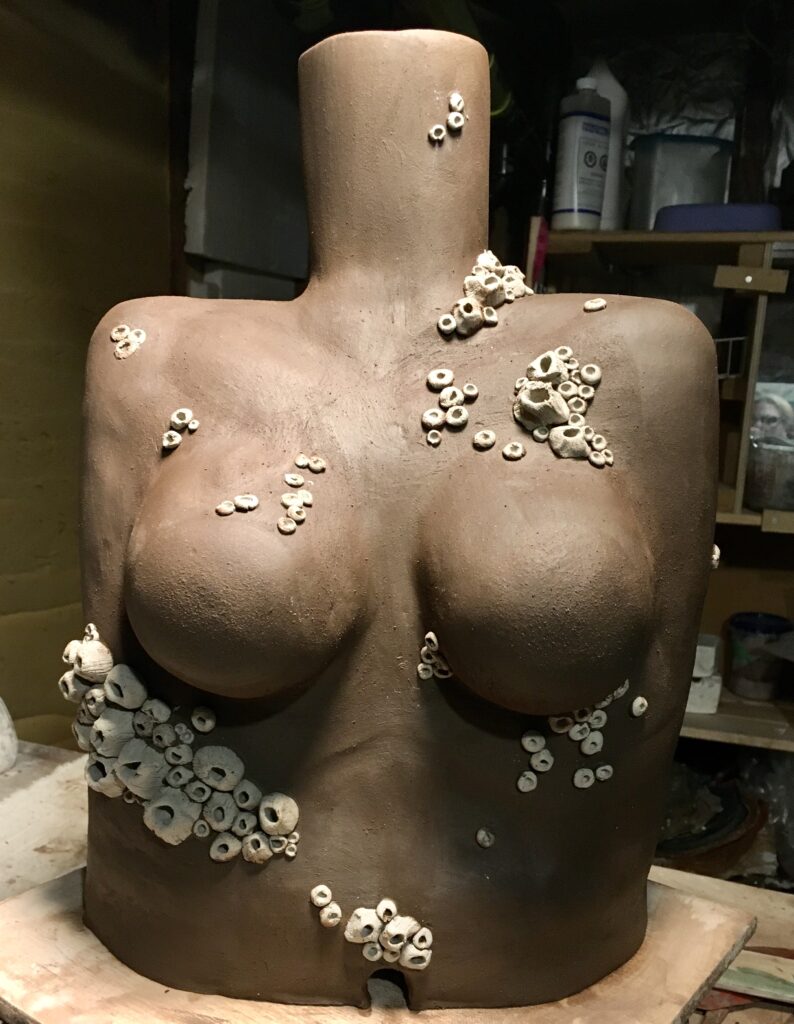
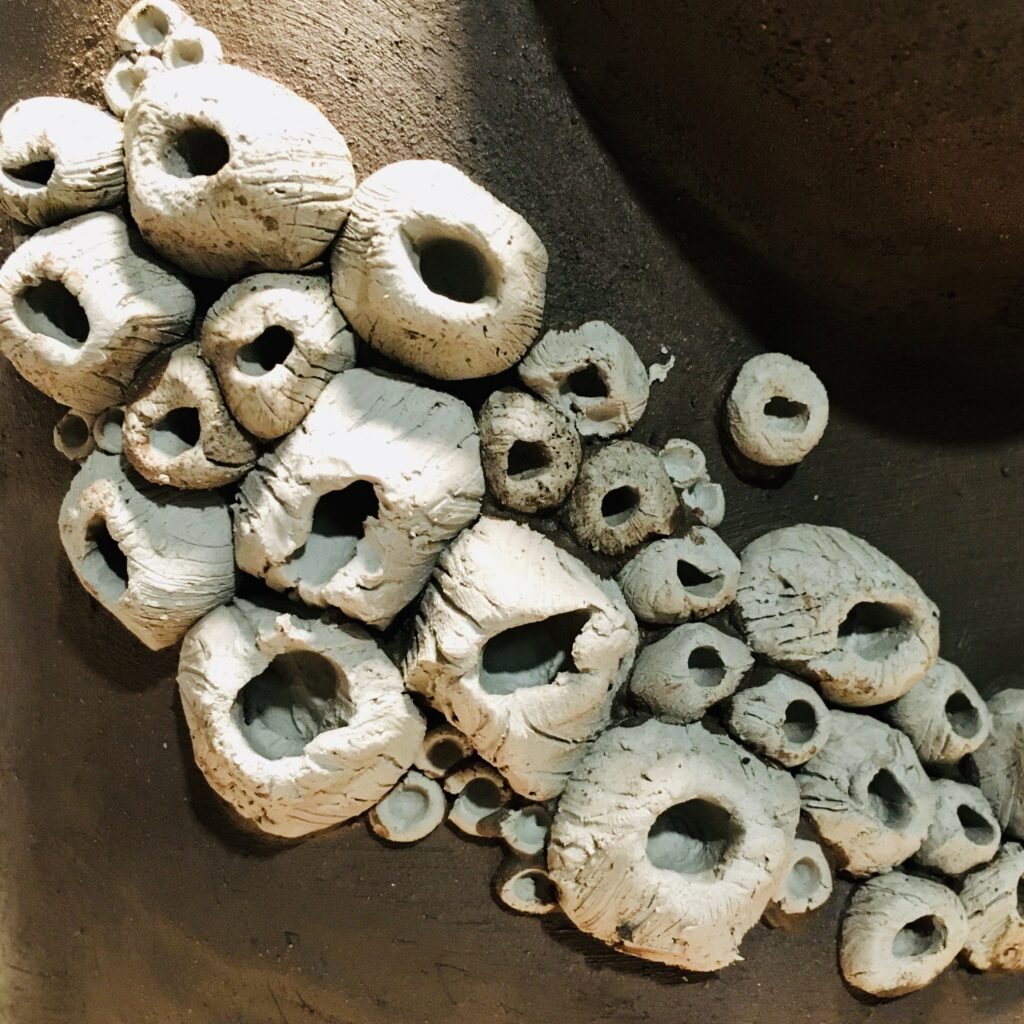
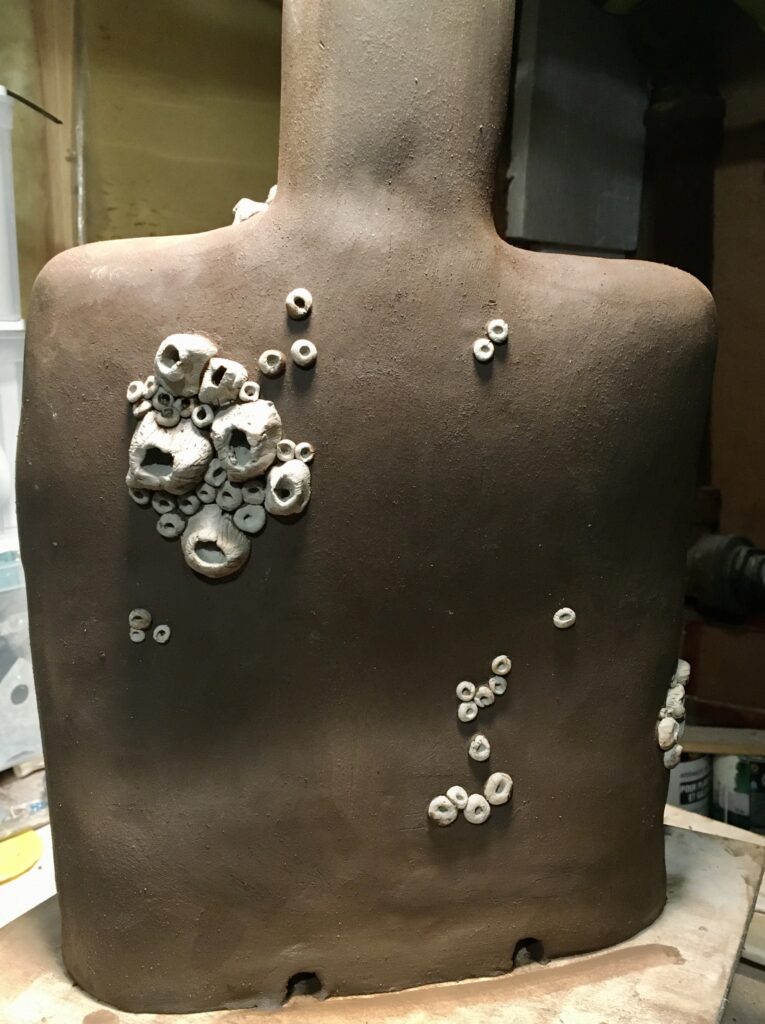
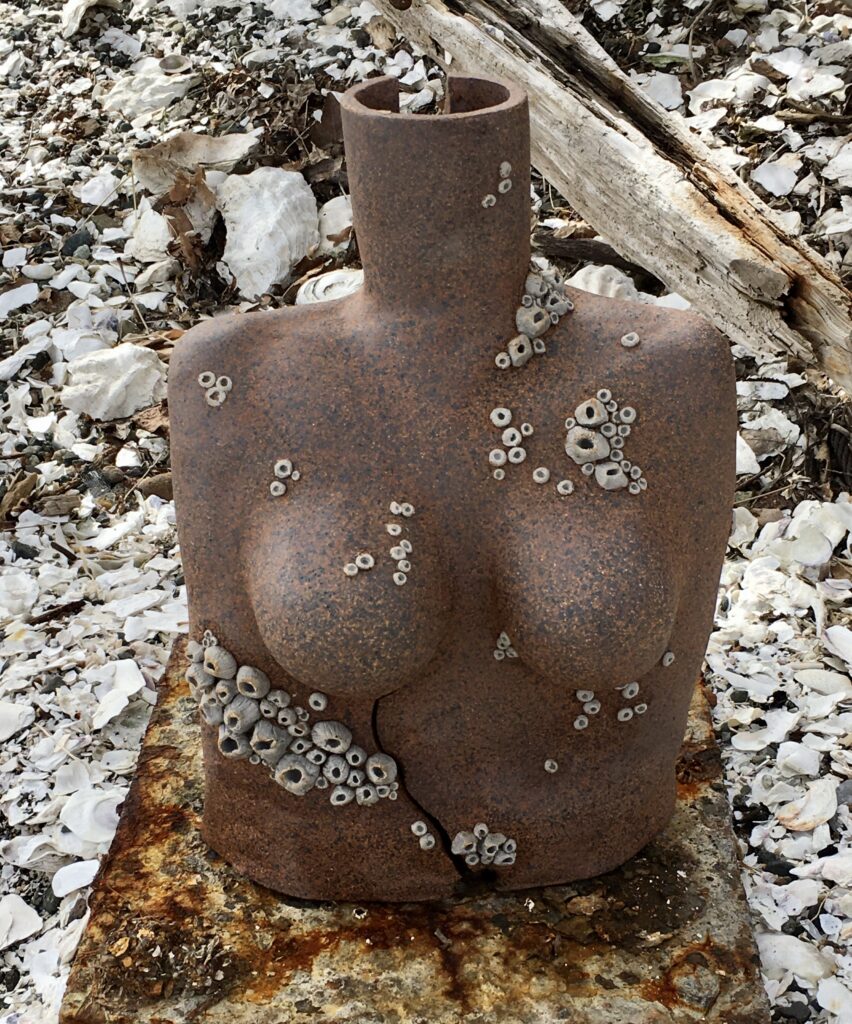
Once I had the form to how I liked it, I switched to a white clay body and made barnacles that I attached front and back. I wanted it to look like it had been in the sea for awhile. The paper was removed from the inside as the structure was stiff enough to support itself.
Front ViewClose up of barnacles Back View
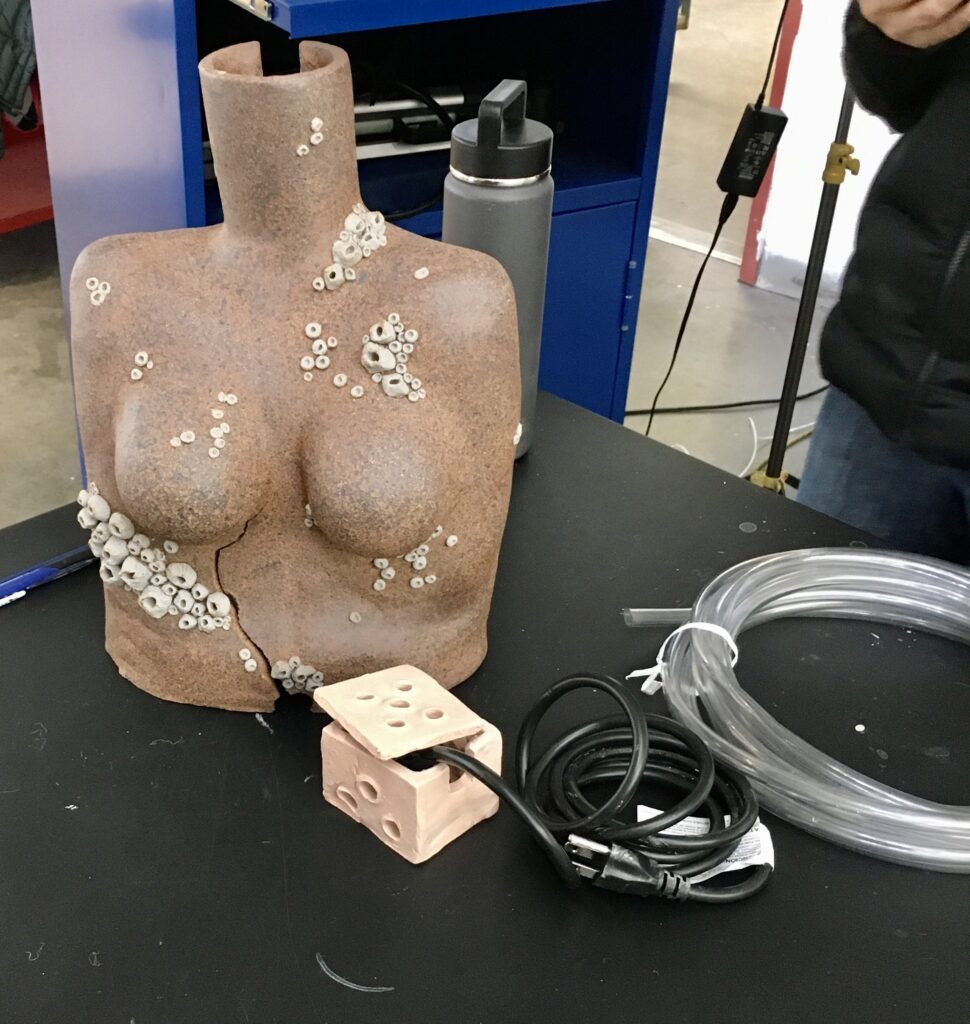
The torso then went into the kiln to be fired. She came out with a crack in the front due to the navel undermining the integrity of the structure. Interesting… I was very happy to see how this clay reacted in the oxidation cone 9 kiln fire. The clay body looks so much like rusted iron! Even though I didn’t use metal, my piece looked like metal. Next came the building of the bottom bowl. I spent 4 hours in the studio one night and made a beautiful bowl. Unfortunately it dried too quick and formed a crack. All I can do is build another one and wait to see if it survives the kiln. I also built a clay box to house the water pump device.
Parts finished up to now.
Now I wait to see what will be ready Monday afternoon as this is due Tuesday morning.
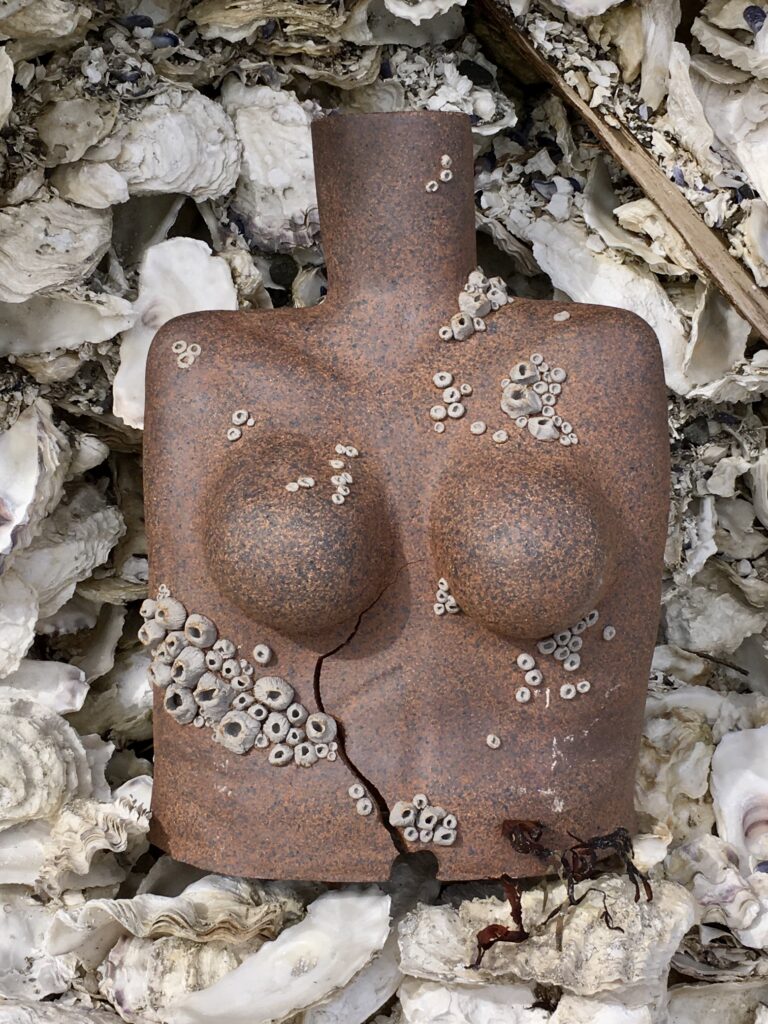
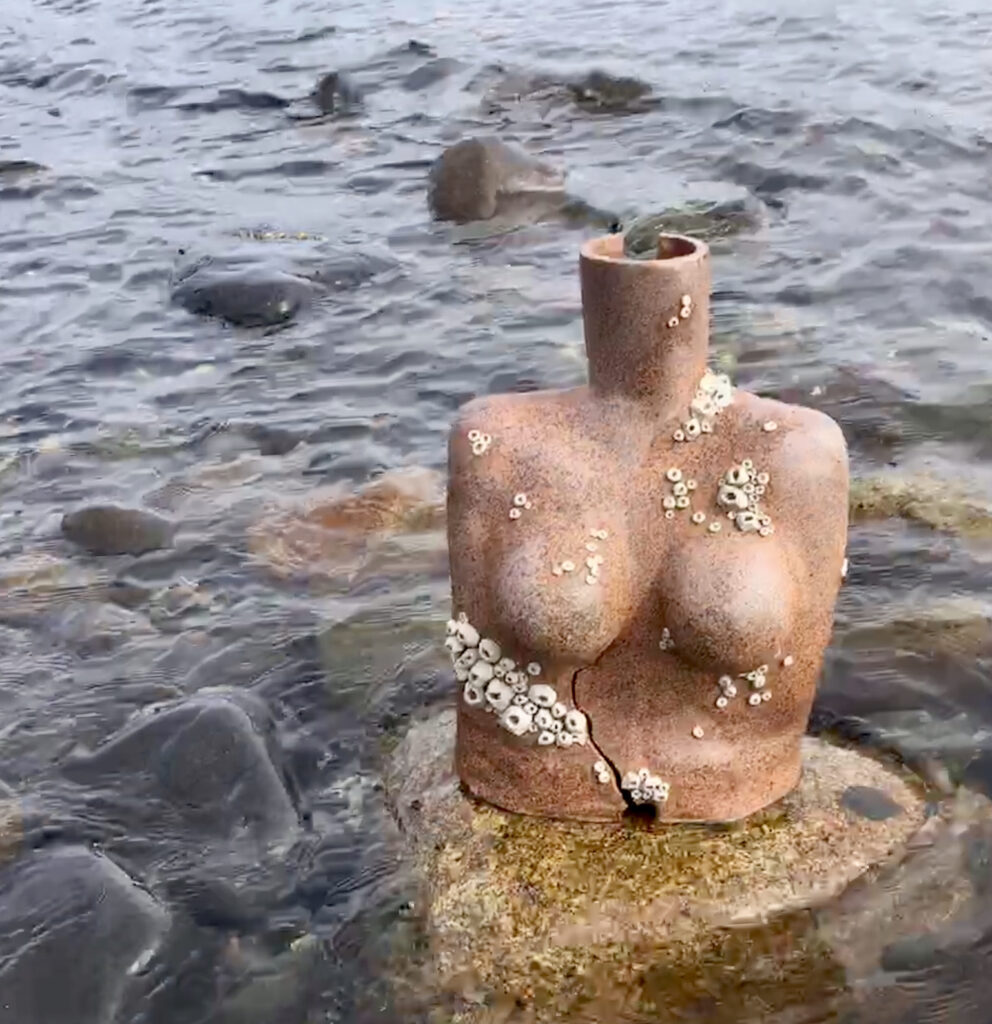
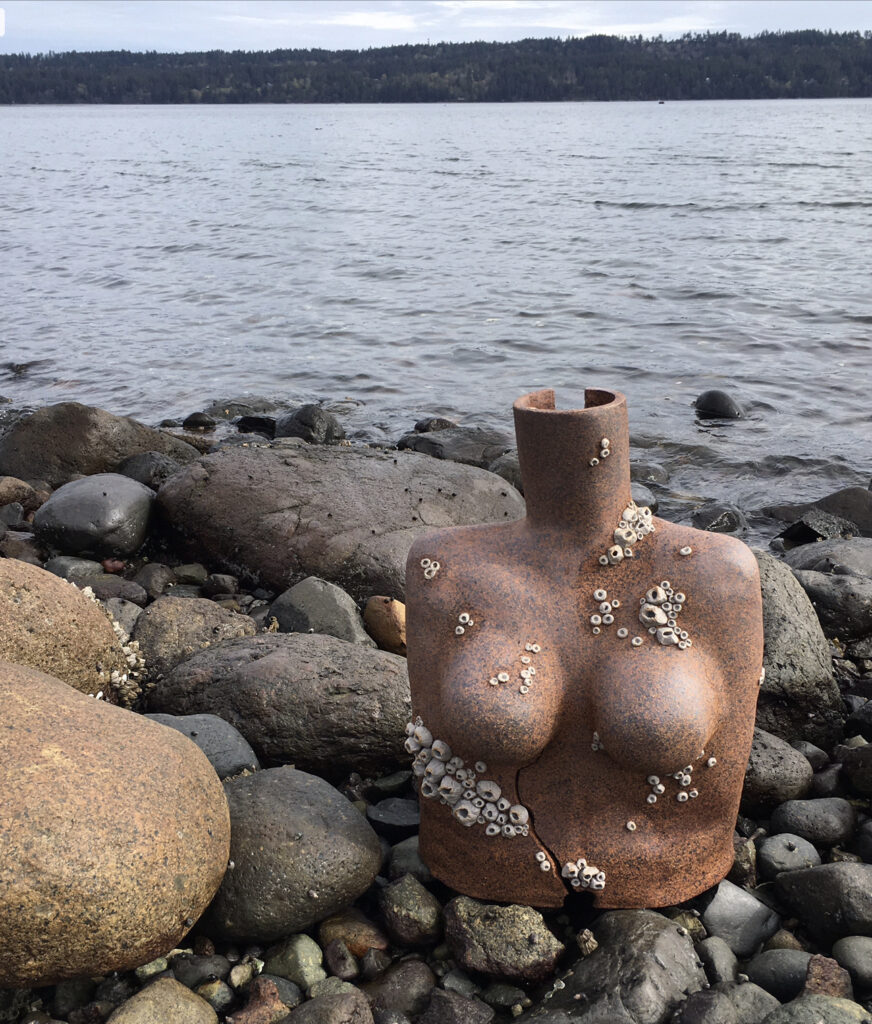
Meanwhile… A visit to the beach was on order to play with what I had.
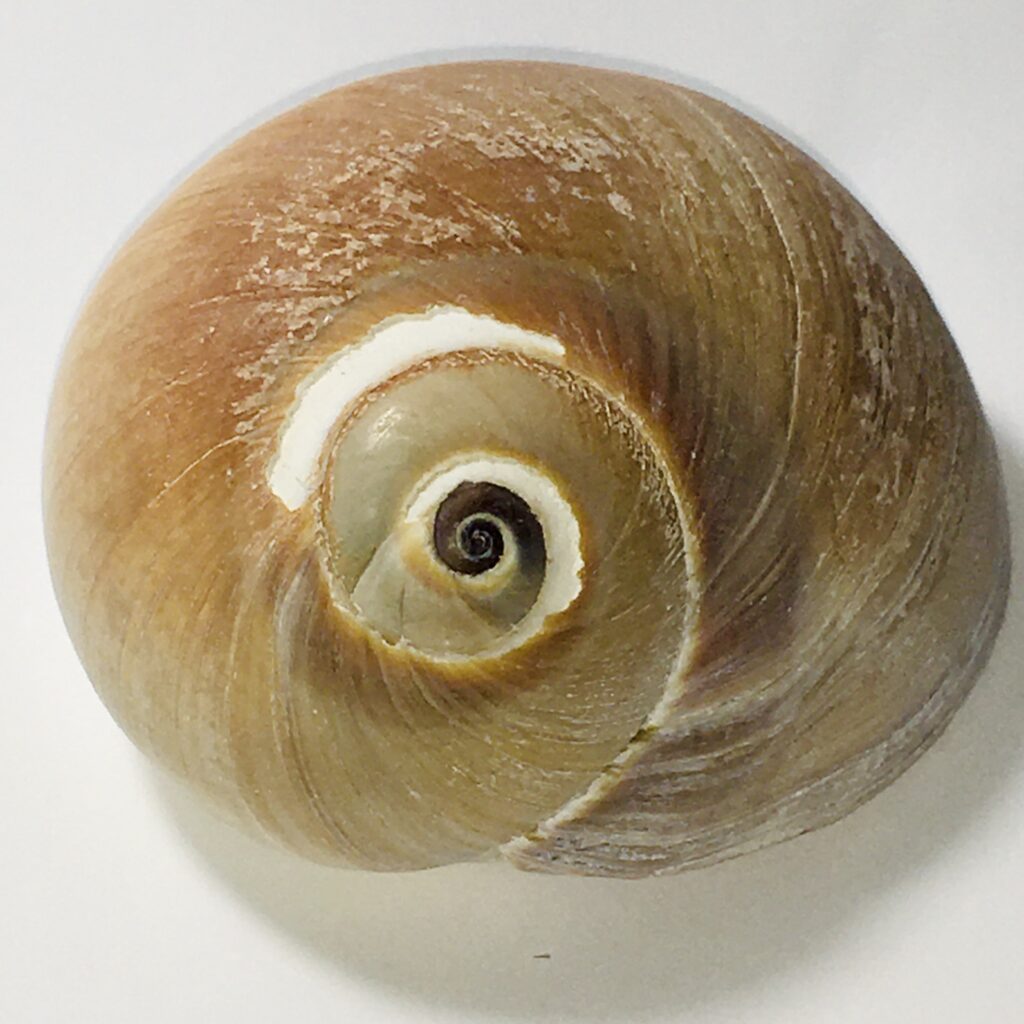
she nestled right in to the shell midden.the colors of the clay and the colors of the rocks were so complimentary.You can see Denman Island across the distance.I found this rusty flat tile of metal on the beach. It makes a great display base for my sculpture if the basin doesn’t work out I will use it.
In the end it did not become a water feature. I was still happy with what I had accomplished. I am looking forward to seeing it displayed in the upcoming Art Show at NIC.
This unit was a continuation from FIN 130 Unit 3 last semester. I was happy to be exploring this process again as I missed part of it last year. I had some experience with the computer programs from before, so jumped right in.
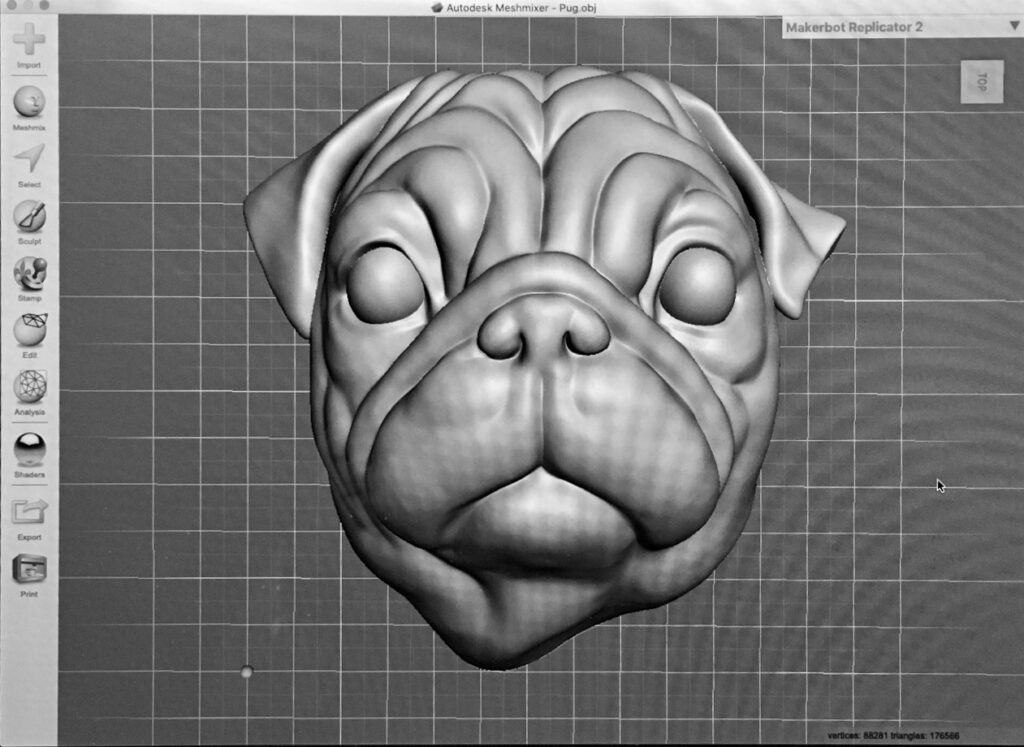
I wanted to create my dogs face in stacked wooden slices. The first program used is called MeshMixer. We needed to import, or create a .STL file. Learning new software is hard for me, so I decided to import a ready made .STL file of a pug face, and do some alterations in MeshMixer. I softened the neck and filled the image in to be a solid shape. It was now ready to be transported to the next program.
Pug face .STL in Meshmixer
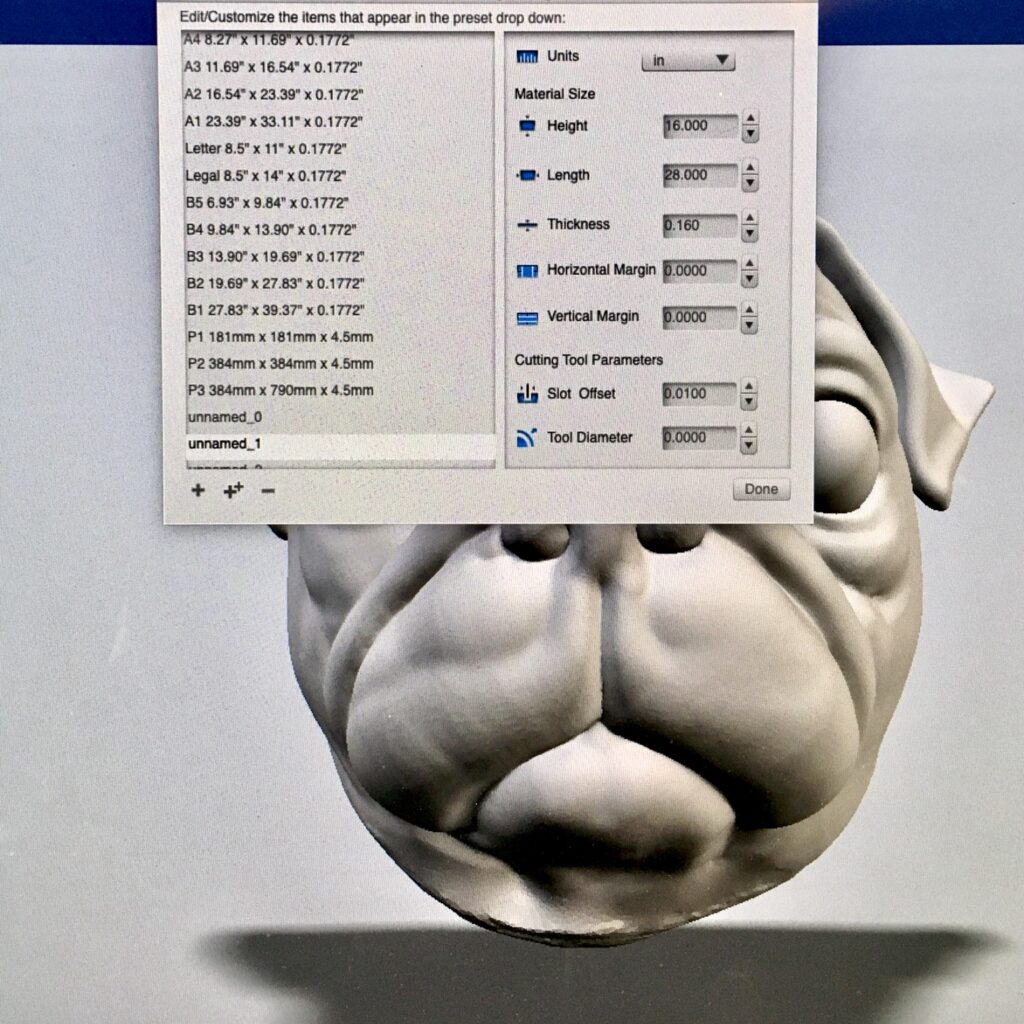
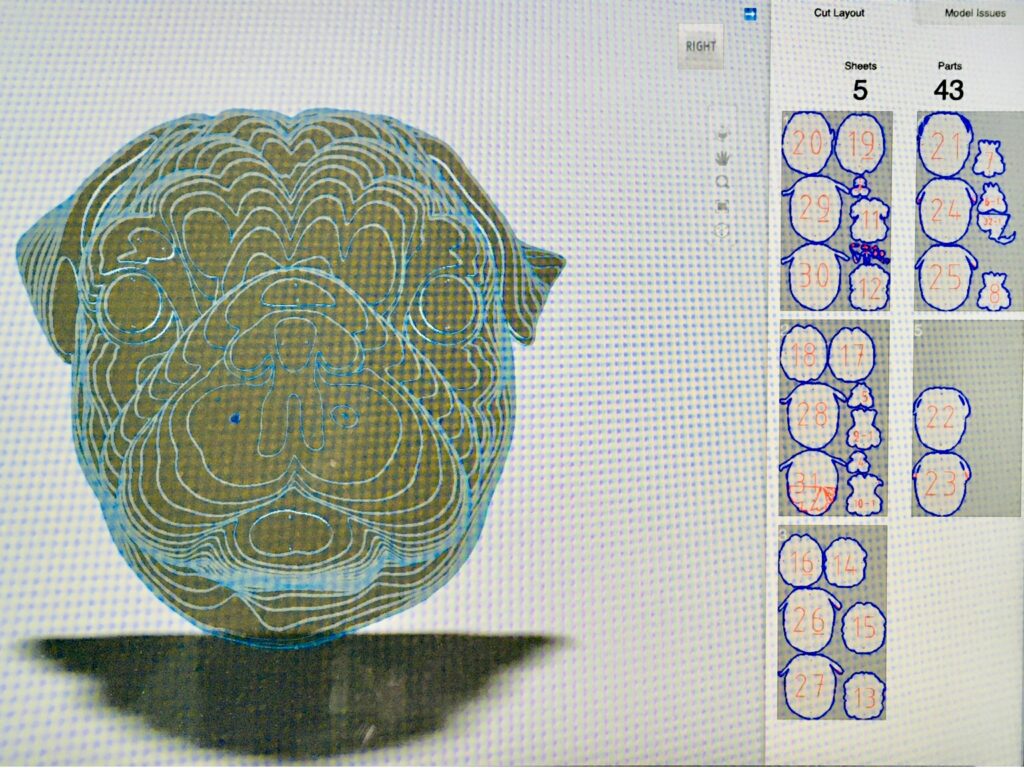
The next program used is called Slicer. It is a fun one because is slices your image up into all sorts of slices. I imported my image in and changed the standard settings to new ones. They now reflect my material size and thickness. As this was being cut out of wood, we were using the stacking slices format.
Face imported into Slicer
I changed the way the slices would be cut to go from the back of the head to the front of the face instead of from the chin up to the top of the head. This provided a neat topographic map sort of feel. A pattern in generated of all the slices. This gets saved as a .PDF file to be imported to the next program.
3D rendering and 5 page pattern.
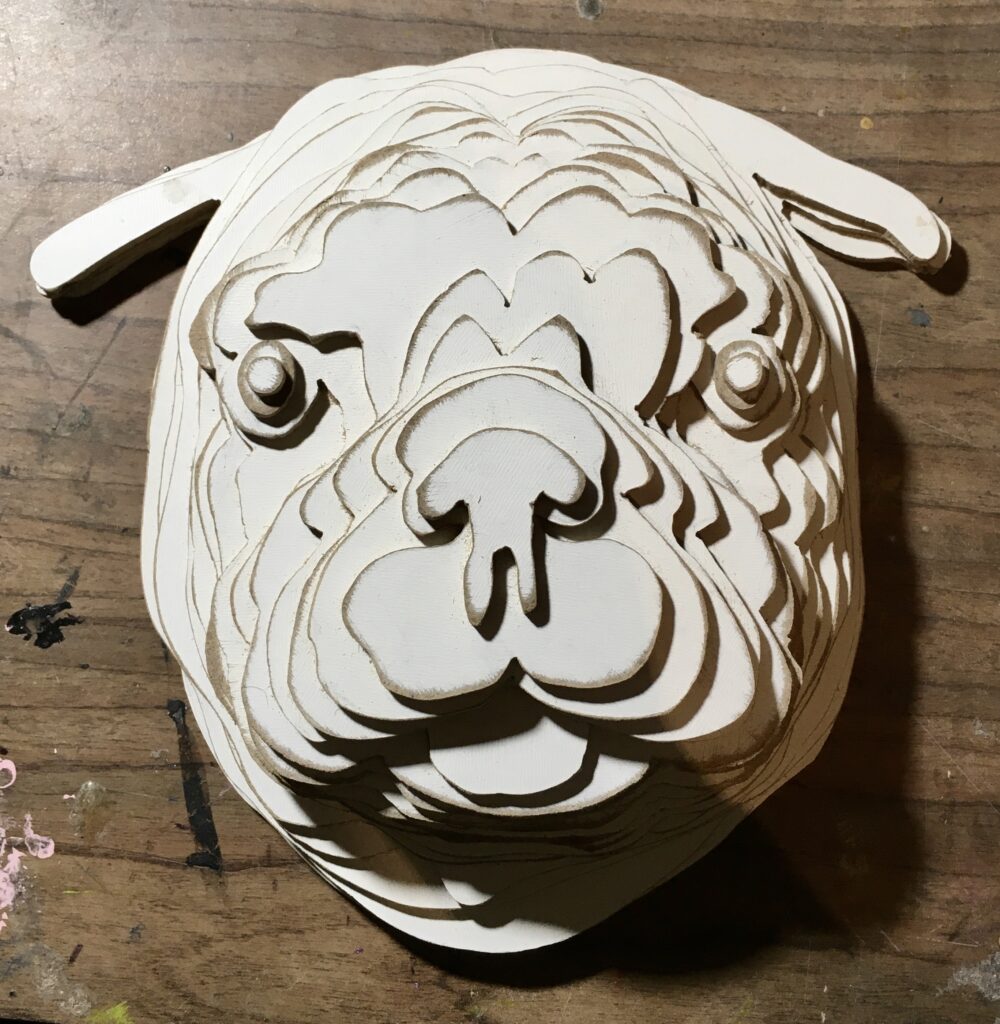
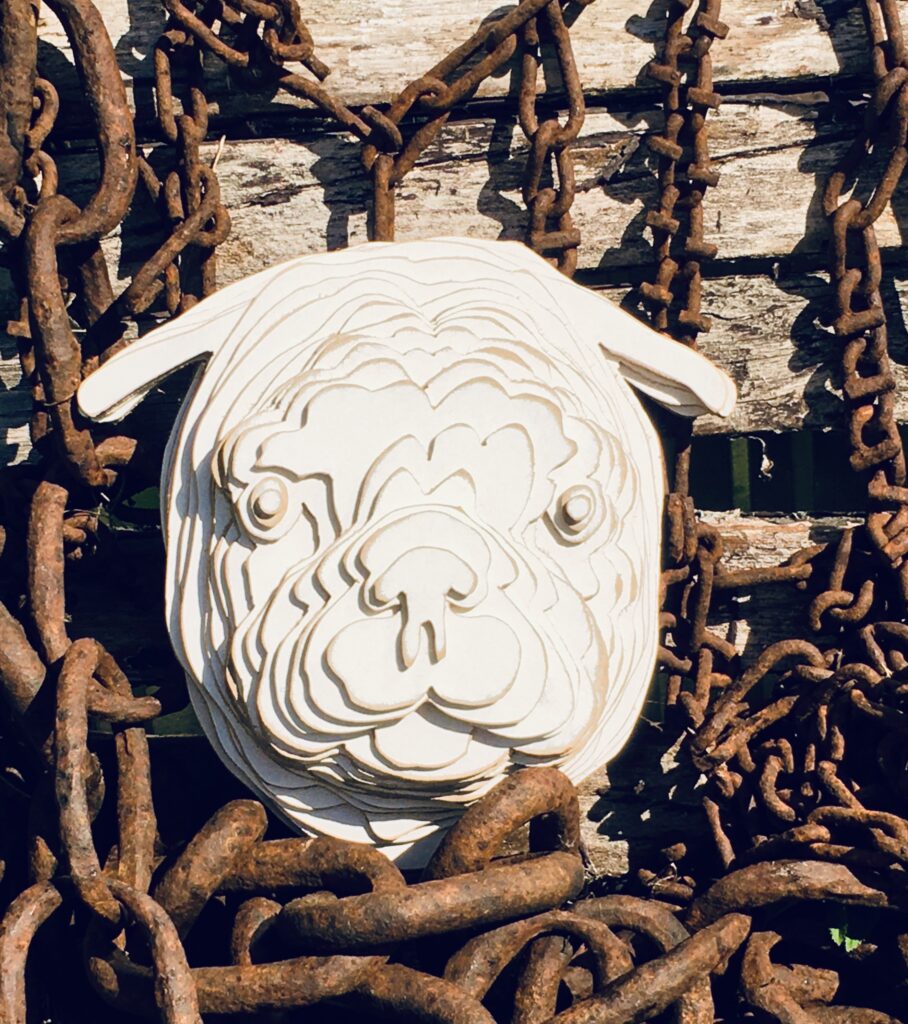
The file is imported into Inkscape and it is prepped for printing out onto paper. Maggie from the digital printshop printed it out onto paper for me. I used carbon paper and traced the design pieces onto the thin plyboard. Time to go into the wood shop and cut the pieces out. I had forgotten how much fun it can be cutting things out with a bandsaw. I was in the flow and got everything cut in one afternoon. I brought the pieces home and gave them a light sanding. It was very straightforward to stack. I used Gorilla Glue to glue it together. I omitted a few pieces in the head as it seemed heavy and they were not needed. I originally thought I would paint the sculpture black. I stacked a few of the extra pieces I had left over and experimented with painting, staining, etc. Everything I tried seemed to flatten the look or take away from it. In the end I decided to just keep it white.
Finished wood stack. I messed up the eyes somehow. Baby Eve does get that super intent stare when she wants something.
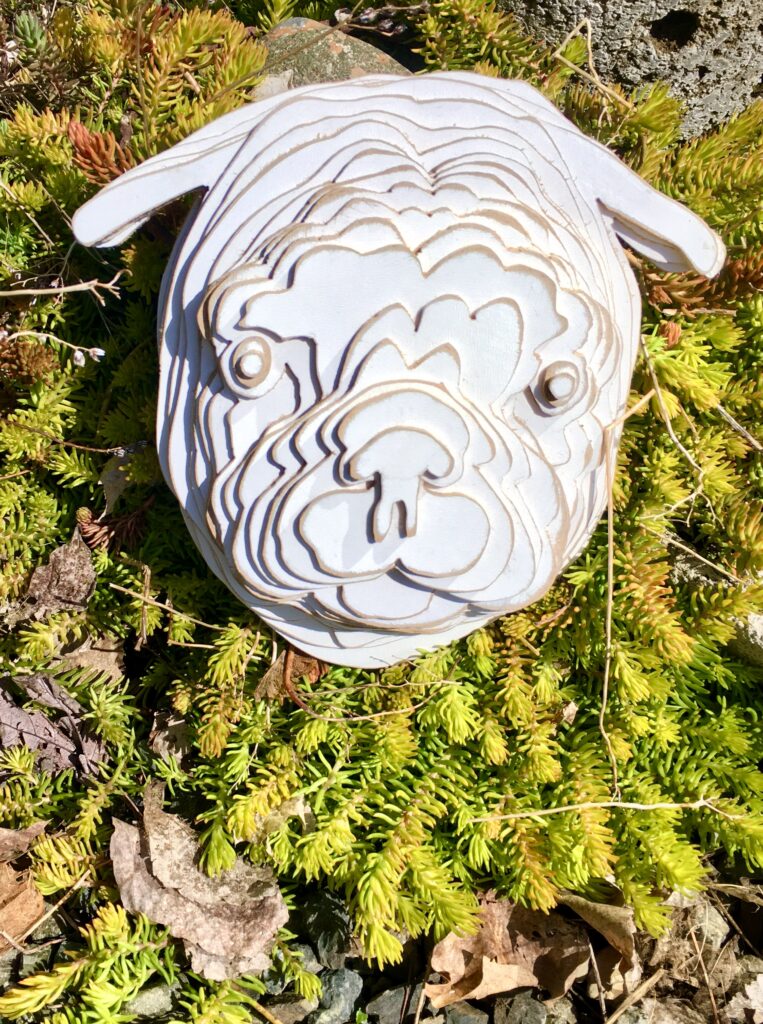
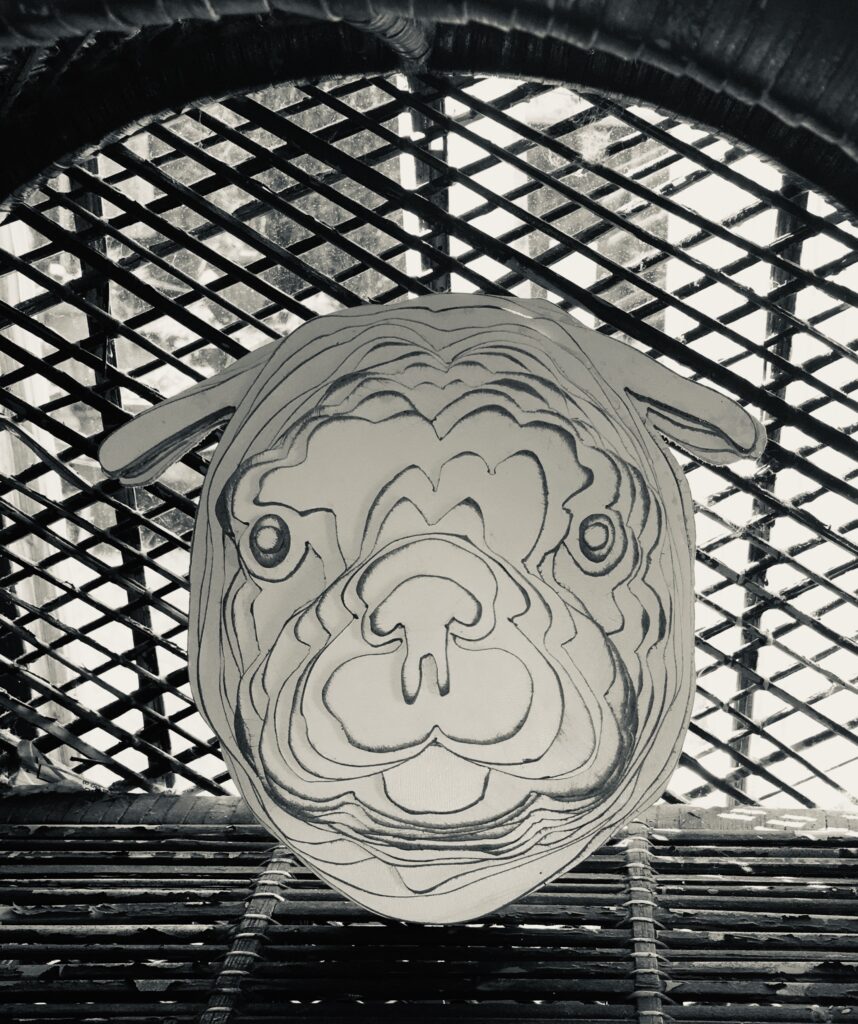
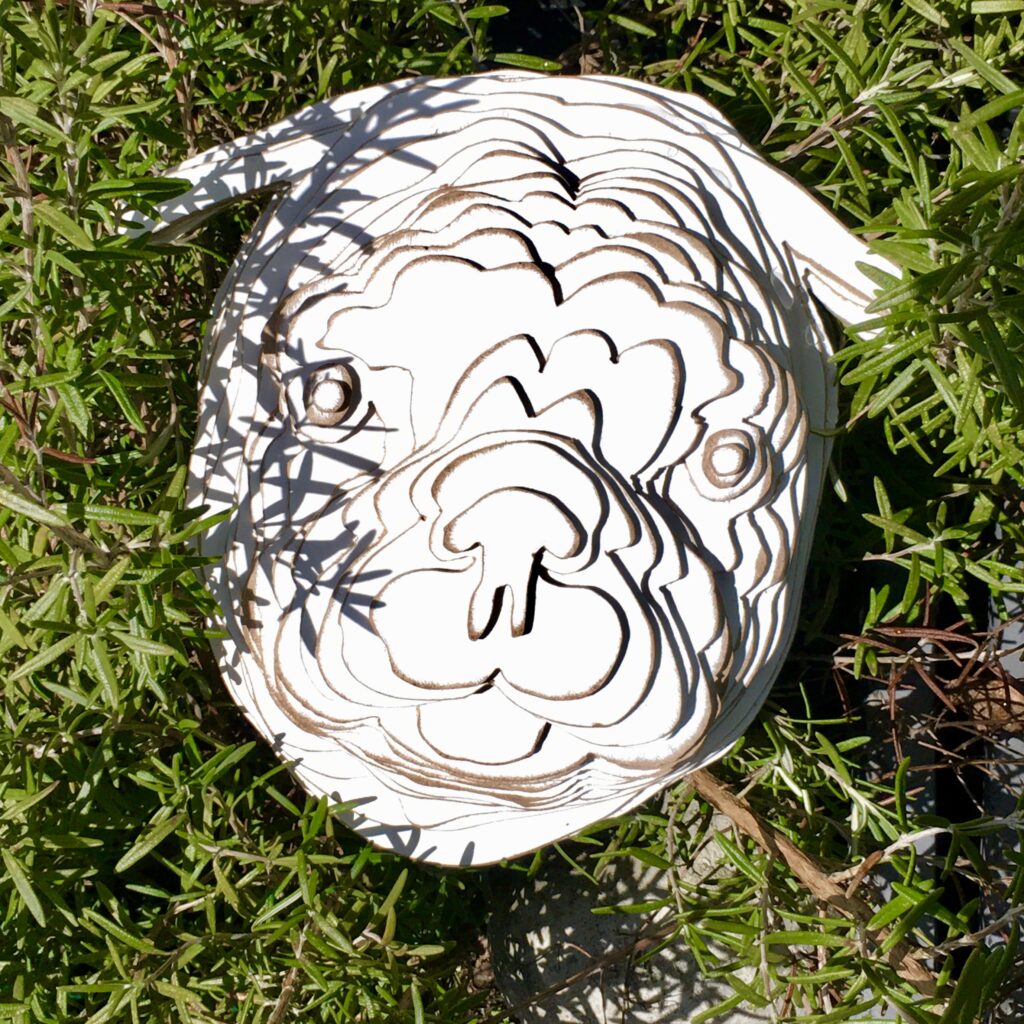
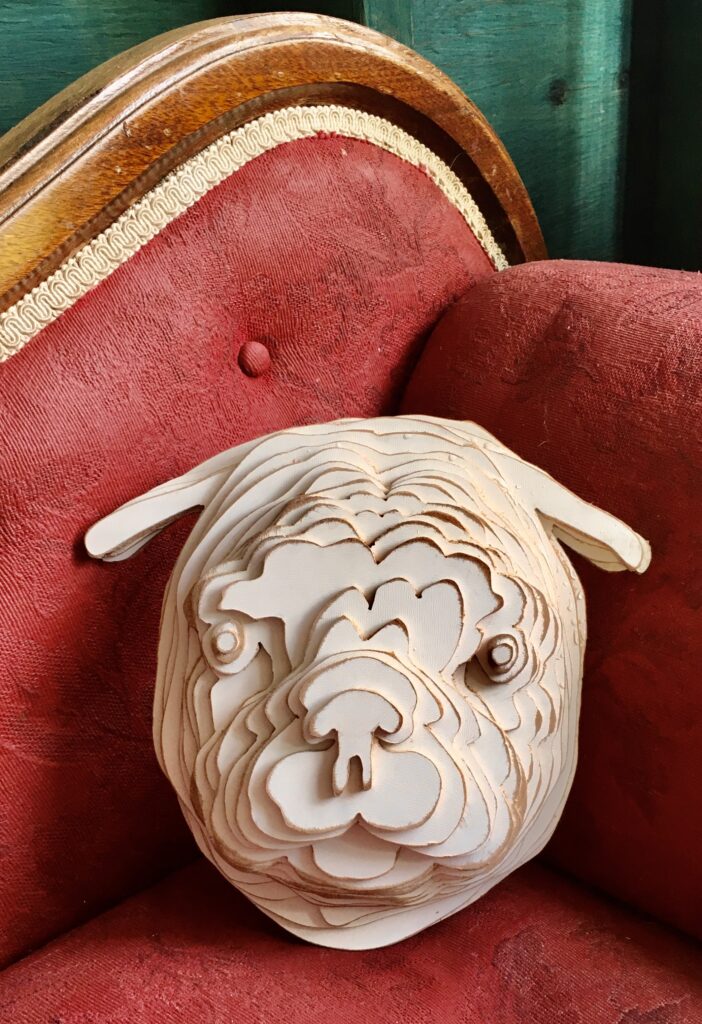
I thought about all the fun places I could take photos of this around my yard, so the first sunny day out I went.
I liked all the lines that are happening in this photo. It’s a contrast between rigid backgrounds, and flowing shapes.Pugs are small but mighty!Always on the furniture in real life too.Baby Eve was unimpressed.
I will be exploring this process more in the future.
We were tasked with finding an everyday, ordinary item that could be altered in some way using modelling clay. After changing the form, a mold would be created and used to pour multiple casts of our altered form. The multiples would then be given surface treatments and displayed together as a grouping.
I have made and sold Hydrostone plaster castings for years. I am excited to experiment with a new molding compound, and make something for fun. Something that has nothing to do with fulfilling a store order, or building inventory. This is what I did…
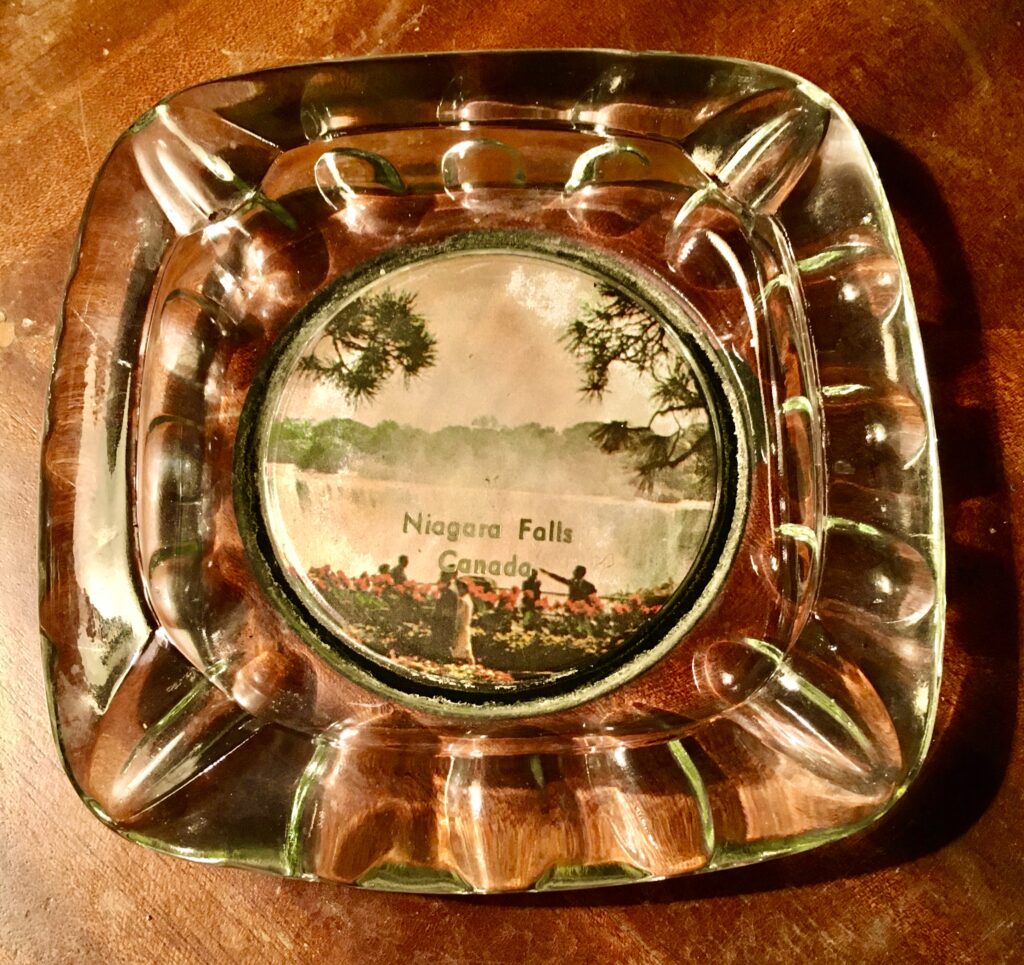
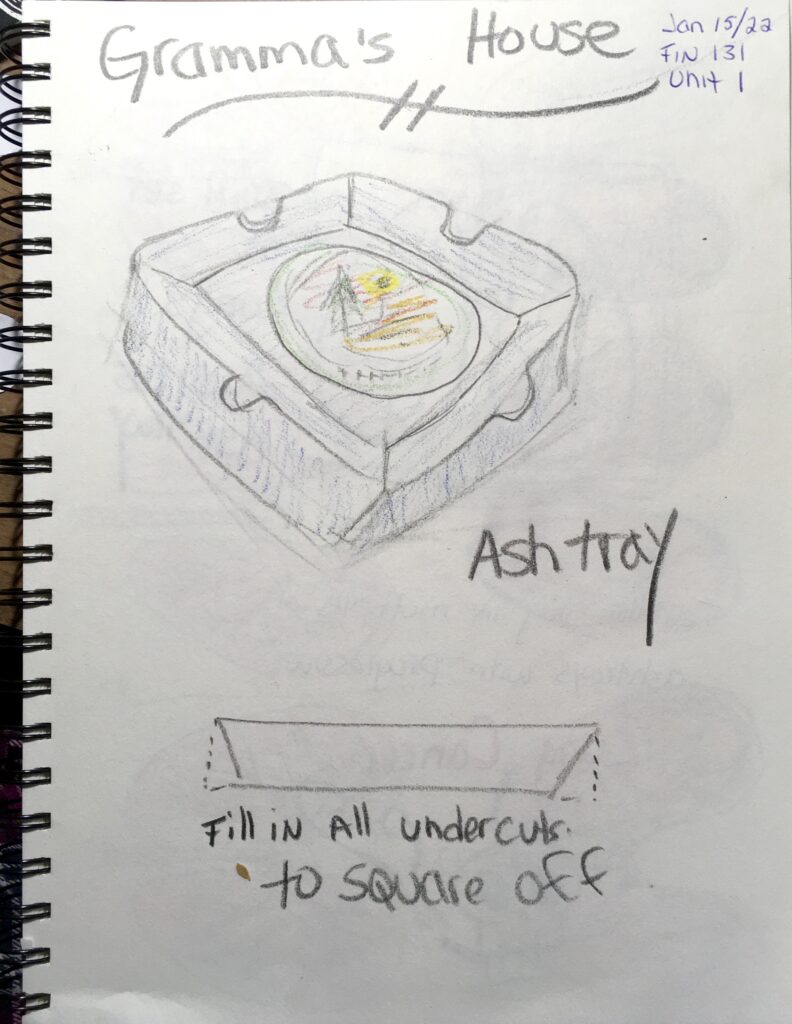
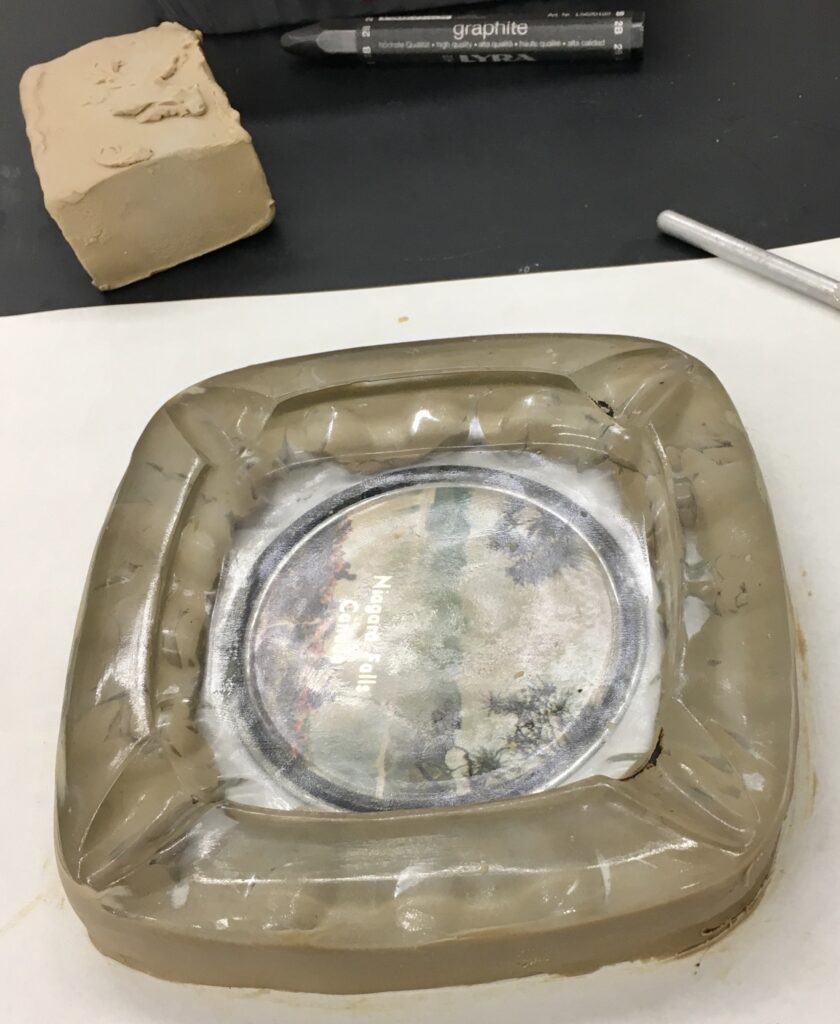
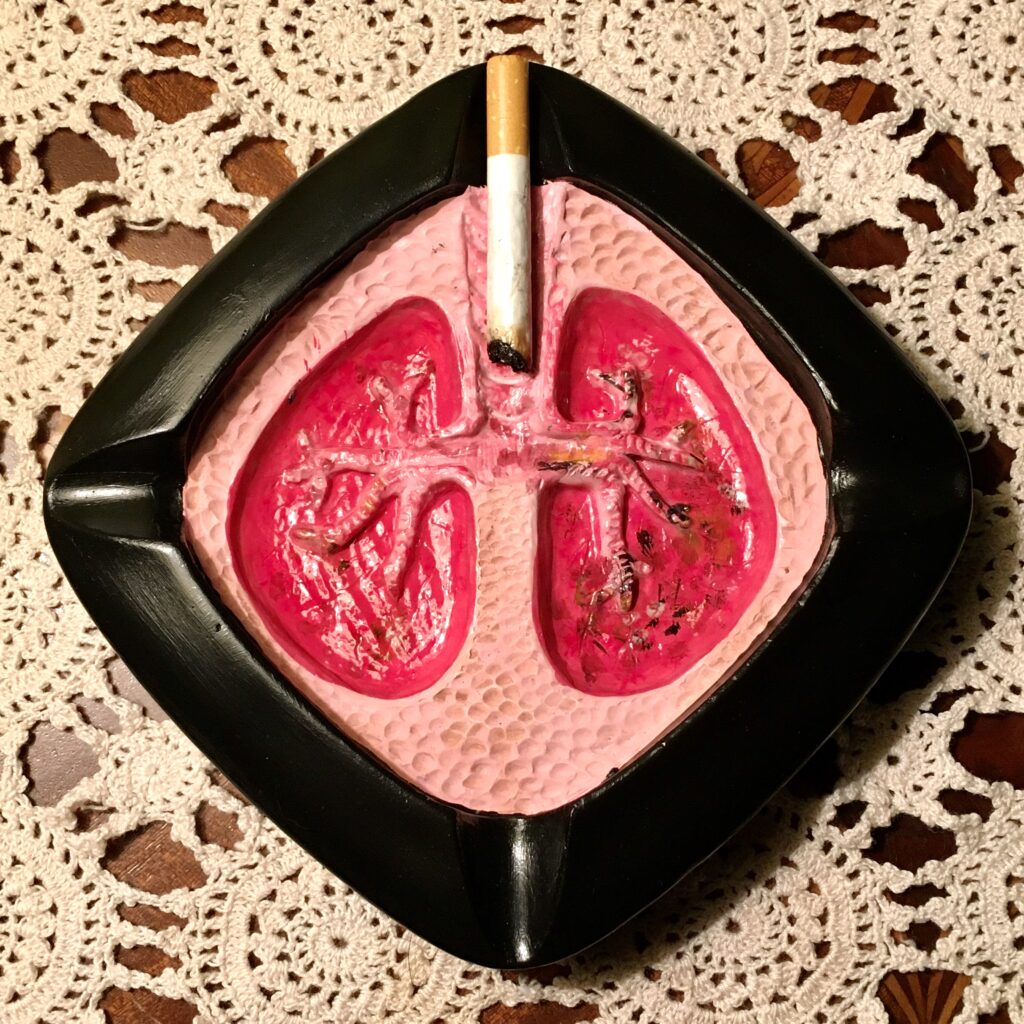
Vintage mid century ashtray.
I chose an ashtray as my object to alter. My mothers parents were heavy smokers. They chain-smoked unfiltered cigarettes constantly. My grandparents grew up in a time and culture where smoking was seen as something different than it is today.
In my gramma’s house there were many ashtrays. Some were made from beautiful cut glass crystal that shot prisms of rainbow light when the sun shone in through the sitting room window. Others told tales of exotic locations from all over the world. Still others, kitchy in form. Imagine a wee claw foot porcelain bathtub with “Cool your Hot Butt in my cool tub”. That was in their bathroom. Each room revealing a clue to a shared life between two people. All those ashtrays, all that smoke, all that cancer just waiting to happen.
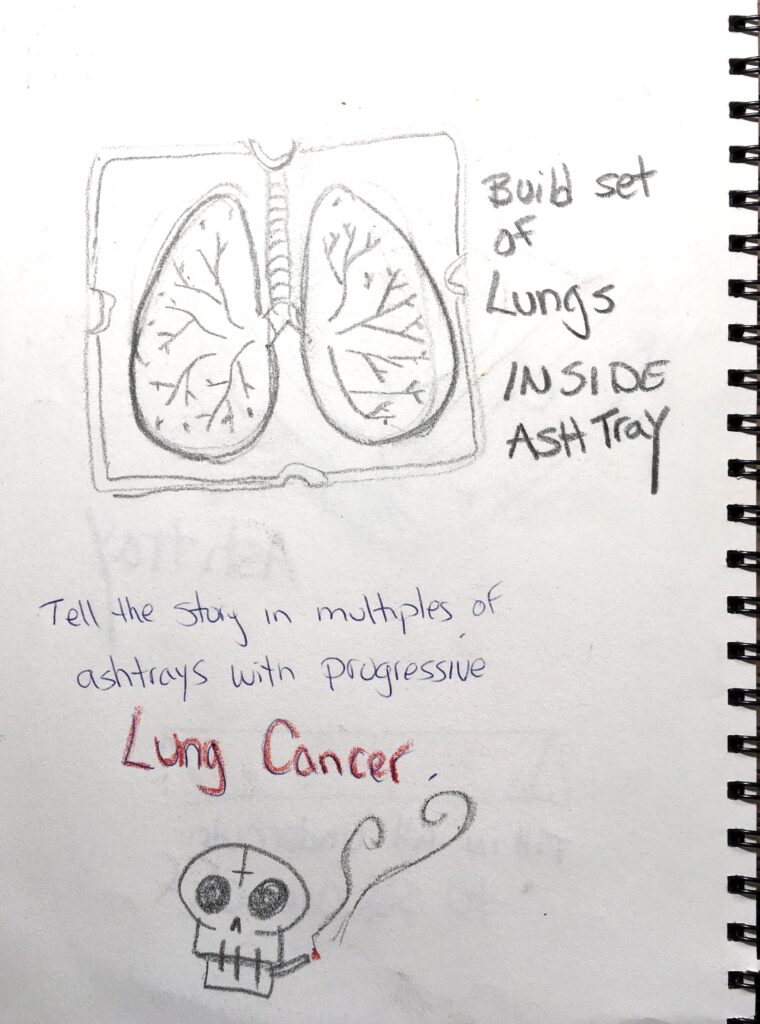
Pages from my sketchbook thinking about my concept and design.
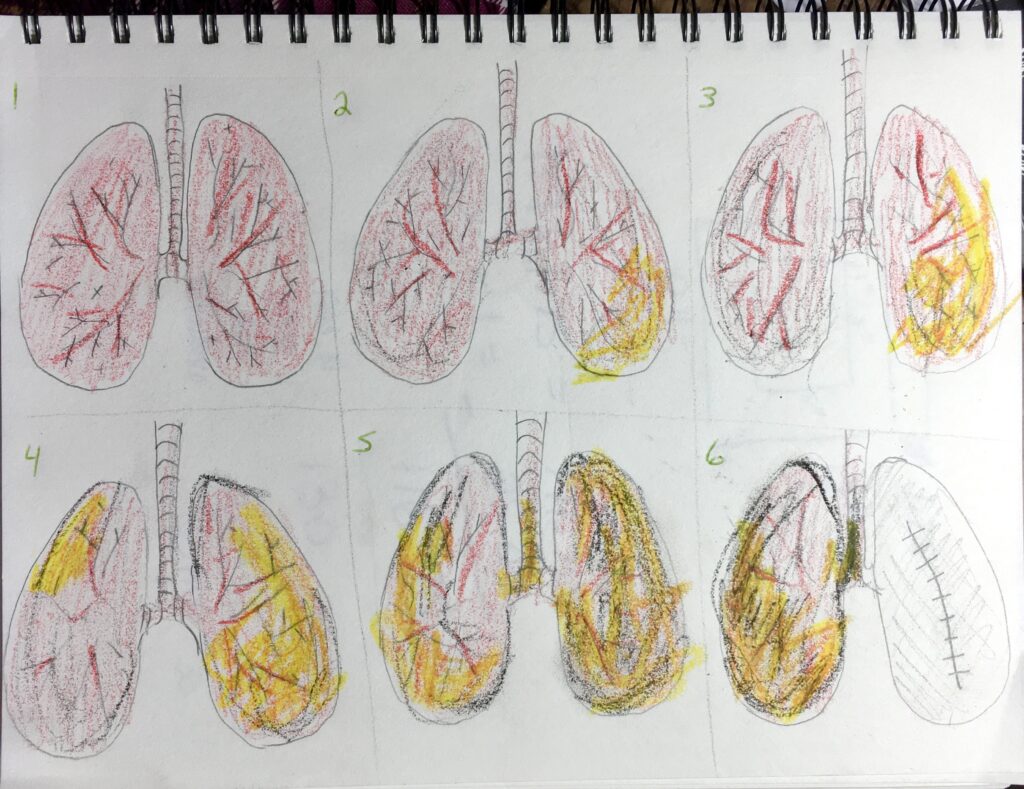
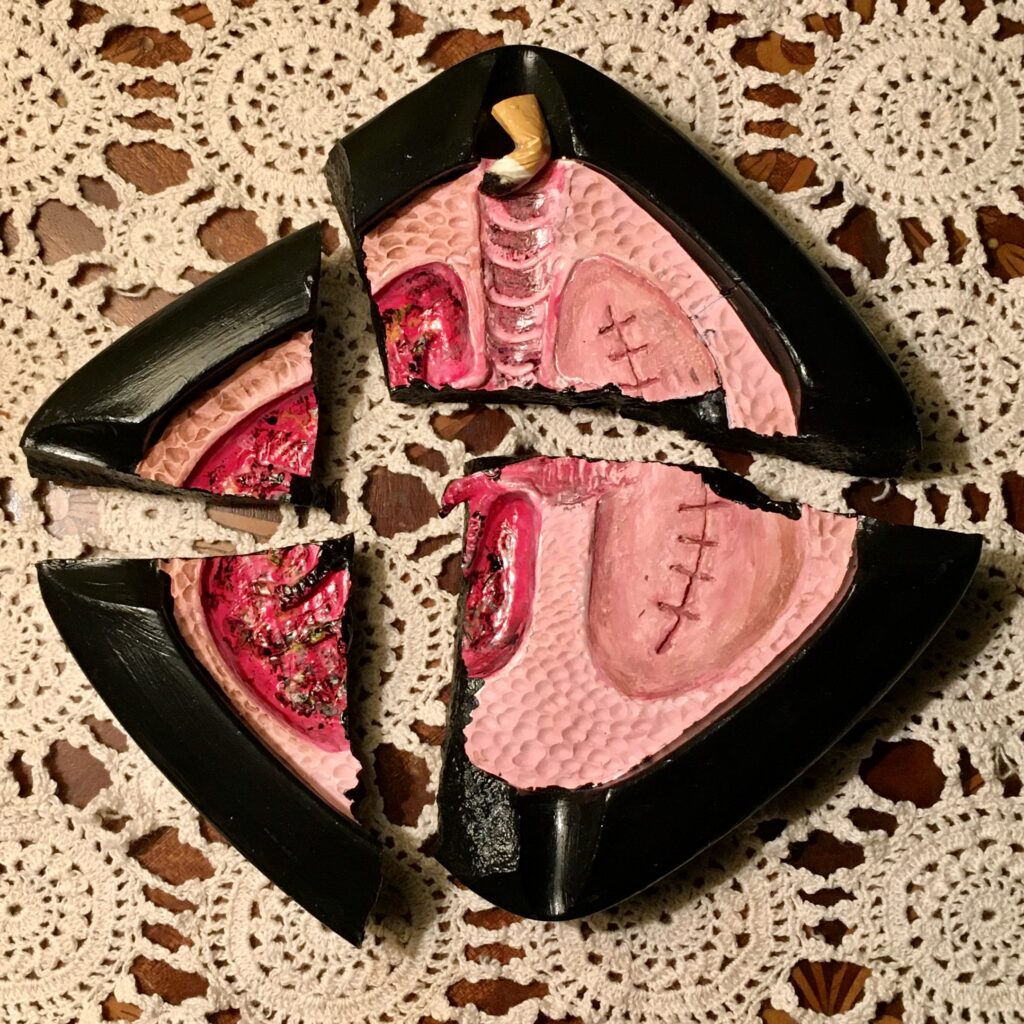
Stages of Lung Cancer in all the ashtrays.
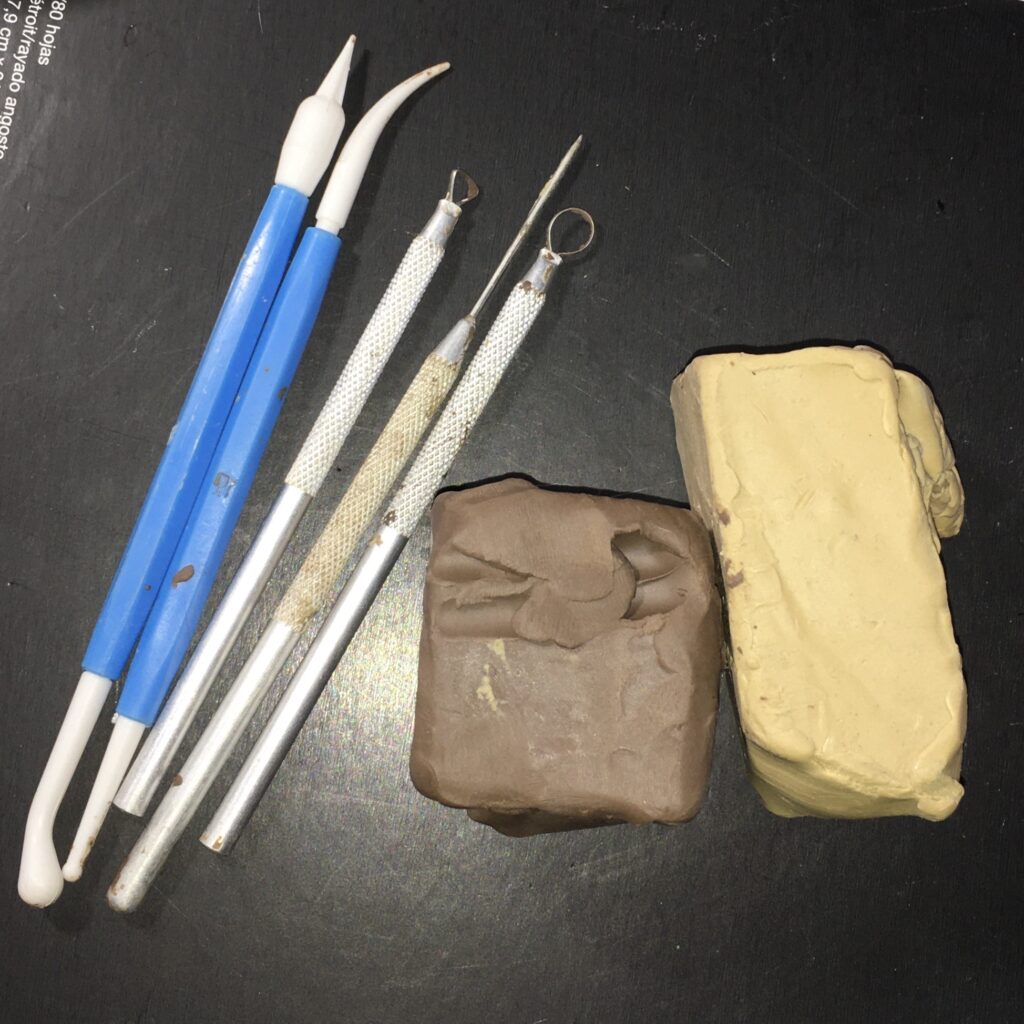
Now came the time to build. we were given two types of modelling clay. One was softer to work with than the other.
Two types of modelling clay
I used the softer light color clay to fill in the undercut on the sides of the ashtray. You do not want your item to be wider on the top than the bottom. this will cause problems trying to release from the mold.
Filling in the sides of the ashtray.
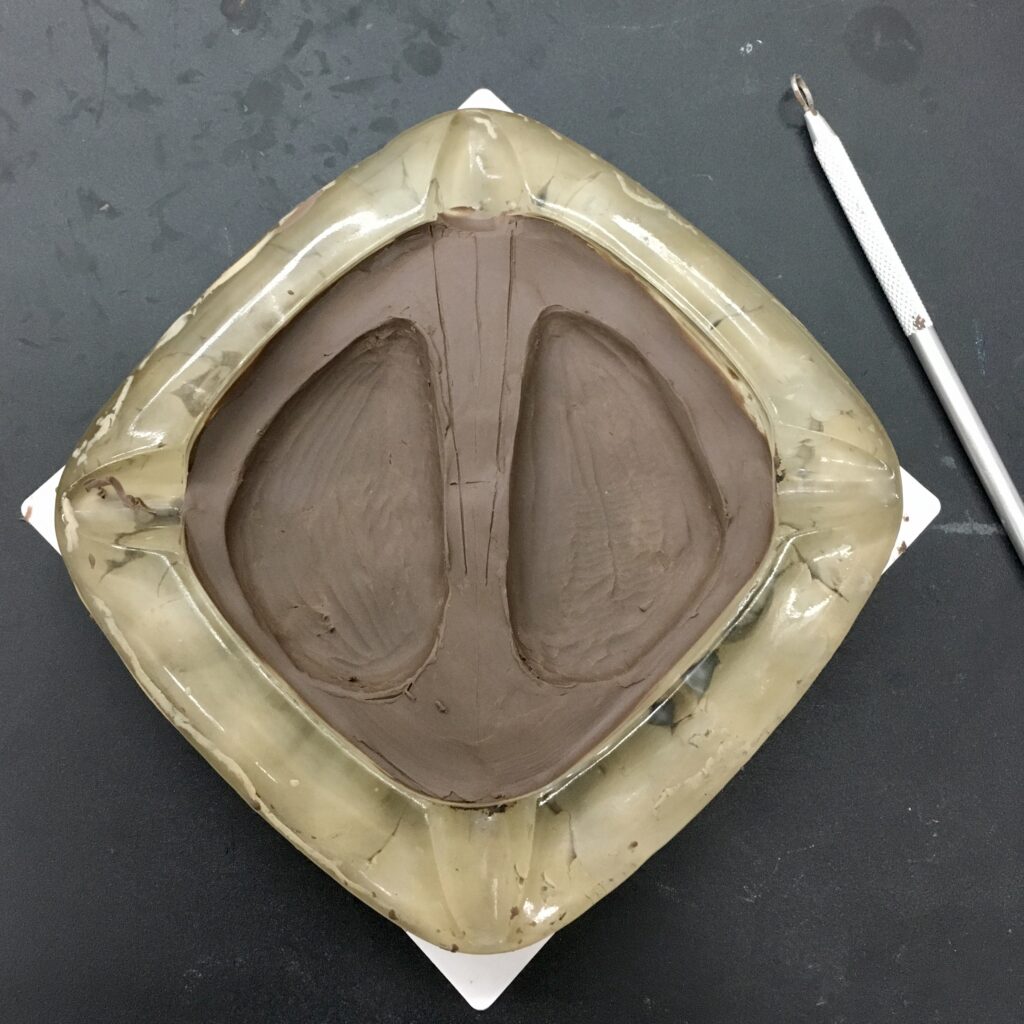
When I had the sides as smooth and even as I could get them, I used the dark, harder clay to fill in the centre of the ashtray. I then used a tool and started carving out the lungs.
Rough outline of windpipe and carving of lungs.
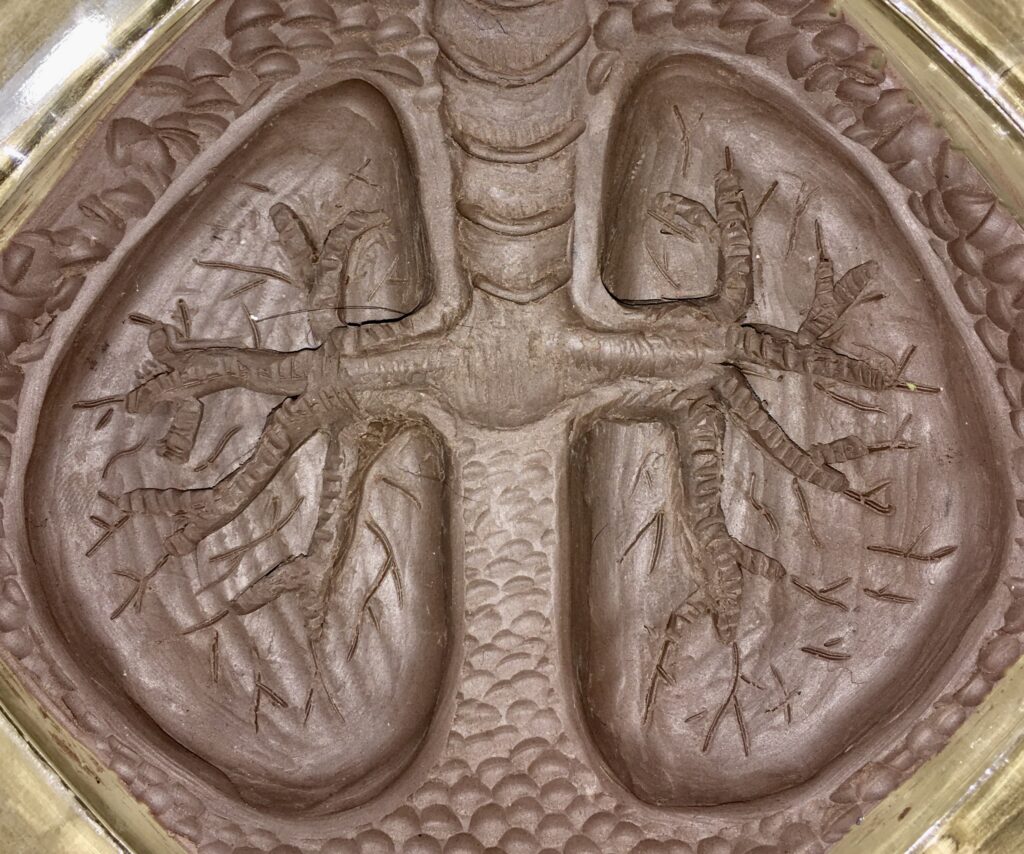
I do so enjoy Anatomy and love looking at old textbooks and pictures of body parts. I went into a fantasy land while carving this out. In my mind it was the late 17th century and I was tasked to create this model for the head surgeon reporting to the Duke of Southampton himself! Late night, poor light, and tired eyes saw this finished.
Close up of carving.Finished lung ashtray
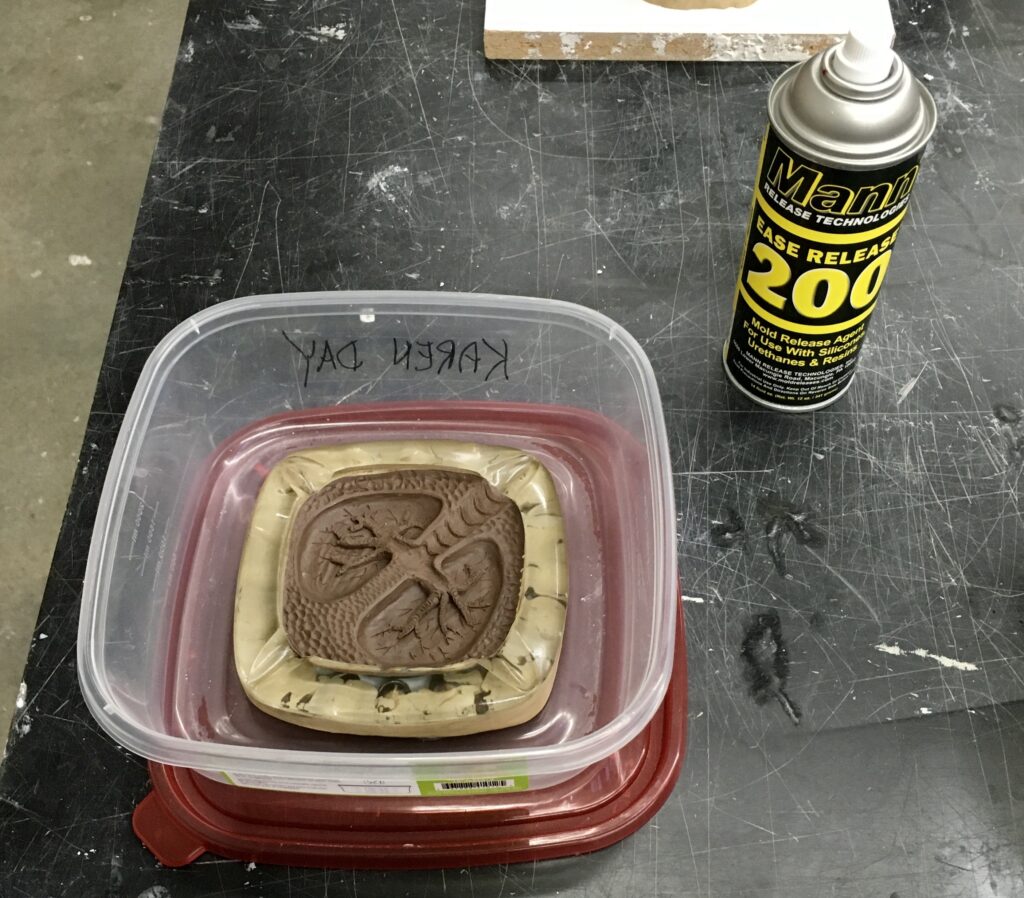
Now it was time to cast my new ashtray. I found a plastic container that was a bit larger than my item. I will use this as a cottle (container) to support the sides of my mold. I glued the bottom of the ashtray down inside of it. A mold release spray was applied to item and all around inside to help with release after mold has set.
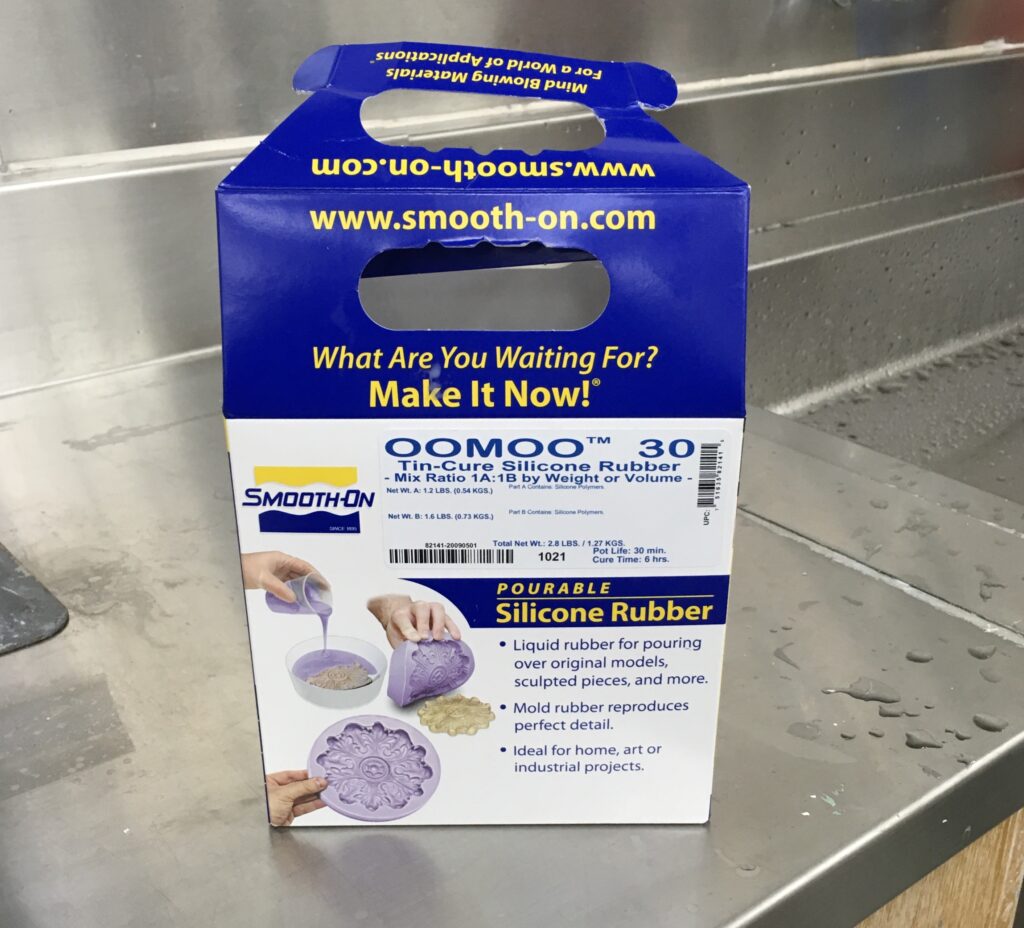
The product we used was called OOMOO 30. It is a two part silicone rubber mold mix
Product used in mold making.
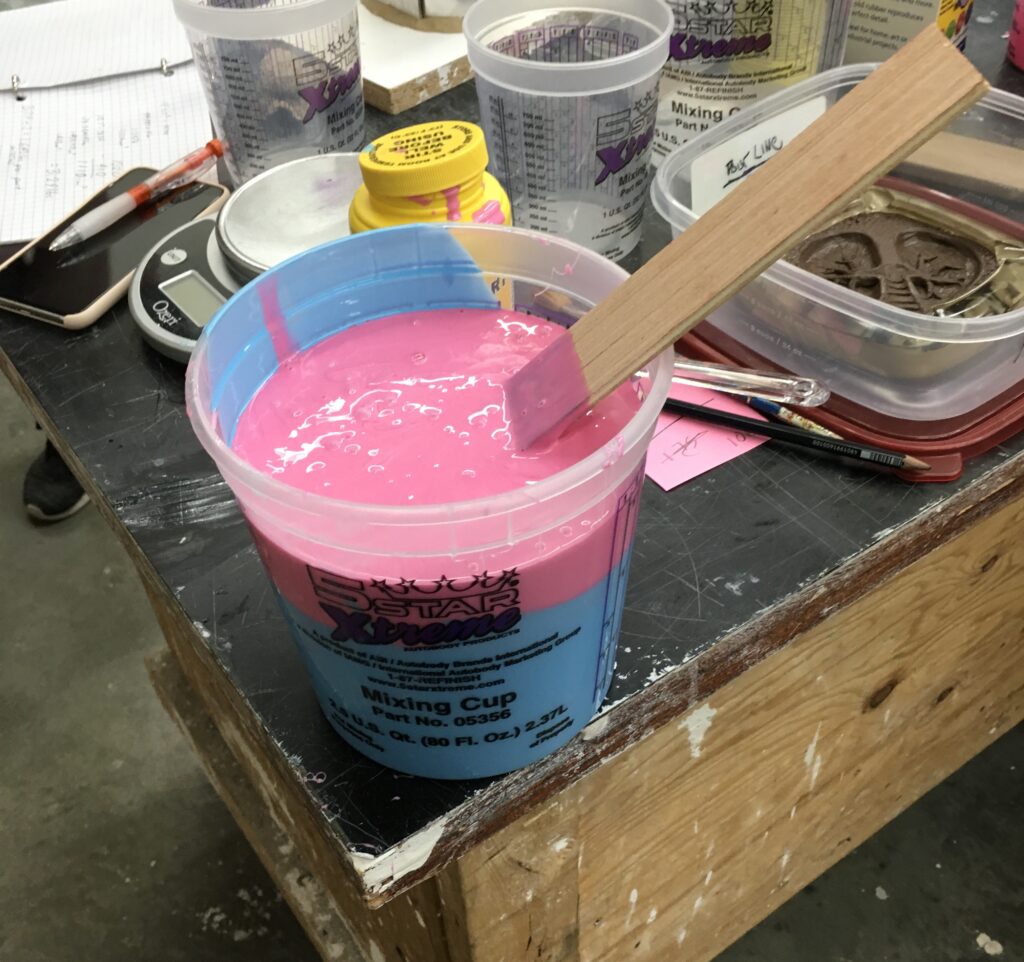
The two parts are mixed together to start activating the compound. It took a fair amount of mixing to turn it into a purple color.
Mixing the two parts together.
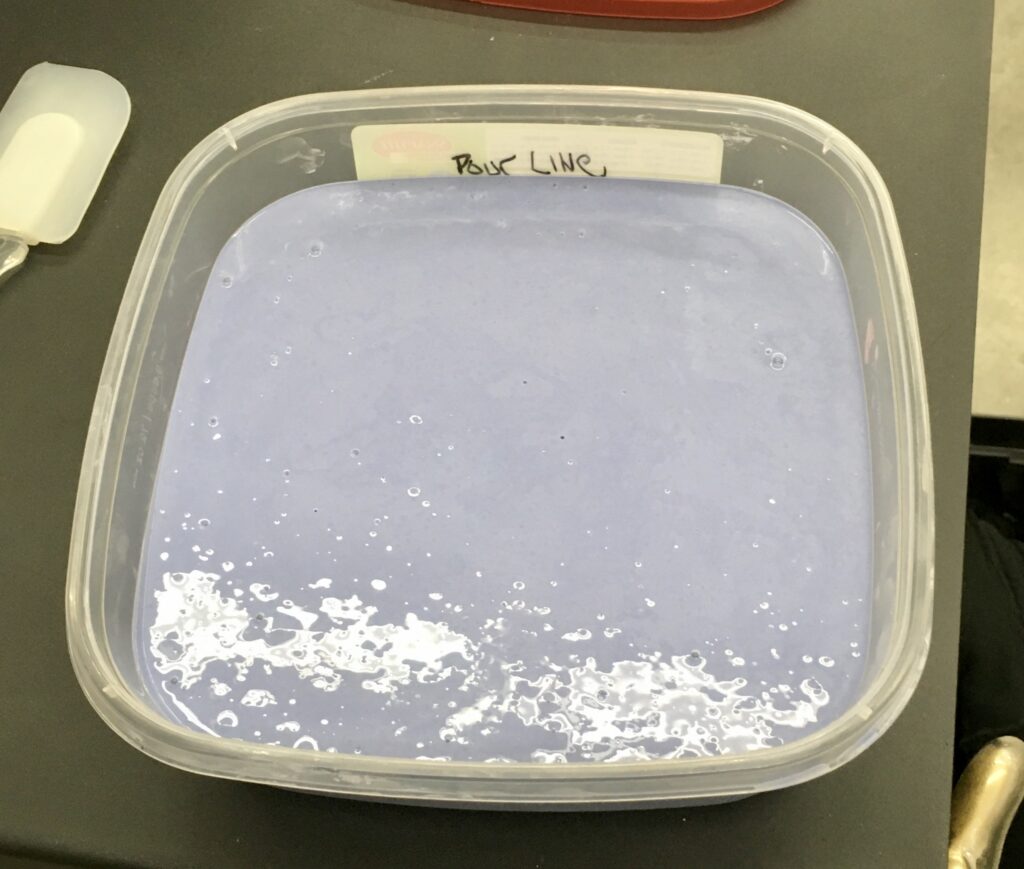
The mixture was then slowly poured down into the container. I filled it up to a line that I had drawn that was a half inch above the height of my ashtray. I wiggled the table it was sitting on to help bring up any air bubbles to the surface. This was then set on some shelves and left to cure for a few days.
Poured and needing time to cure and harden up.
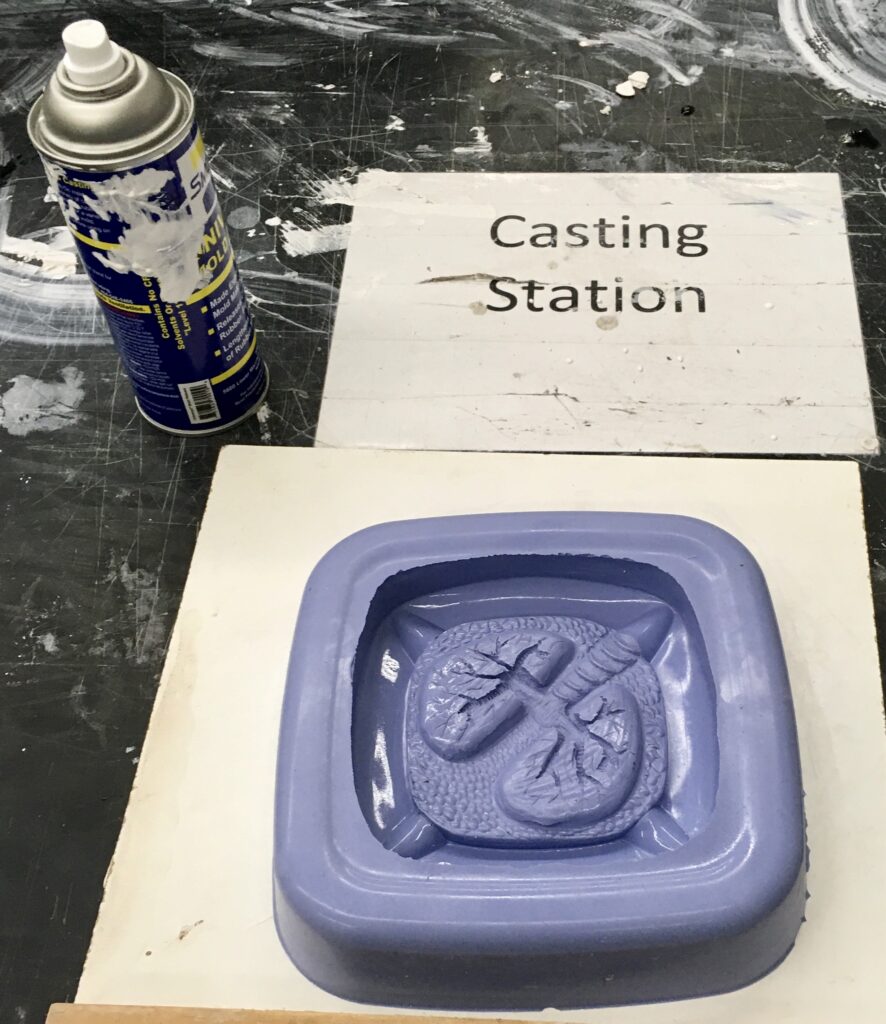
After the mold had cured, I turned the container upside down and pulled my mold out. I then removed the ashtray out of the new mold. The product was flexible and did not tear. I used an exacto knife to clean up a few edges. Time for casting!
Mold prepped with a mold release. This helps to keep your mold conditioned and not dry out.
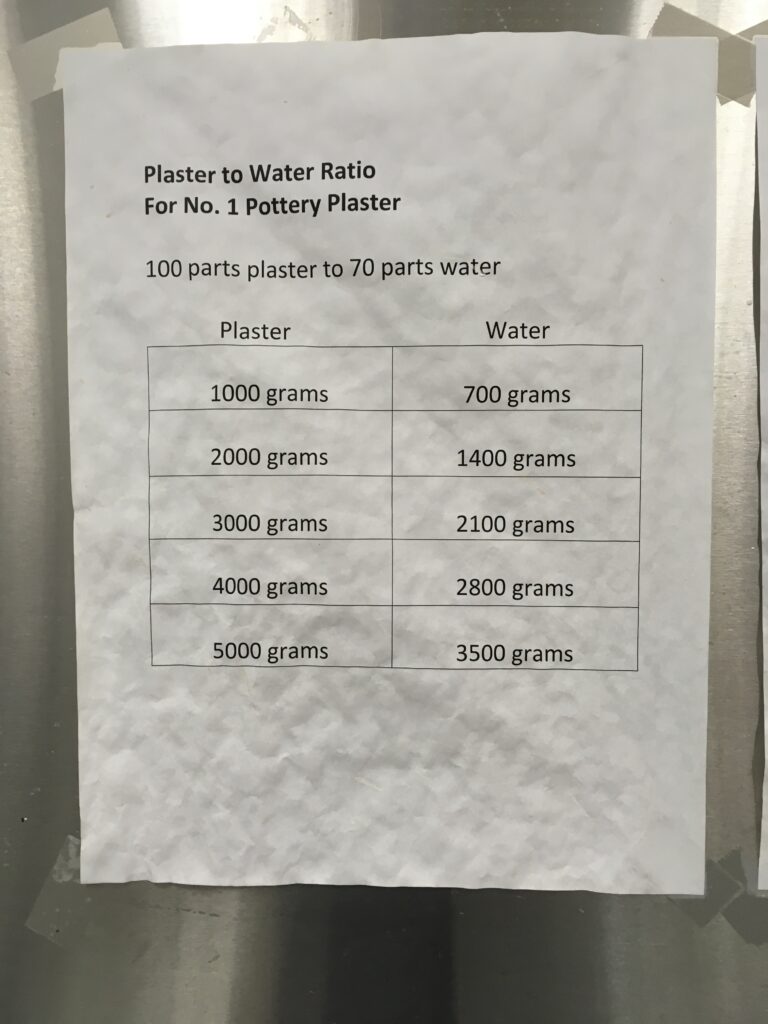
When it came time to mix the number one pottery plaster, I learned a whole new way. After years of pouring the plaster into the water until a little mountain formed above, has now been replaced with a formula that makes the perfect plaster every time. I figured out what I needed for my mold and was ready to mix and pour.
Plaster mixing formula
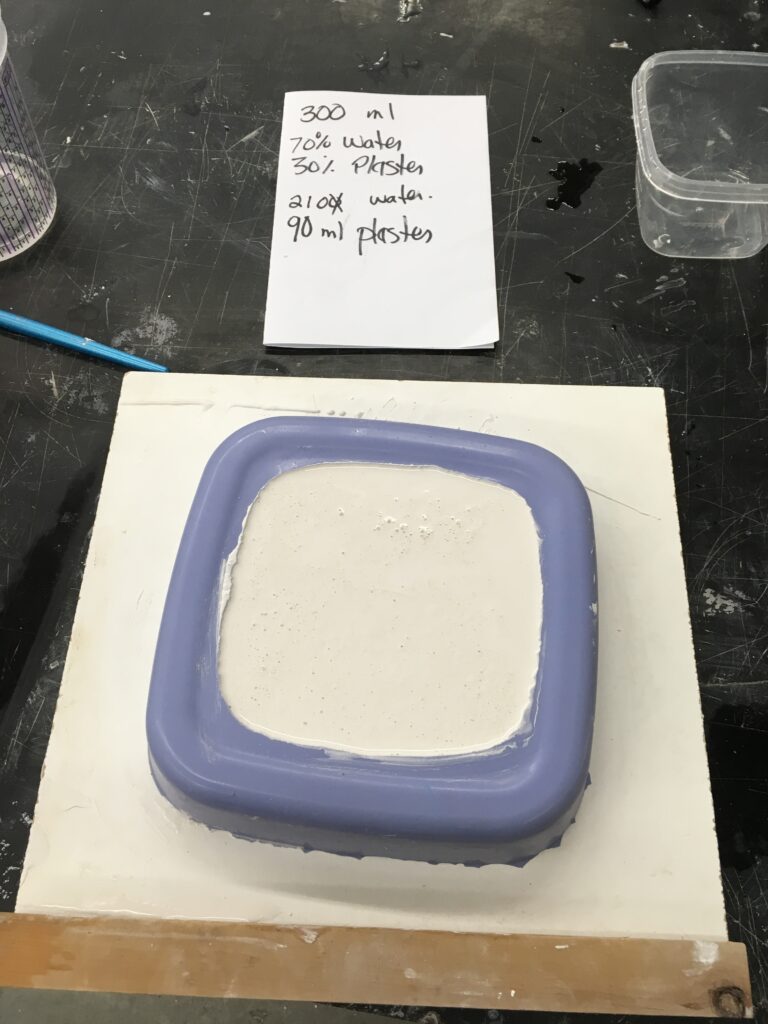
I am not the best at math, but was able to figure out the exact amount of plaster and water I needed to pour my item with no waste every time.
Science and Math in the Art room!
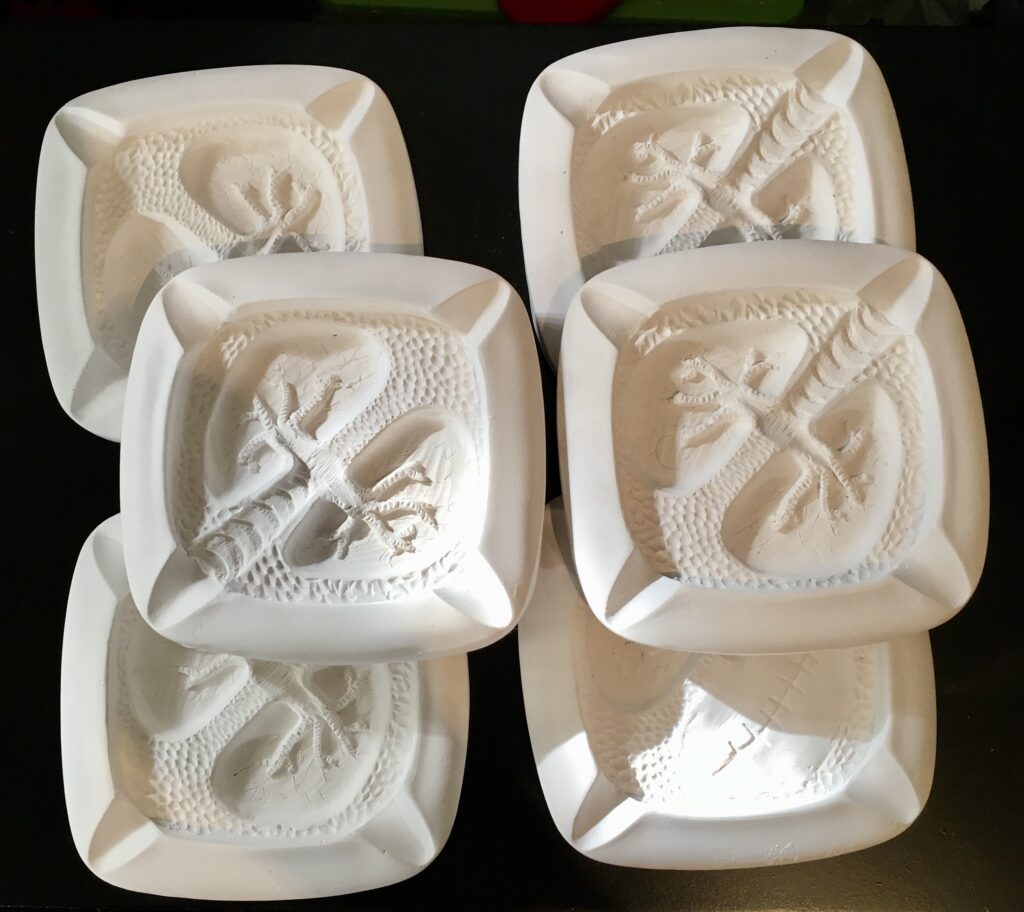
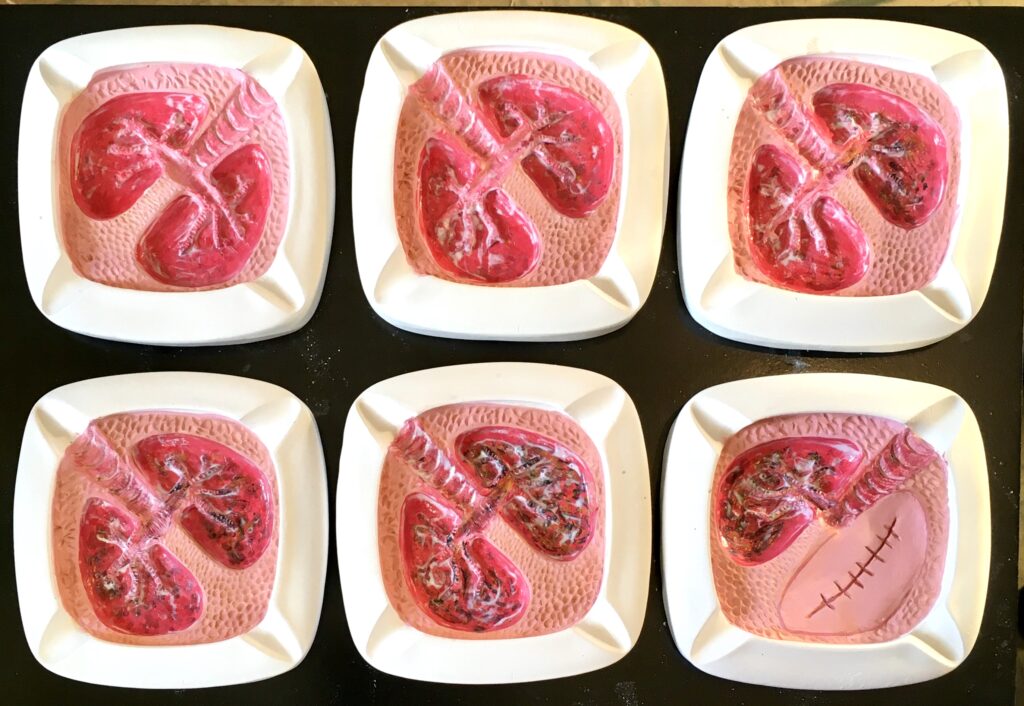
I poured all my multiples in the number one pottery plaster. I wanted everything to be the same material in my series. I further altered an ashtray by filling in a lung and adding a scar.
Note the far right bottom ashtray has a lung filled in.
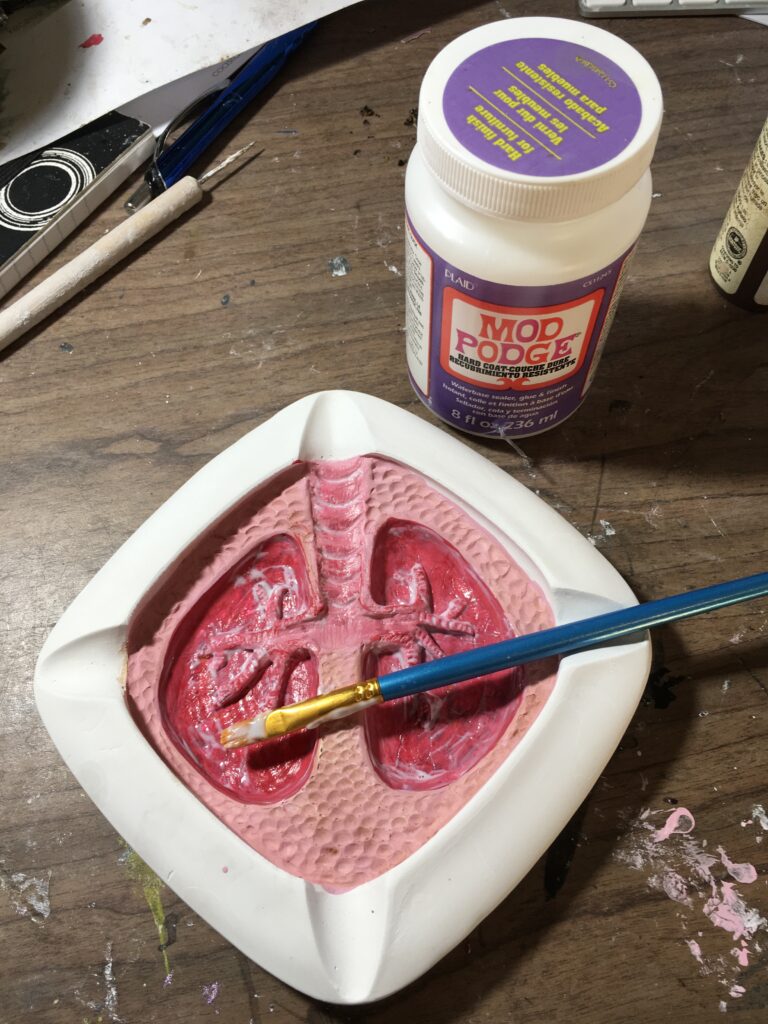
Using acrylic paints, I painted the lungs in progressive stages of lung cancer. I used a sealer in the lungs because I wanted them to be glossy and wet looking.
Adding a sealer to create a shine.
I was happy with how things were looking.
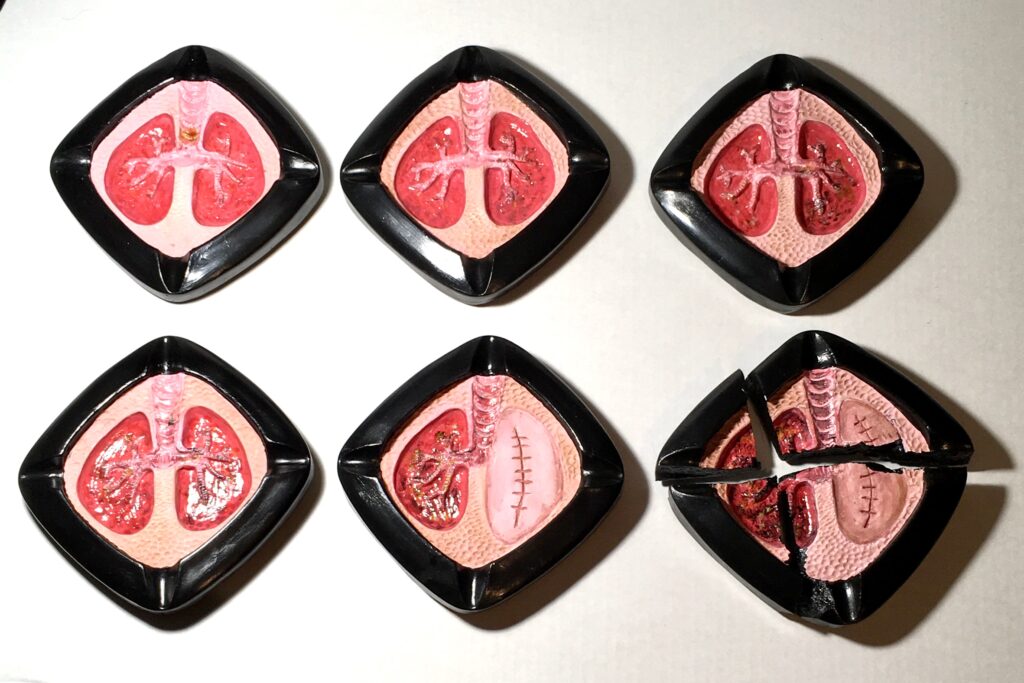
Next thing to do was paint the outside ashtray black. It added a solid heaviness to the feel of the piece The black also framed the lungs dramatically. I had a design idea/change at this time. I removed a piece out of the middle and added it onto the end. I modified it and broke it into pieces, thus representing the death of the smoker. The lungs were not looking wet enough so I grabbed a bottle of clear nail polish and gave them a slick tip coat. Now they had that wet, mucus look that I was envisioning.
New configuration of 6 ashtrays.
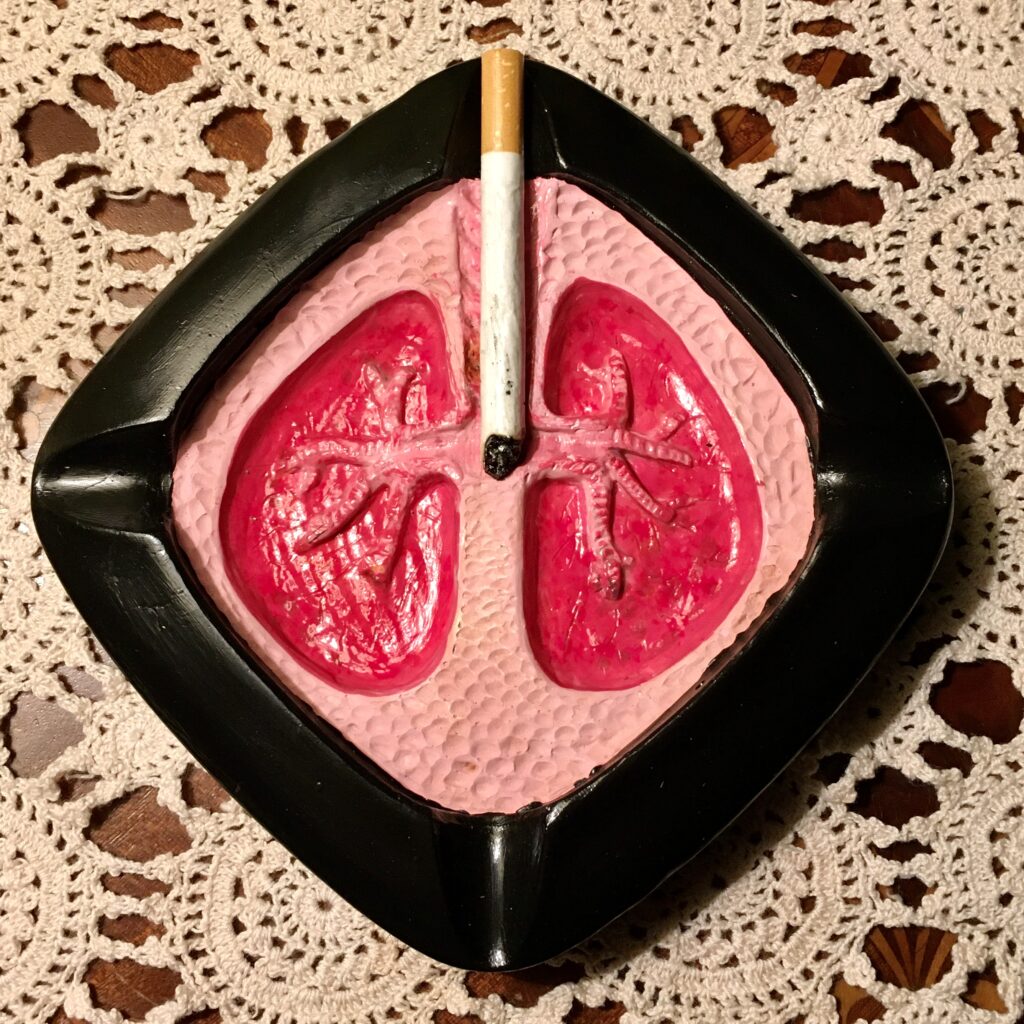
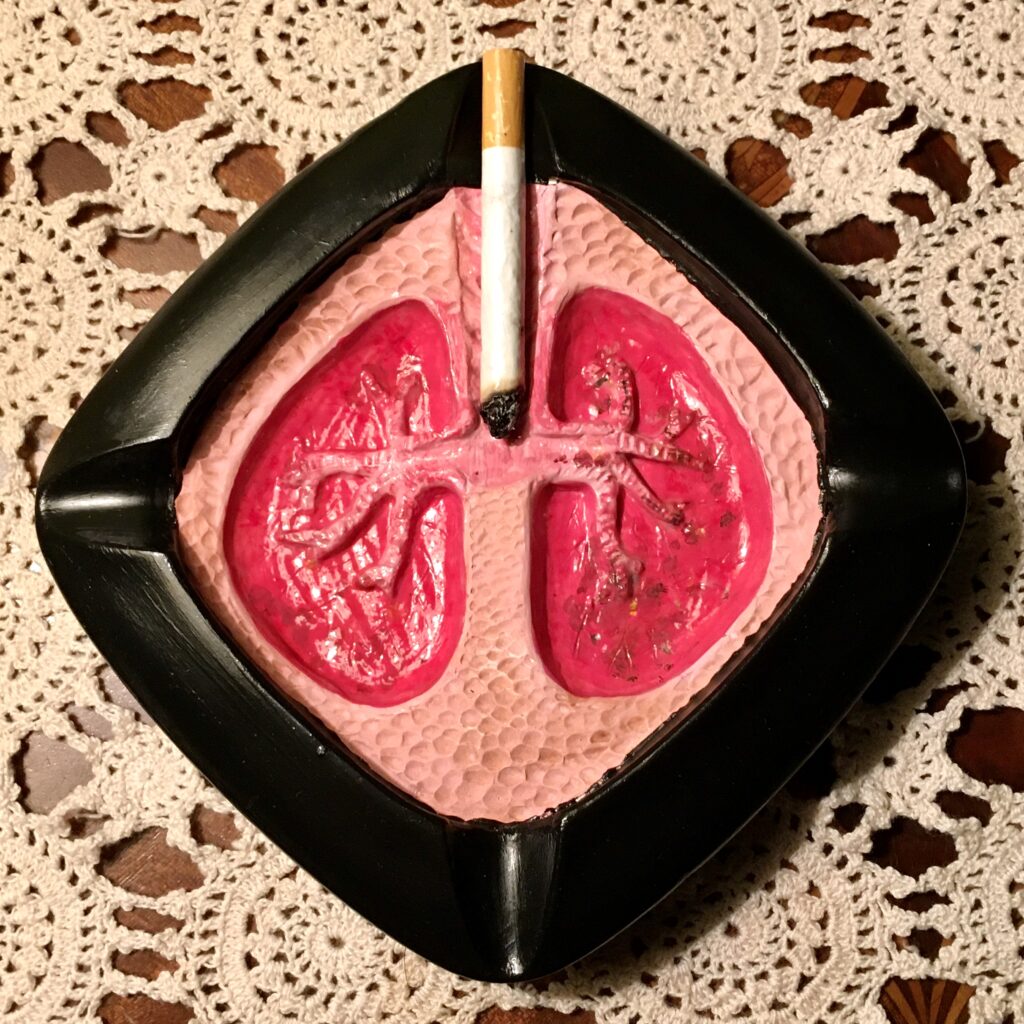
I added some burnt cigarettes to my timeline and narrative.
Gramma’s House 1 – 6Gramma’s House. 2 – 6Gramma’s House 3 – 6Gramma’s House 4 – 6Gramma’s House 5 – 6Gramma’s House 6 – 6
I made a video vignette using one of the ashtrays. Everything in this video is vintage. The wooden side table, crotchet doily, lamp and picture frame. Even the curtains are vintage. That is a picture of my Gramma Pearl and Grandpa Bud.
Video Vignette Title: Bud and Pearl Artist: Karen Day
I did use some artistic license in this piece. My Grandma had breast cancer mid age, and died of a massive heart attack in her early 60’s. I am sure the cancer was in her lungs too, and would have killed her if the heart attack had not first. The song ‘Only Forever’ was recorded by Bing Crosby in 1940. he was my grandma’s favourite singer at that time.
This unit was very frustrating for me. It involved navigating 3 different computer programs to reach the end product. I am not computer savvy, and I am sure everyone on the block heard my profanity.
First program to figure out: Meshmixer
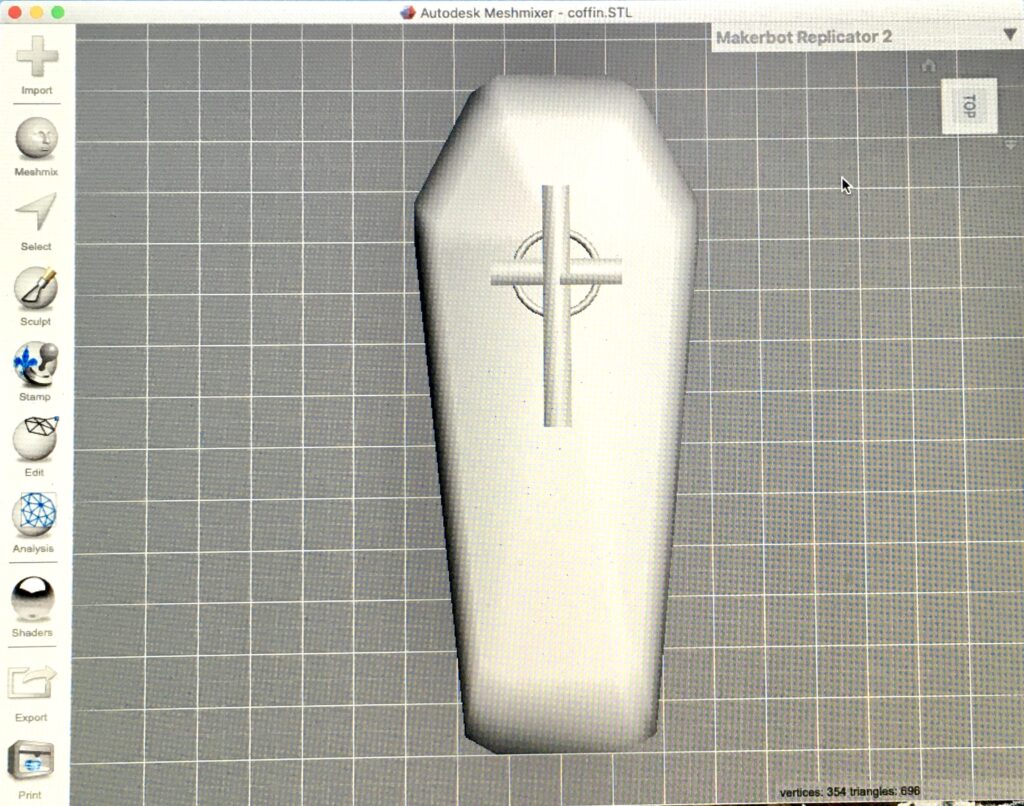
Coffin shaped box downloaded from cults.com
I went to a website called cults.com and downloaded a coffin shaped box. I used the Meshmixer program to remove the raised cross motif. It was fun to just play with the different brushes and see what they would do.
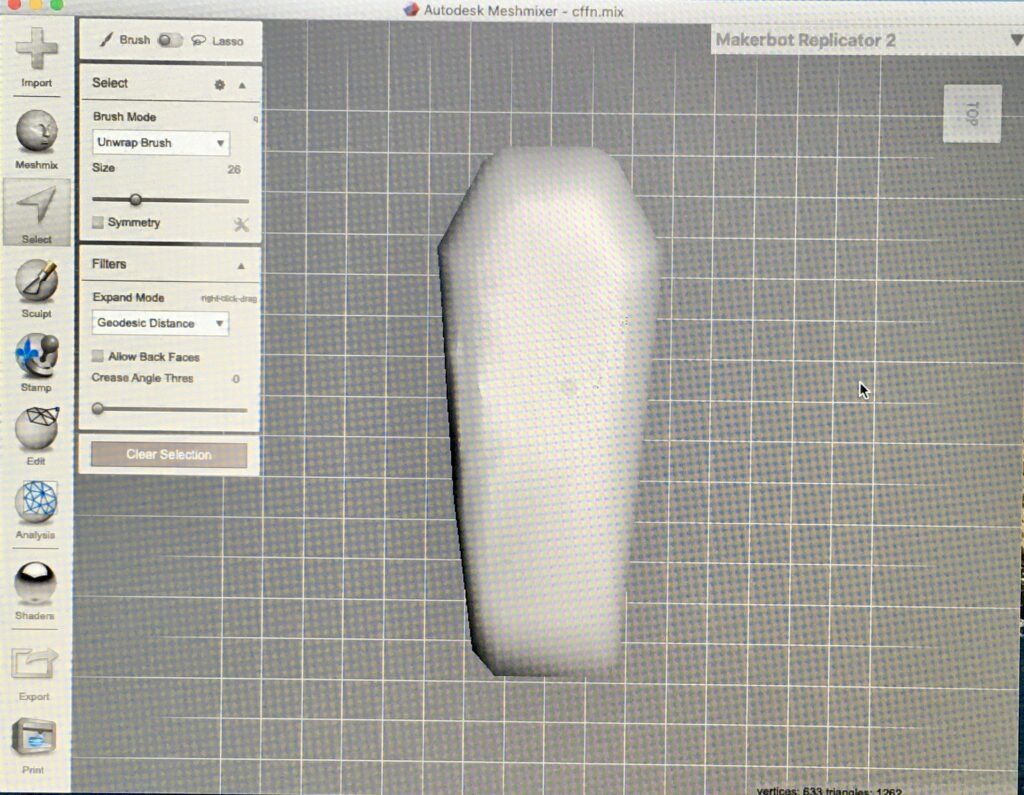
Using brushes to remove cross motif
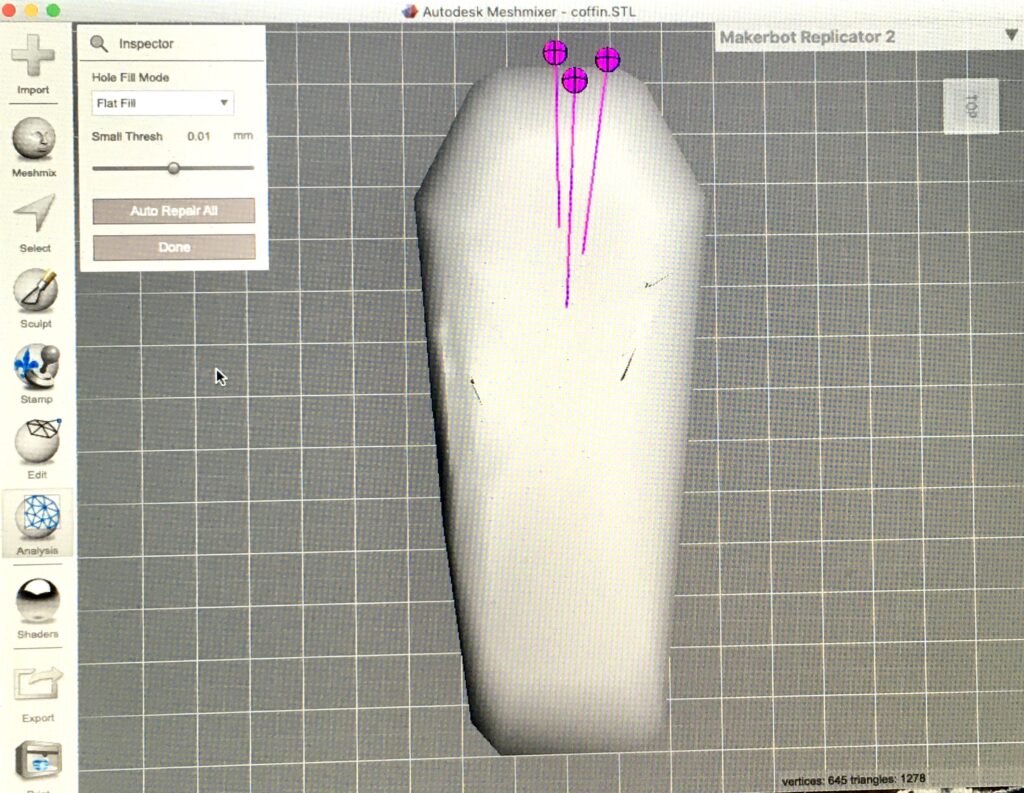
Once I had the cross removed, I used the Inspector button to see if there were any problems with the image. It indicated that I had rips that needed to be repaired. I also used a fill tool to make the whole shape solid and not hollow inside.
Using the Inspector button.
Everything was fine, and I saved it as a .mix file to be used in the next program.
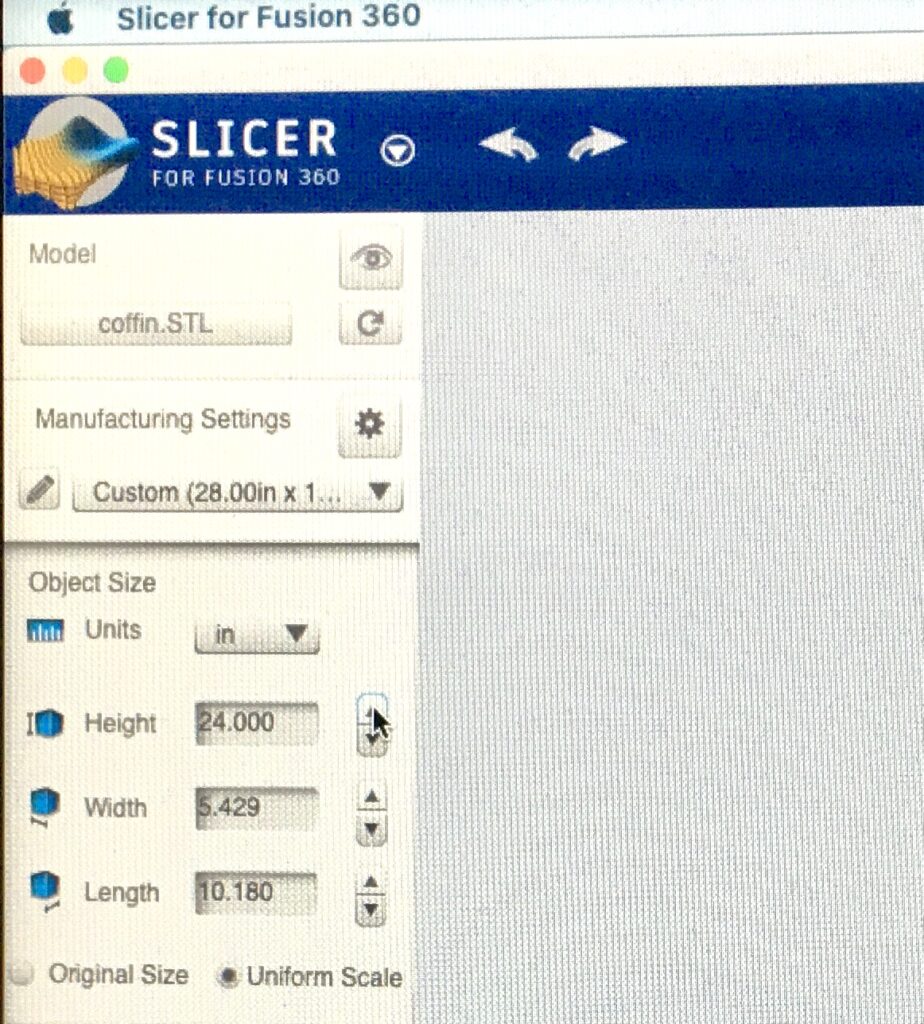
Second program to figure out: Slicer for Fusion
Entering custom paper size and object size.
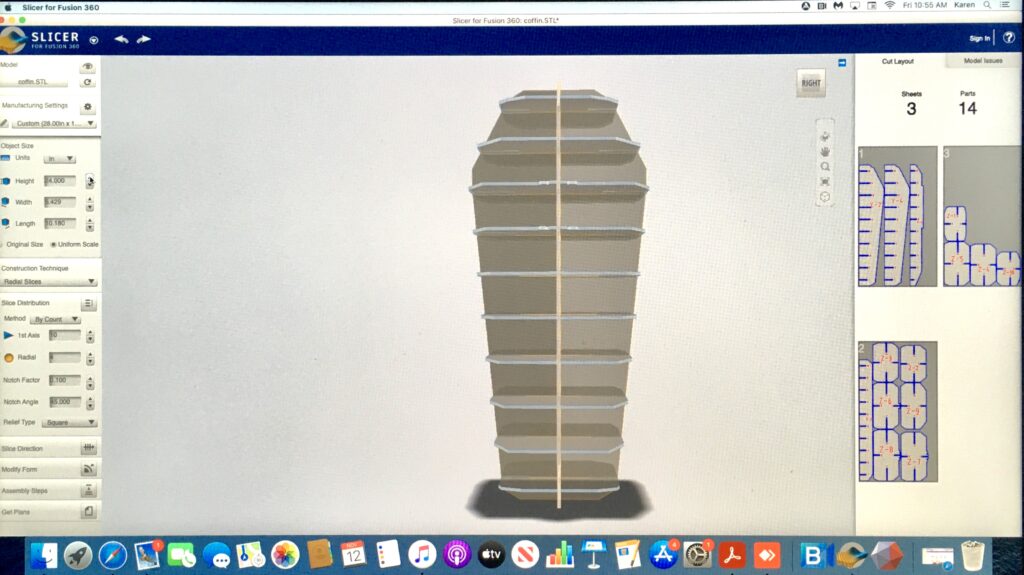
Slicer was a very easy program to use. I downloaded my coffin and ran it through the settings. It worked out the first time, and gave me 3 pages of pattern pieces. (I ended up making the whole thing a little larger that translated to 4 sheets of cardboard pattern pieces.)
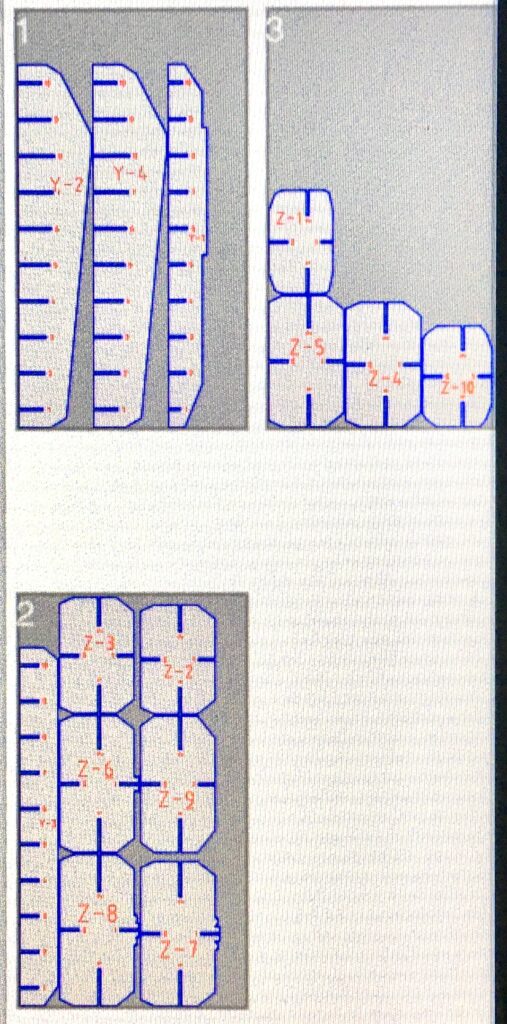
I like the way this divided up into shelf units within the coffin. It reminded me of the above ground graves I saw on my travels in South America.3 pattern pages.
I saved each pattern sheet to a PDF files. That is the format that the next program requires. I found Slicer to be a really easy program to use. Probably due to the basic nature of my shape.
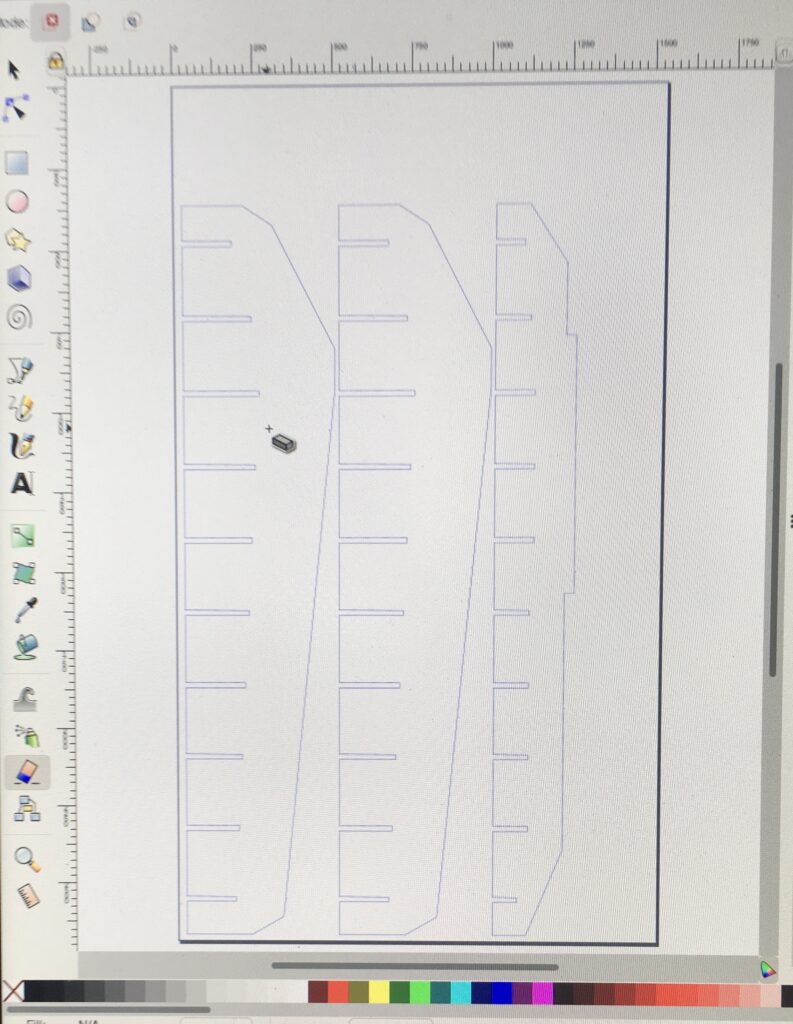
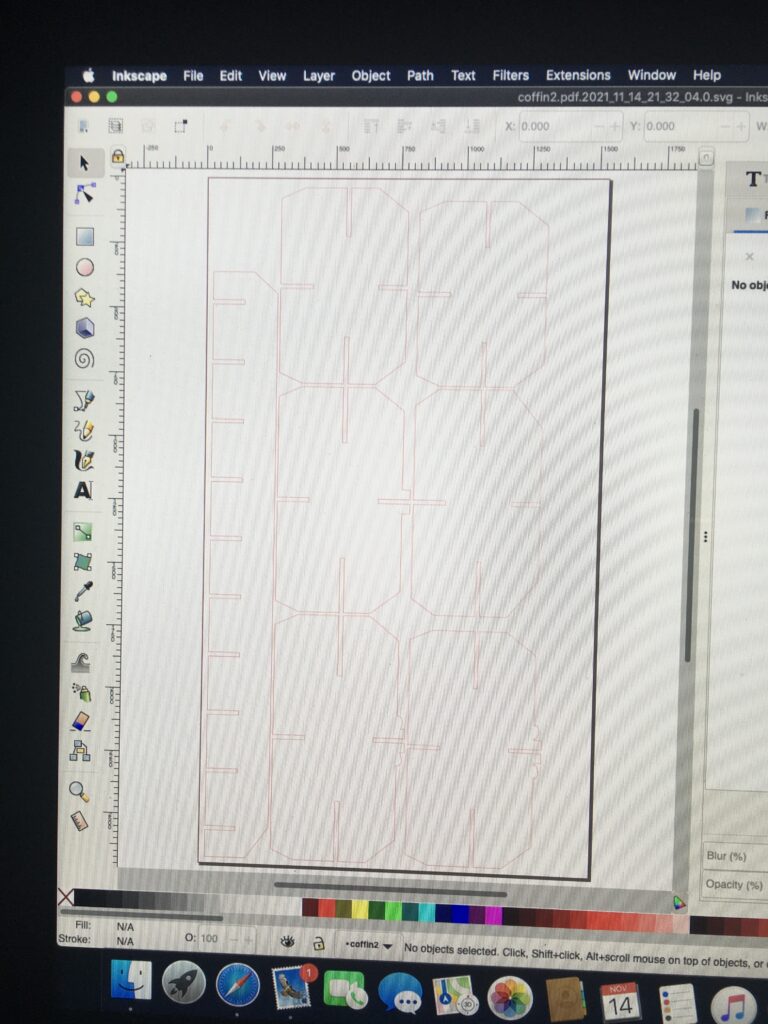
Erasure Tool
Using the erasure tool, I erased all the red numbers used for putting the model together. I also changed all the shape lines from blue to red as the laser cutter requires it to be that shade. I did this for each of the 3 pages and saved them as .svg files to be sent off to the computer.
page ready for sending to be cut.
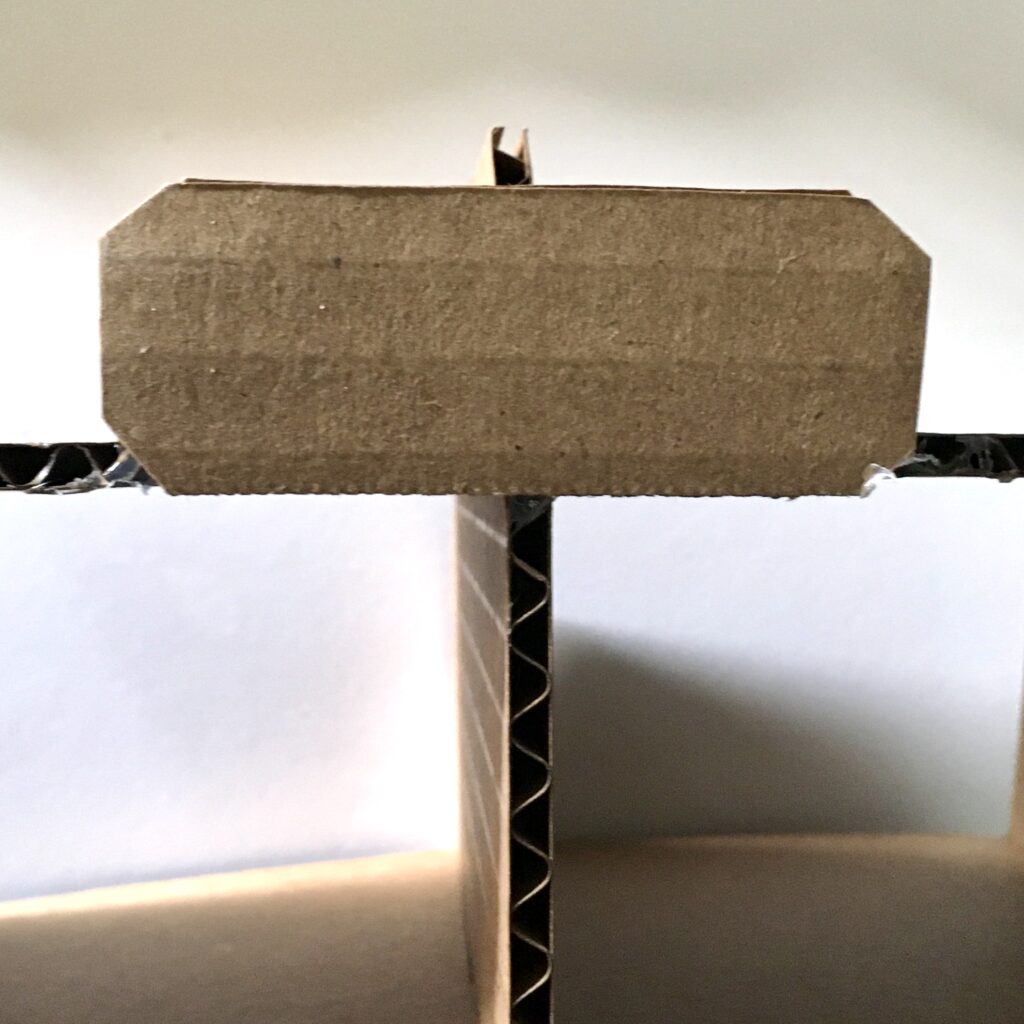
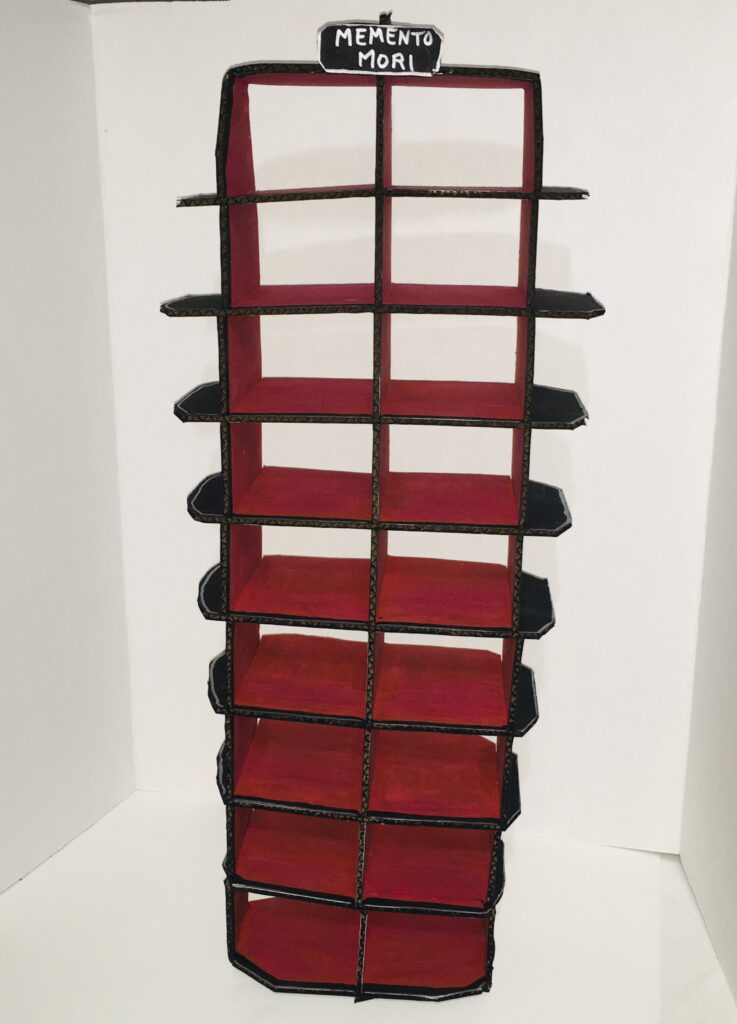
Four pages of lovely precut cardboard were created for me down at The Makers Space. I was so excited to punch out the pieces and assemble my coffin. After getting it all put together, I noticed a couple of areas that needed fixing.
A few minor adjustments needed.
Two different edges were about an inch short so I cut some more cardboard and hot glued them into place to extend the side walls. I also added two more pieces on the bottom to provide it with a base to stand on.
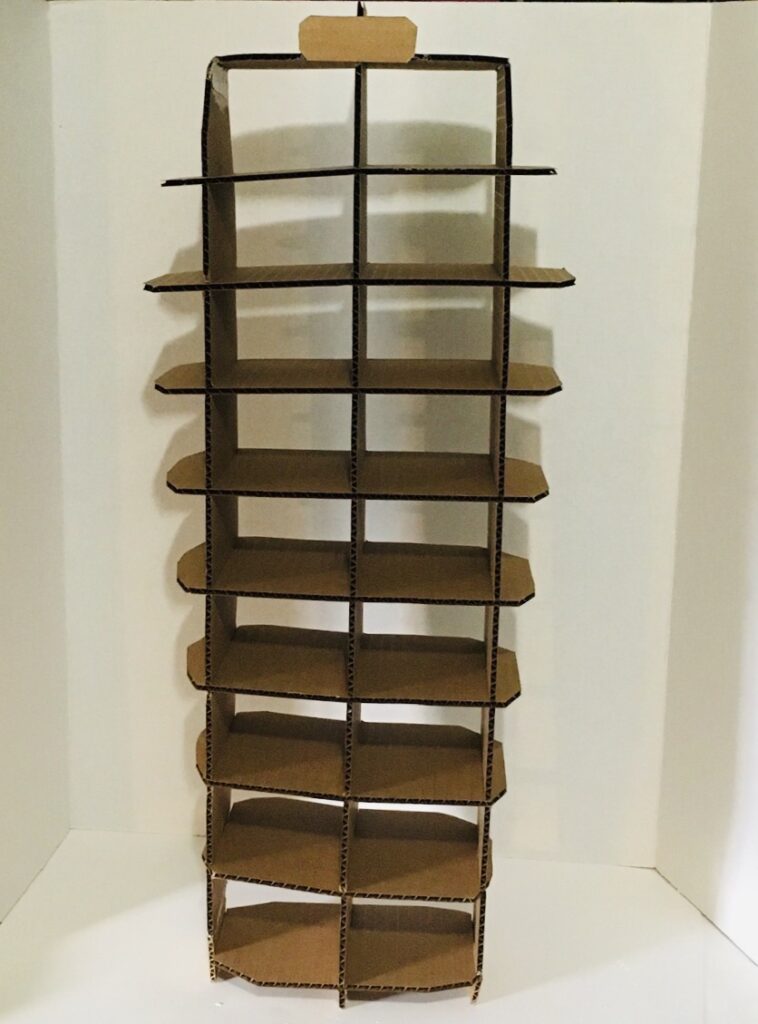
Little sign board on the top.
I created a little sign that I hot glued onto the top front. This coffin is ready to be painted!
Cardboard Coffin Tower.Still needs something more.
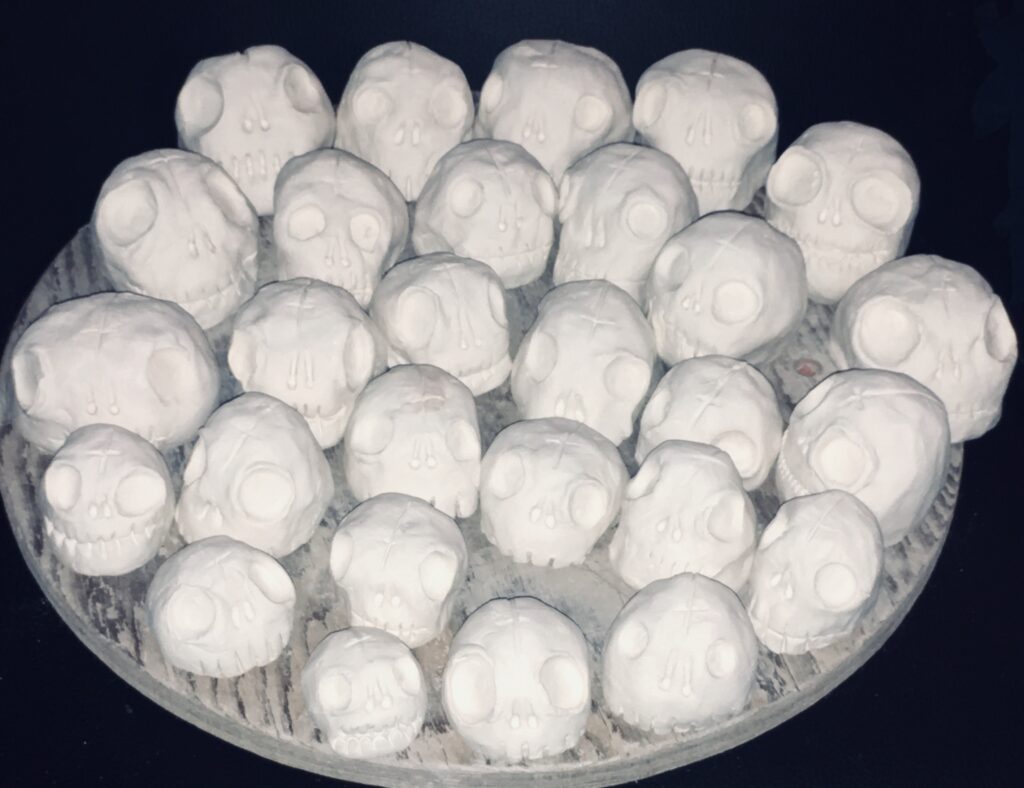
I was called in for hip surgery near the start of this unit. It also involved cutting a wood art piece in the studio as well. Since I was home recovering and had lots of clay, I asked my instructor if I could substitute making clay skulls to go into my coffin as a replacement for the wood piece as I am not able to go into the wood studio and use the machines. (I look forward to doing woodcutting in the next class!) These clay skulls were created October 31 and November 1st while the veil between the two worlds was thin. I called upon my ancestors and honor the ones before me. After they were dry, I sent my friends off to the college to be fired in the kiln.
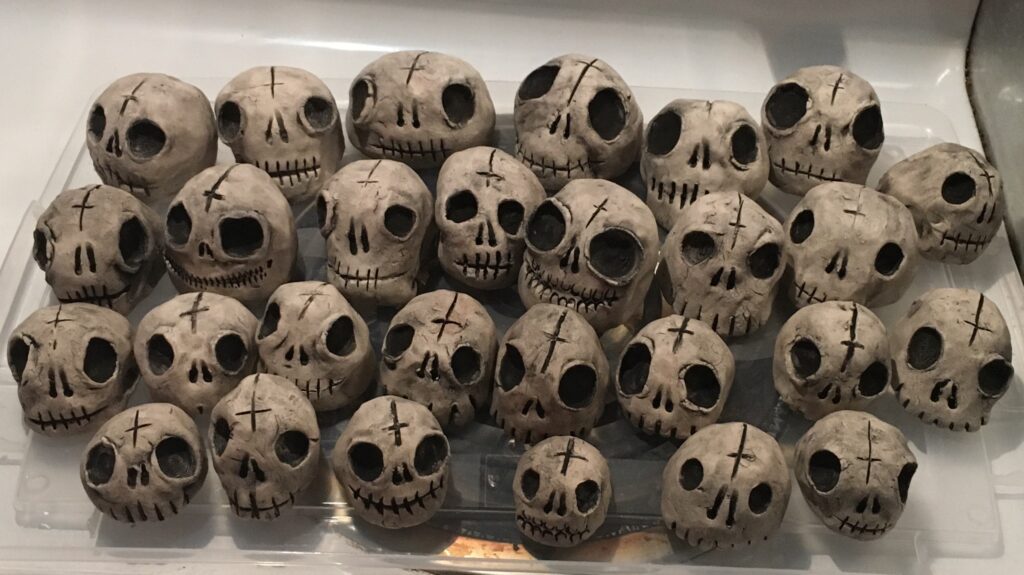
Clay skulls out of the Bisque Kiln.Skulls with a black iron oxide stain waiting to go back into the kiln.
I ended up not putting the skulls back into the kiln. I heated them up in my oven and rubbed a wax coating into the clay surface.
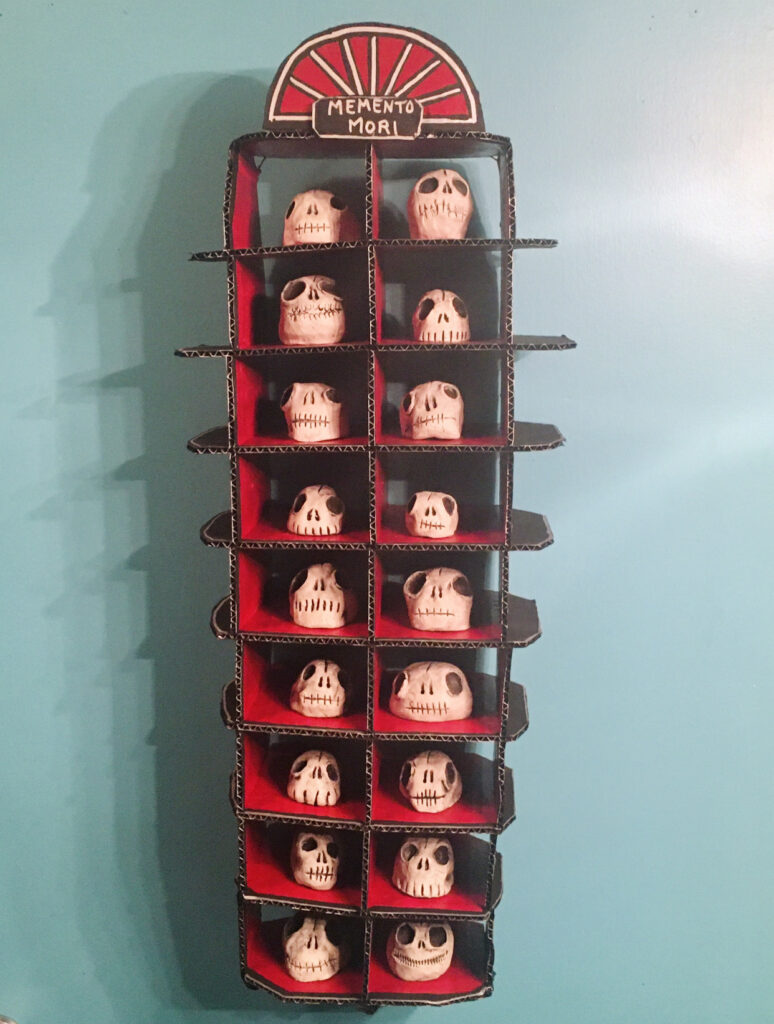
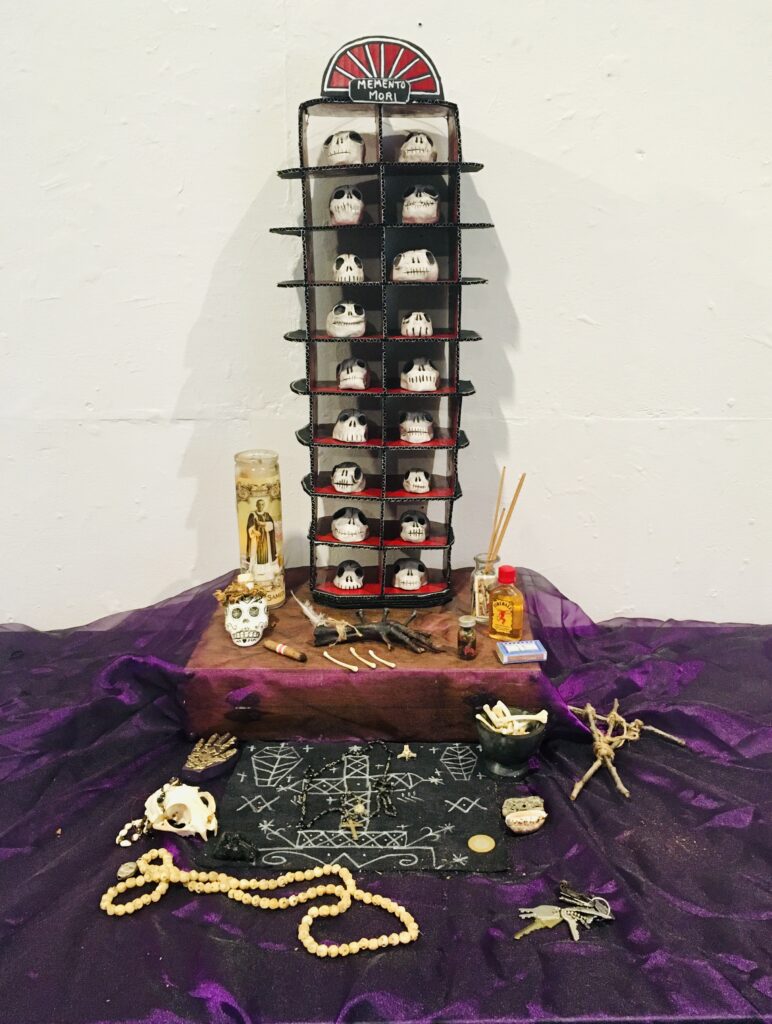
Now it is time to assemble my Momento Mori in honor of my ancestors. I very much enjoyed this unit in spite of the frustration with the programs and the glitches. I look forward to creating more 3D art in the future.
The 18 skulls that made the final selection for the piece.Baron Samedi alter Instillation at the college I set up for critique day. This is me, this is Karen Day.Saw this course and got excited!
I think it would be really interesting to do portraits in layers of people I know. Reminds me of Michael Murphy who is in my artist research. So many 3D ideas in the future!
I am excited to see how two similar objects can be so different.
This project required us to draw a pattern with certain dimensions and use it to make 2 wire bags out of steel mesh.
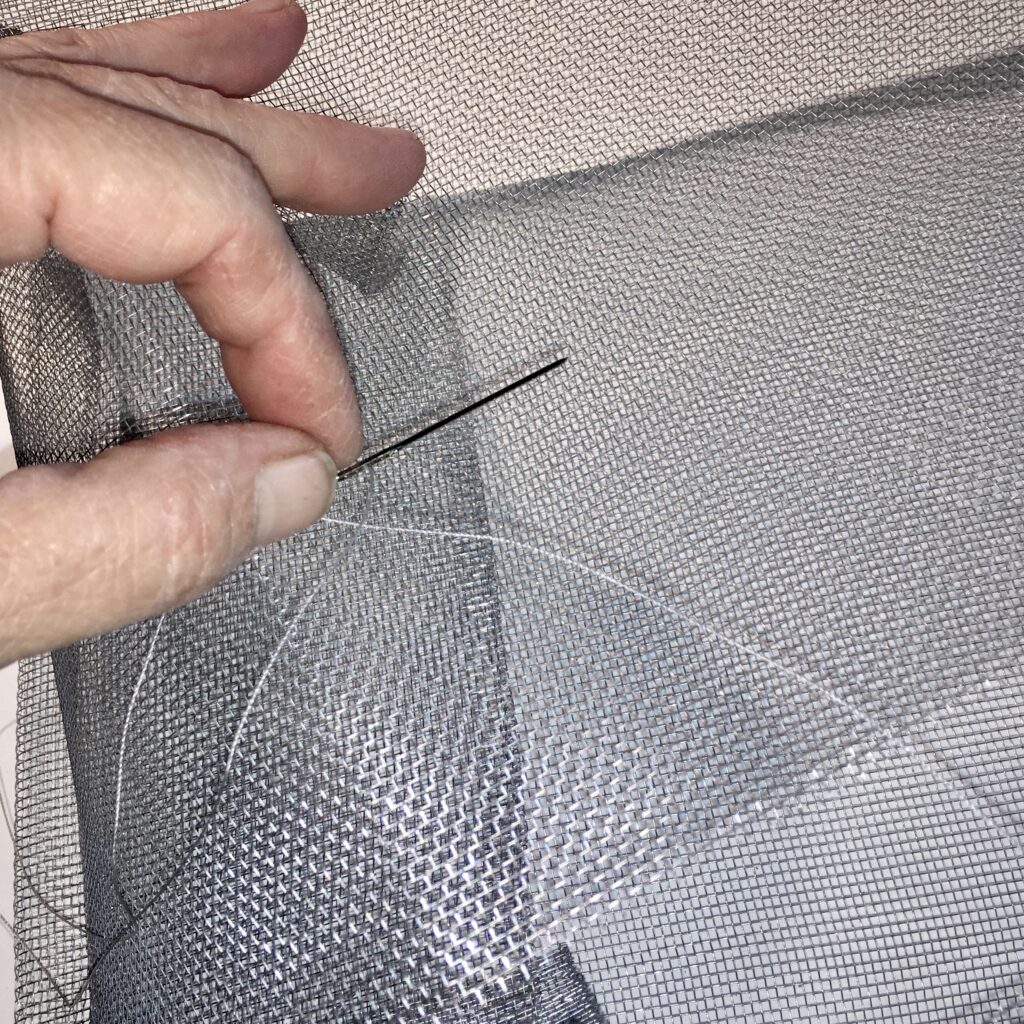
Blunt needle and upholstery thread
I cut the wire mesh out and pinned it just as if it was fabric. The sewing was very easy for me as I have worked with textiles for many years. I loved the way the mesh conformed and held itself rigid. I wanted to immediately make a frock coat!
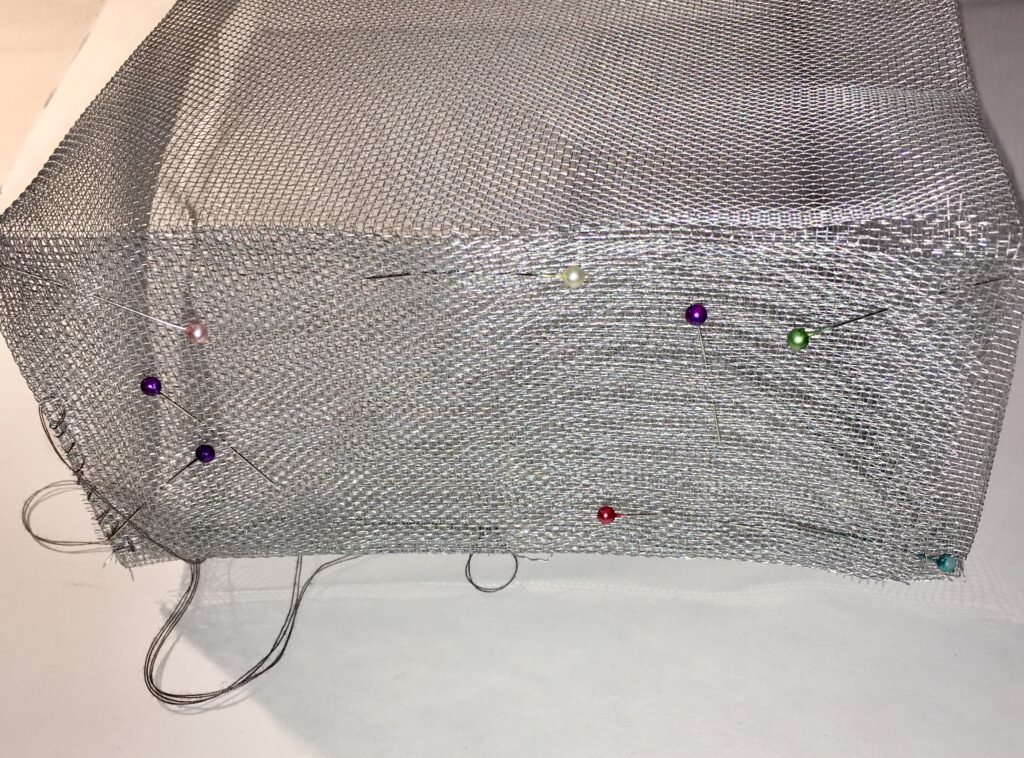
I found that just like fabric, if I pinned the corners and some key areas the sewing just zipped along.
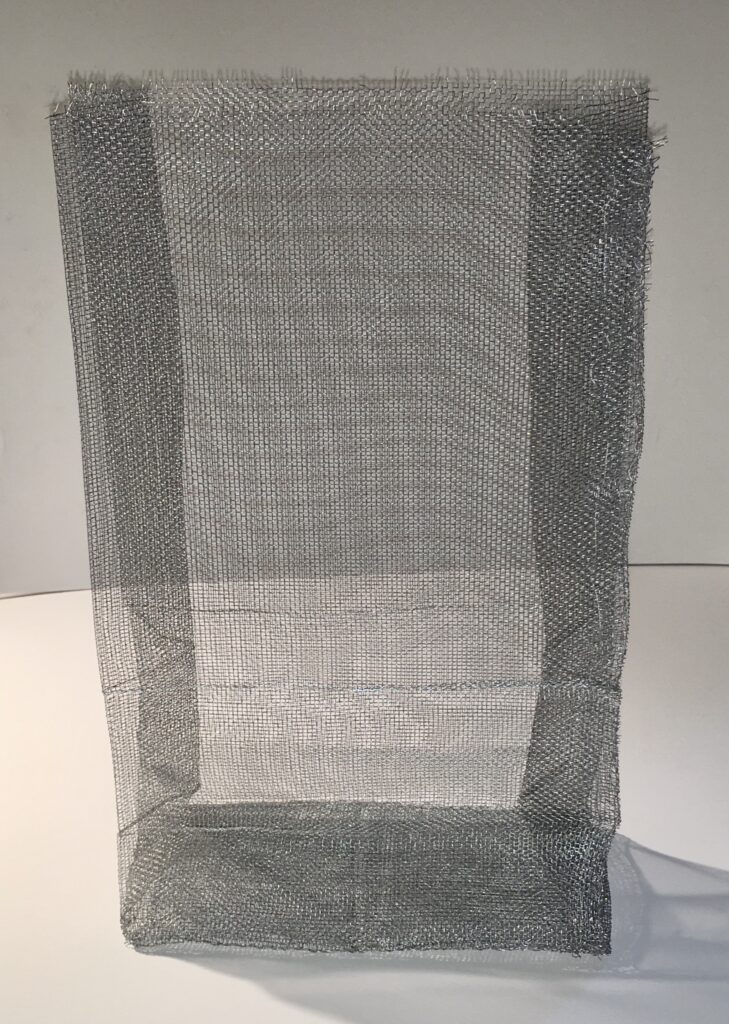
Wire mesh bag
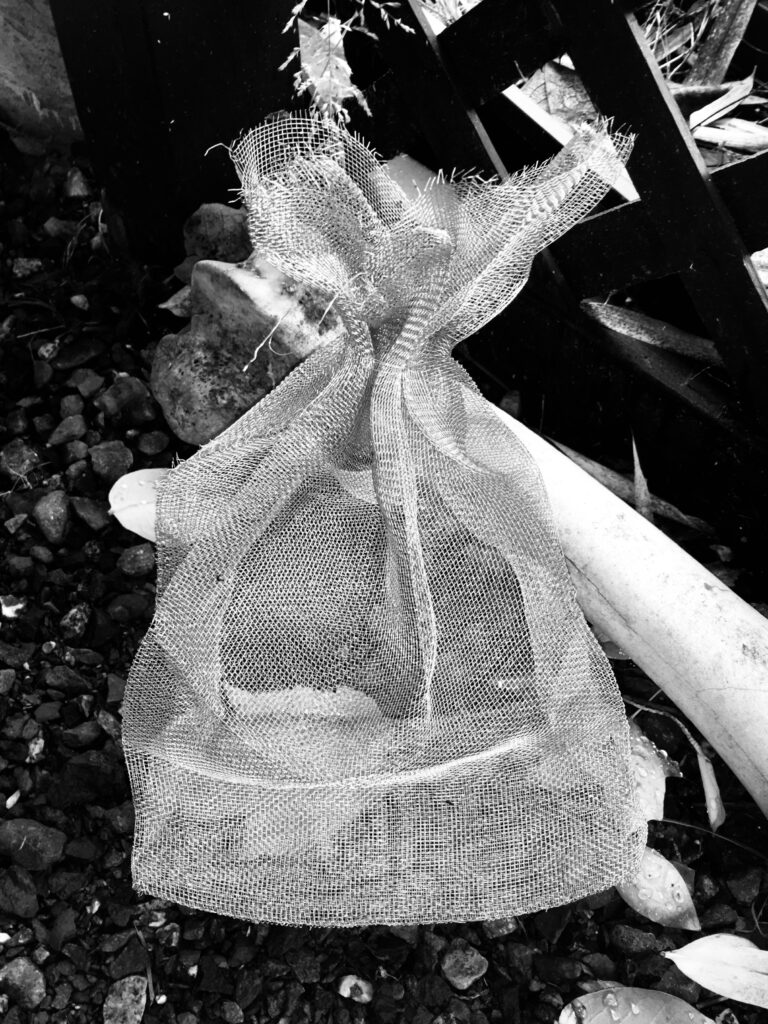
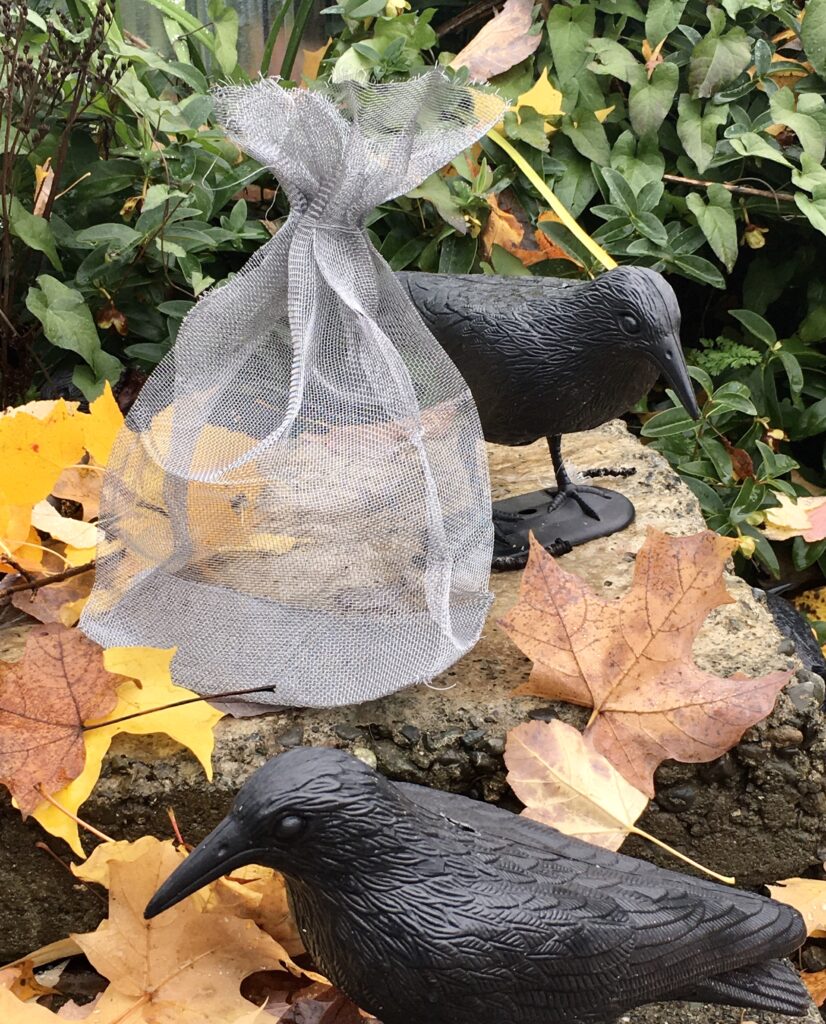
End product produced two nice clean lined wire mesh bags. I took one of the bags and had fun squishing it and looking at the different forms. I decided to make the wire mesh bag into a closed bag. Wire was wrapped around the pinched in neck. I liked the idea of a closed bag being see through. Like when you go through security at the airport and they x ray your bag and can see everything inside. Paper bags are not usually transparent.
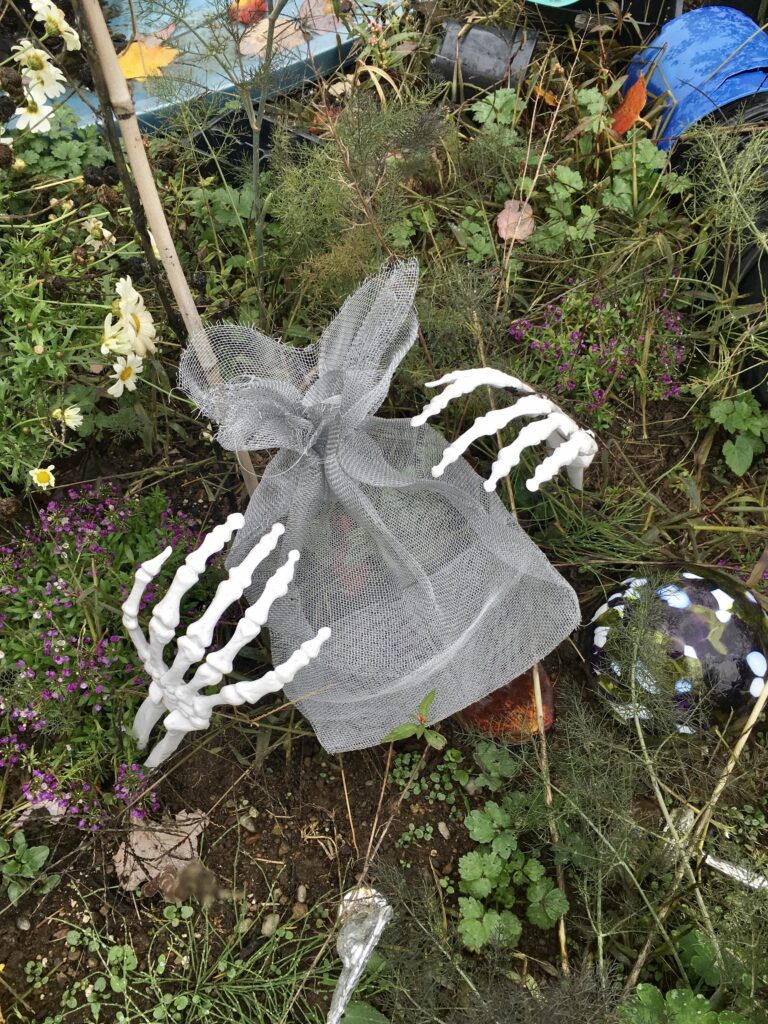
I then took the bag outside and had fun taking some photos of it around the yard.
Bag and bone.Bag Envy. I think she wanted to fight me for it!Bagging Up the End of Summer.Picnic lunch.Grave goods. Trick or Treat?Attempted Murder Bag.
Part 2
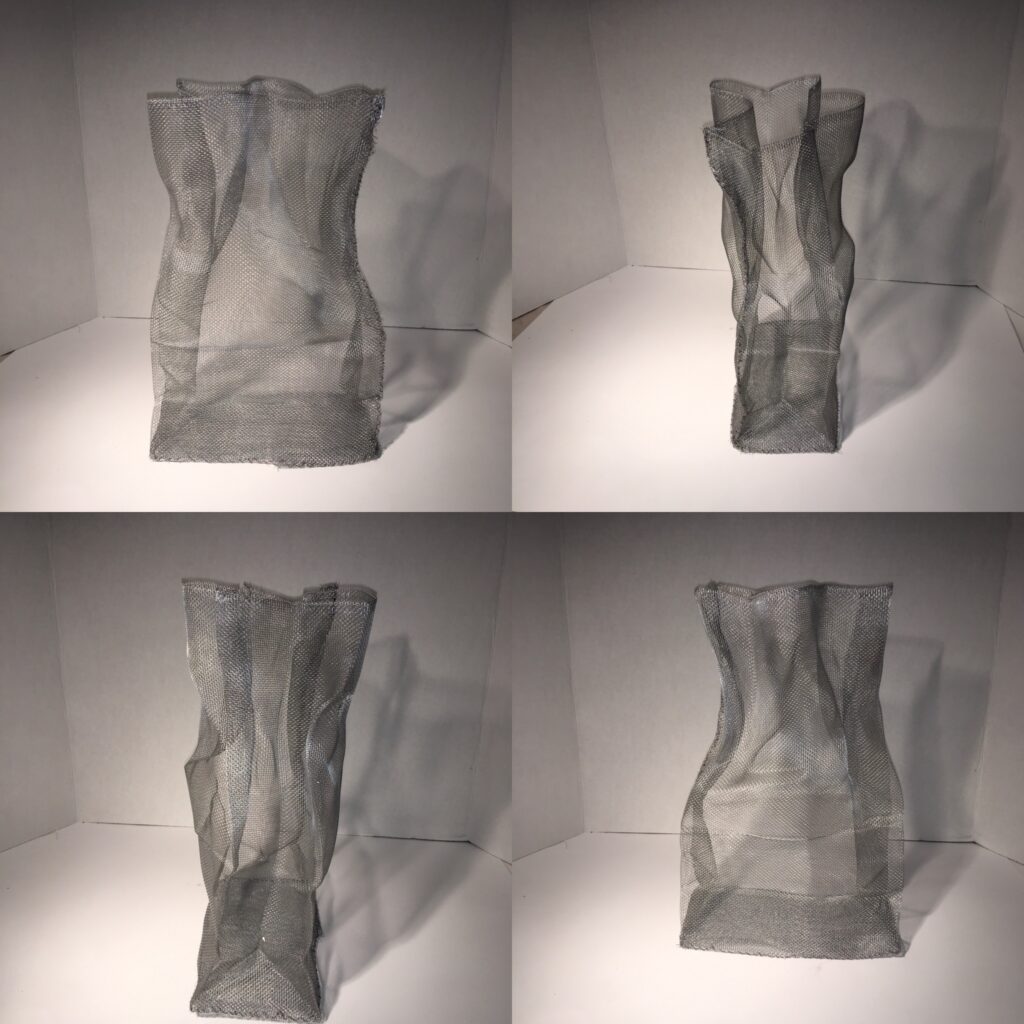
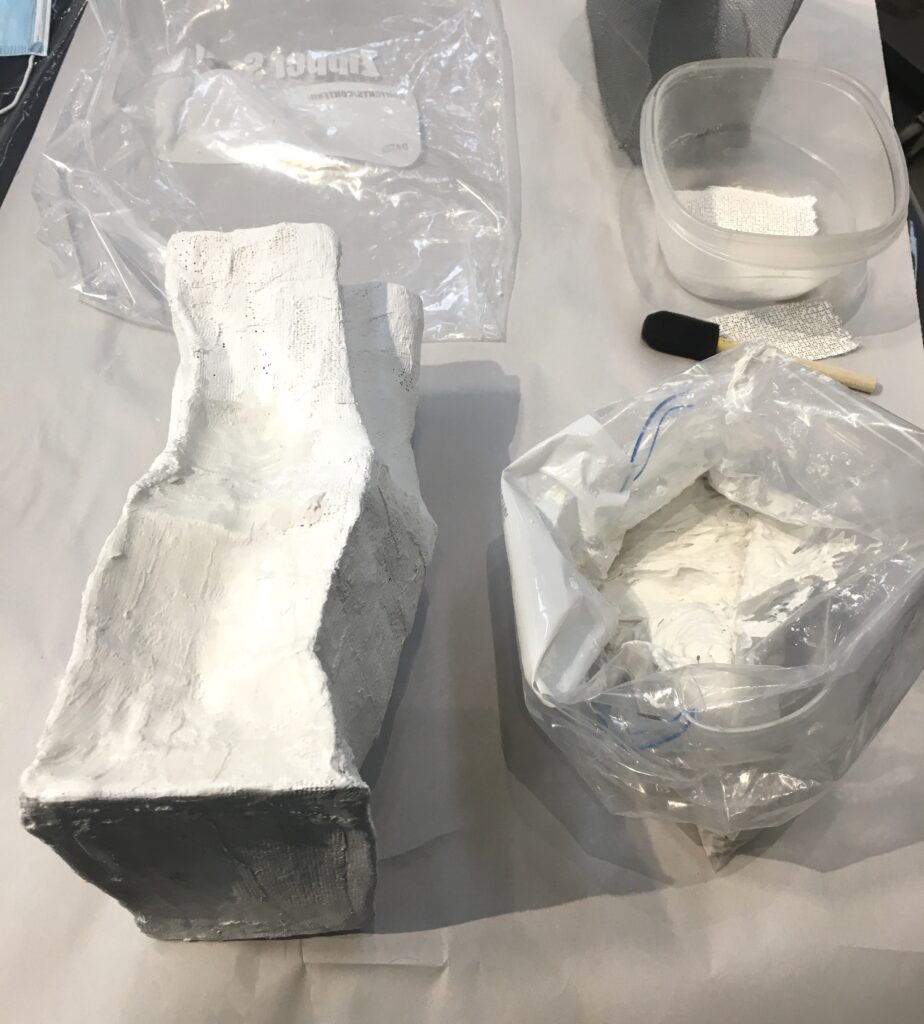
Time to move onto the second part of this production. The second wire bag will now metamorph into a solid plaster bag that will be open at the top. I shaped it into a position with a wide enough neck to get my hand inside for future applications..
The second bag I formed into a shape that I liked.
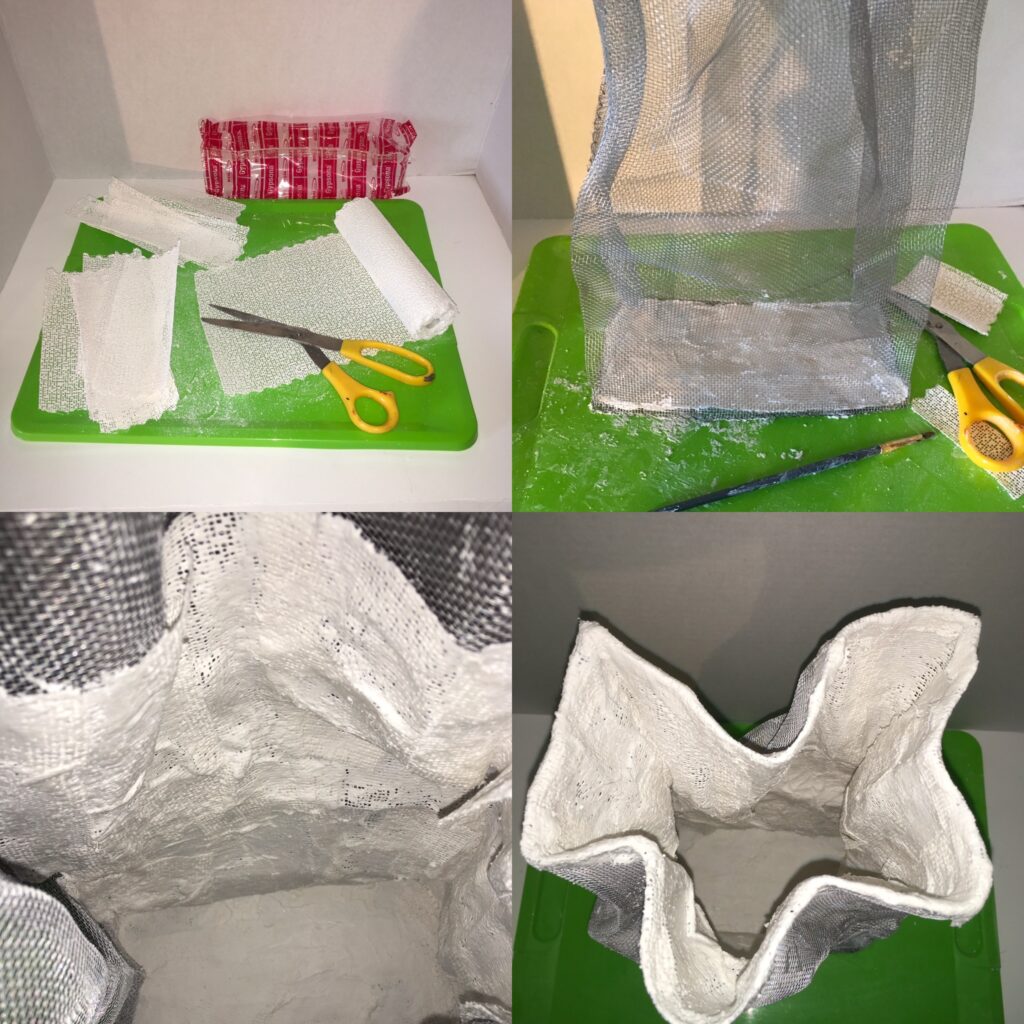
The Gypsom plaster bandages were cut into squares and strips. These were immersed one by one into water and smoothed onto the mesh form. Starting on the inside, I worked from the bottom up. I covered the first 1/3 inside the bag and then set it to dry. I found if you went to fast, things would get top heavy and slump down. This resulted in a strong stable base while working upwards. Next I plastered the inner middle third and let that dry. The top 1/3 I wrapped the plaster fabric up to the rim. After the inside was completed and dry, I repeated the same process on the outside of the bag, starting at the bottom and working towards the top of the bag. As the form was now hard, I didn’t have to wait for parts of it to dry before I put the next part down. I laid the bag on its side and did the outside in record time. A sponge brush helped in some areas for applying it into the folds. I wrapped the plaster fabric over the rim and down inside to give it a finished edge.
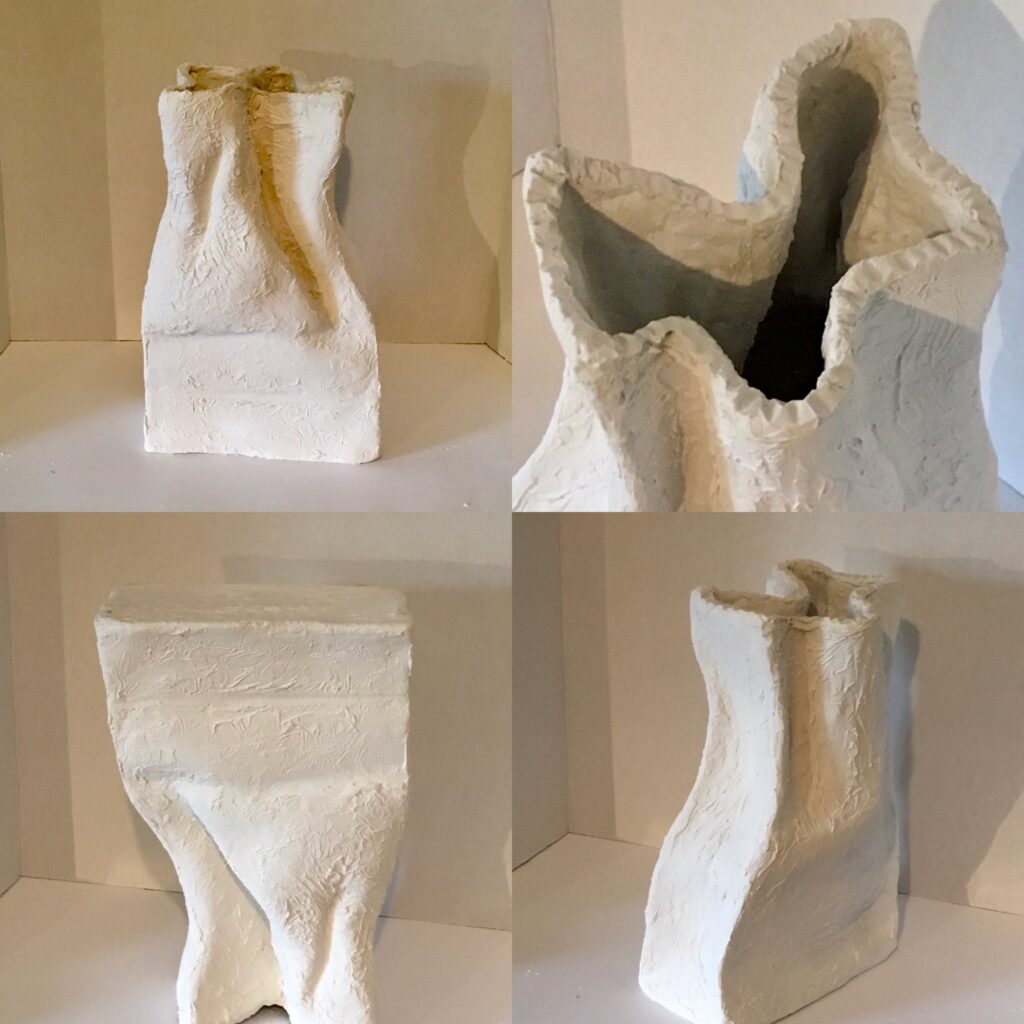
Finished plaster wrapped bag ready for surface treatment.Dry wall compound application.
Using rubber gloves, a thin layer of drywall compound was applied to the outside and inside of the bag. I used a fine sanding sponge in-between layers to remove the uneven spots. If one sanded too vigorously the metal shows and that is not a good thing. In some areas the drywall compound cracked due to instability. I took PVA glue and mixed it with Hydrostone and poured that into the inside of my bag to give it a more internal structure.
Sanding with the wet sponge.
*Trigger Warning* Childhood Trauma
This process of adding and subtracting became a full time job for me. I became Hyper Obsessive sanding down every little imperfection. Hours and hours spent worrying about the smallest flaws. My father was a carpenter and I have done many hours of drywall and painting in my life. Unfortunately, my father was also an abusive alcoholic. All those hours are not happy memories. I could hear my dad yelling at me in my head. Criticizing my actions, my work, my life. This bag was becoming a bag of Childhood Trauma. It wasn’t good, and it was OPEN.
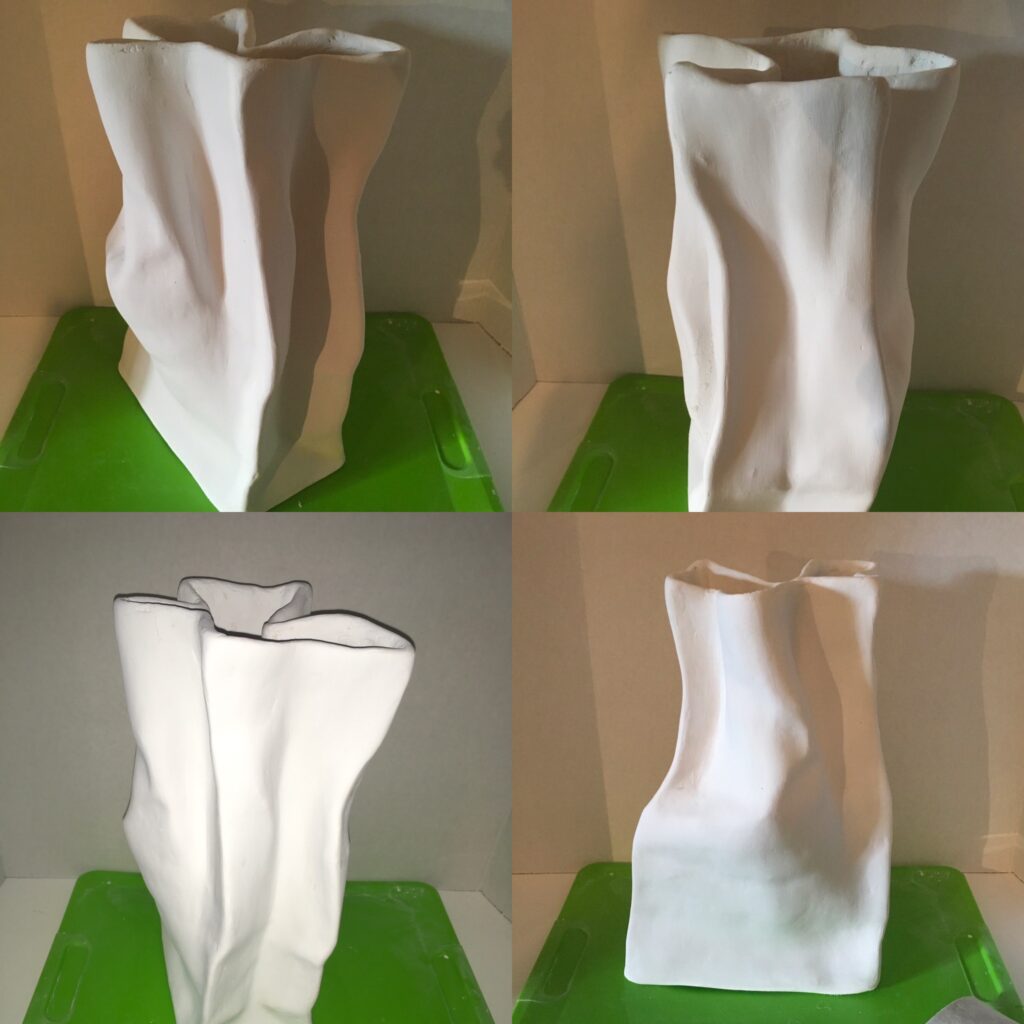
The many views of childhood trauma
My brain kicked into Fight or Flight mode and I checked out. I just left it. I couldn’t do it anymore. This plaster bag sculpture was so full of negativity. I had to step away and regroup my thoughts before this heavy plaster object became a flying missile out my second floor studio window!
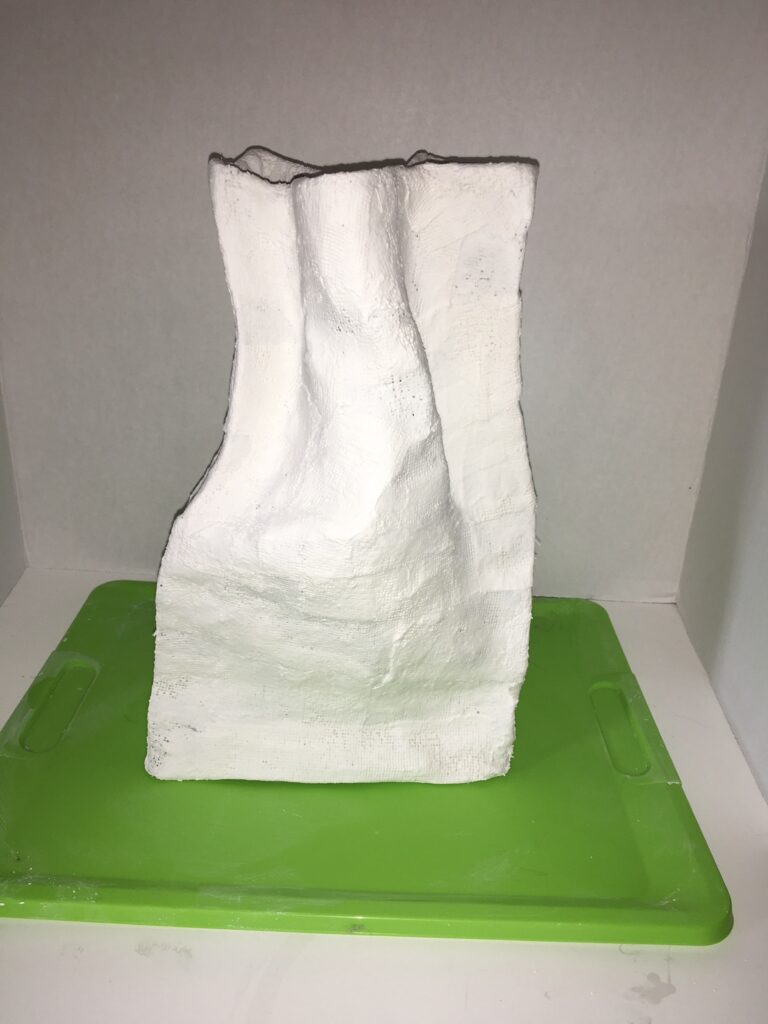
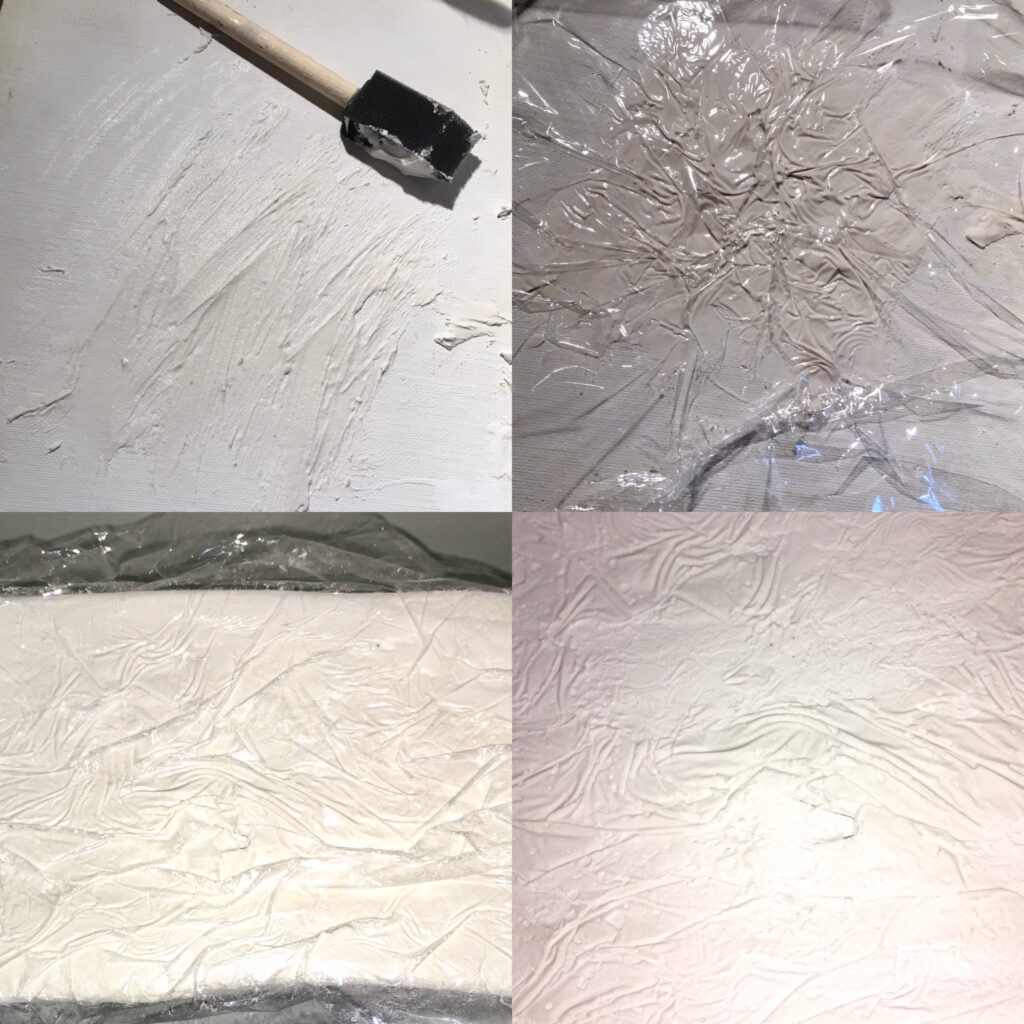
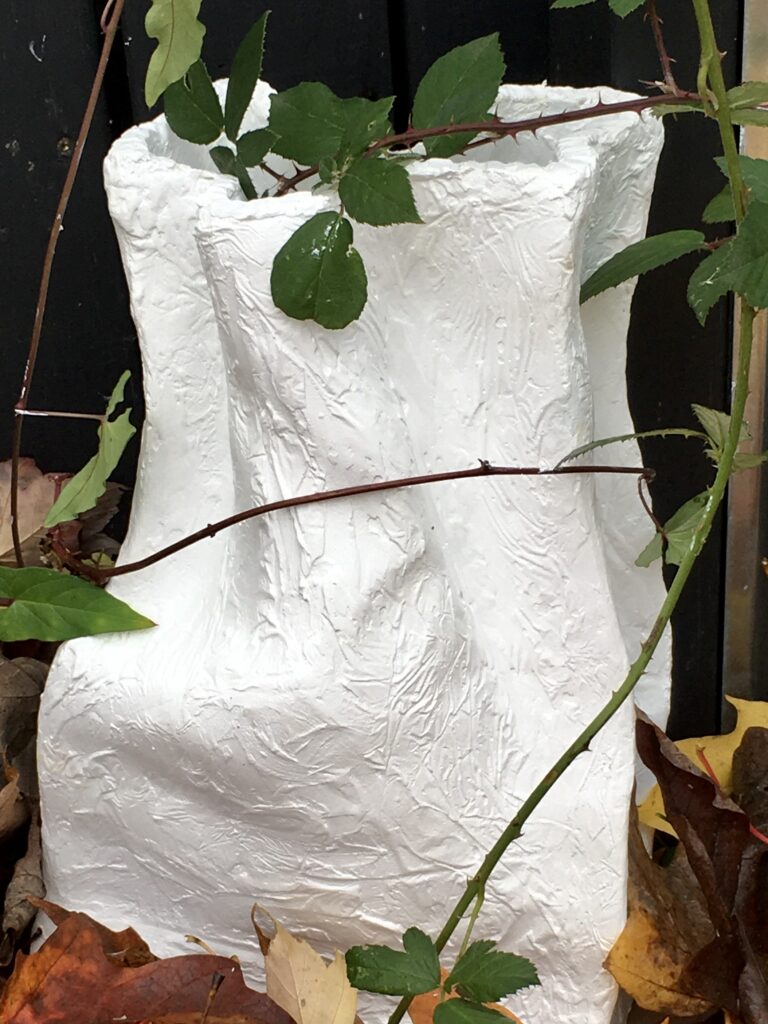
I needed to shake that all off and get this unit done. I do remember that in grade 5, I took huge pride in re using the same lunch bag as many times as I could. I would usualy make it last a month, sometimes longer. My mom would finally throw it out after it started tearing and/or getting holes. The bag would end up looking like fine wrinkled leather. To achieve the texture I wanted, I put down a heavy coat of drywall compound. I then put a piece of plastic wrap over the top. Using my fingers I squished it into a wrinkly pattern. Then it had to dry for a bit so the pattern will set. If you remove the plastic too soon, it looks like a bad textured ceiling in a 1970’s rental unit.
creating wrinkle textures
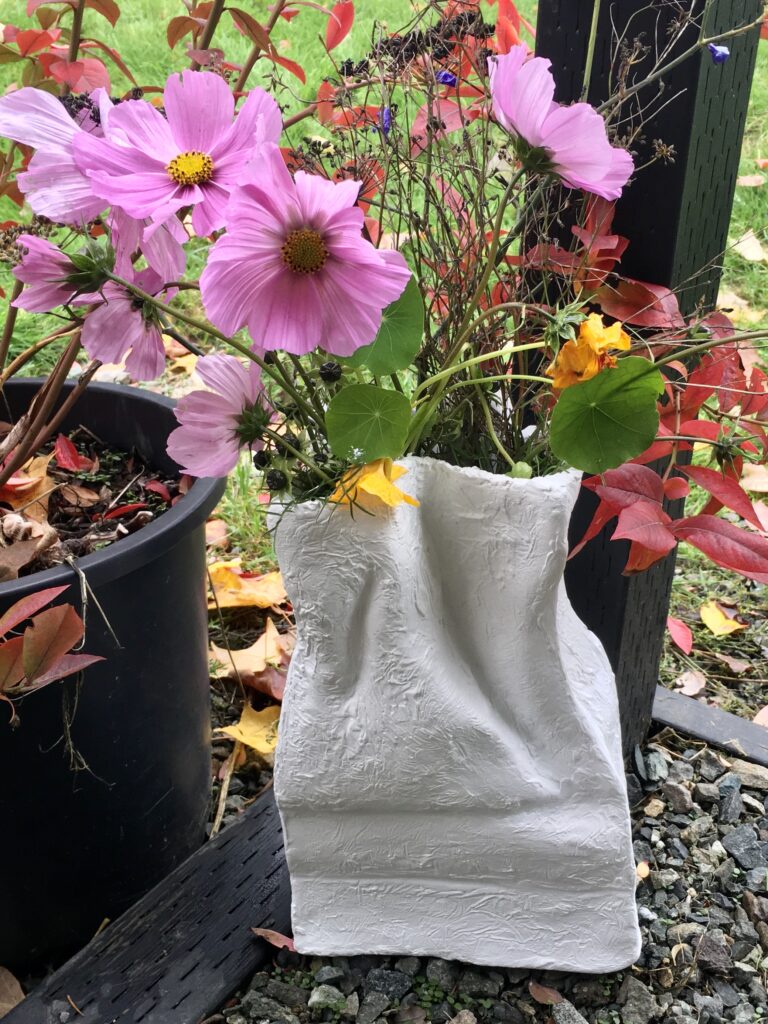
once the bag was dry, a coat of Primer was painted on. Over that went a layer of white acrylic paint. This bag is so begging for a wash of color too emphasize the texture, but that will come at a later date as we must keep it white.
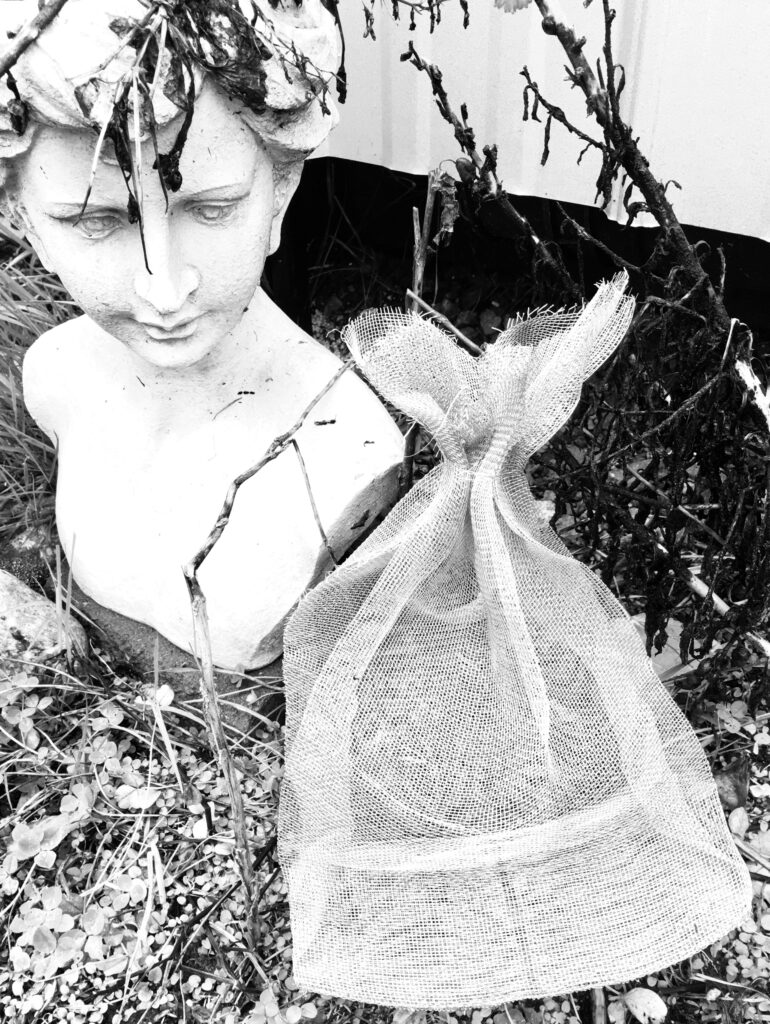
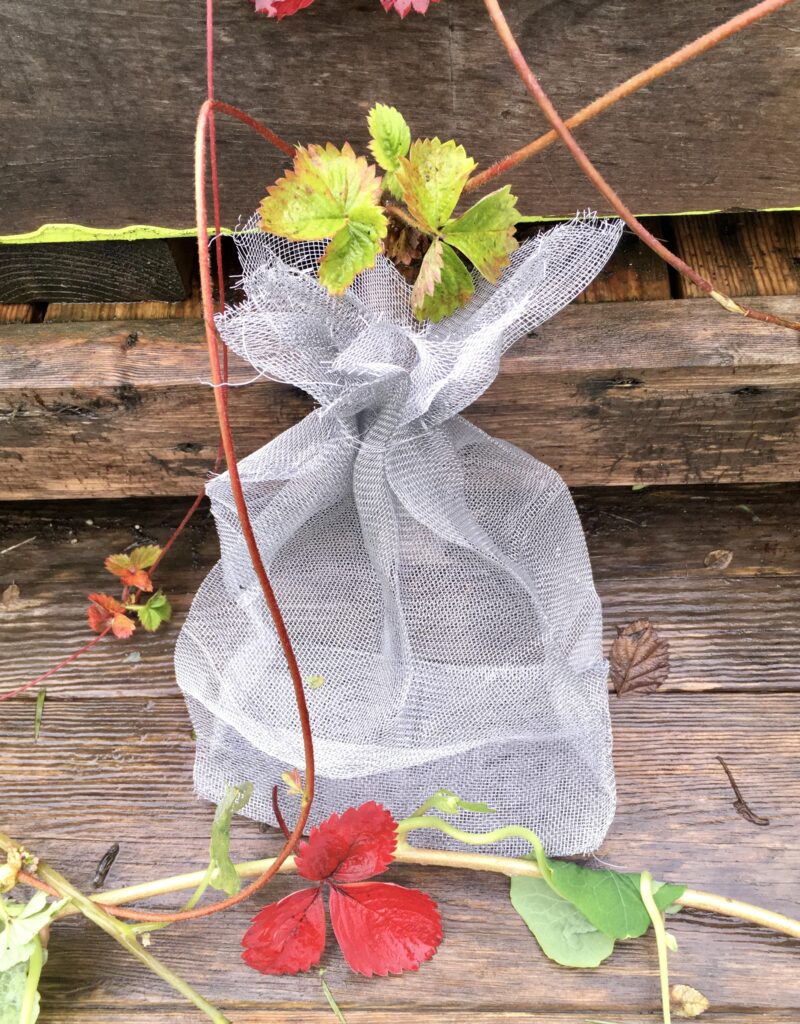
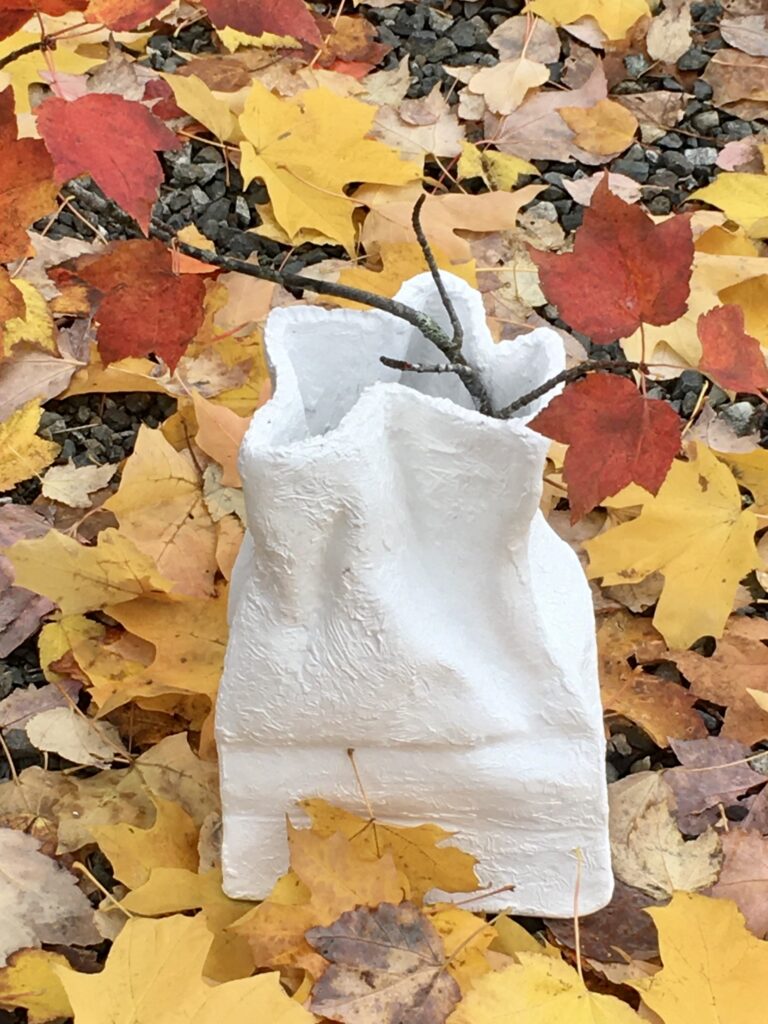
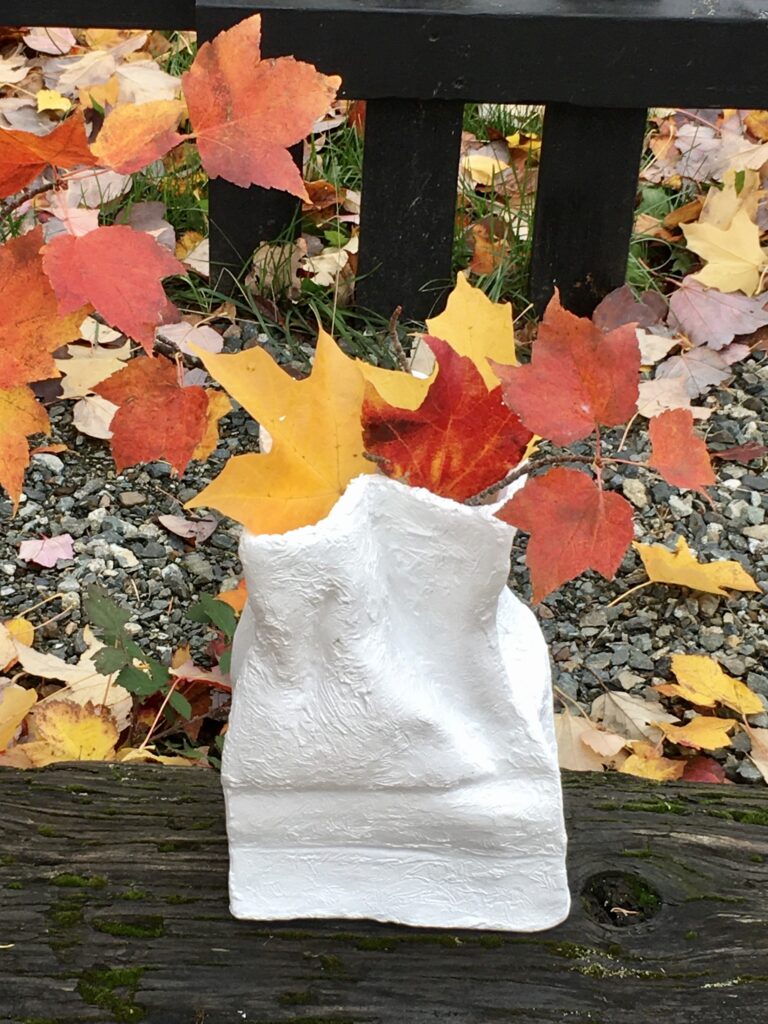
The rain has stopped so I will get the finished sculpture outside for some photos.
Flower bagColors of FallBag of leavesReclamation Bag lunch
Part 3
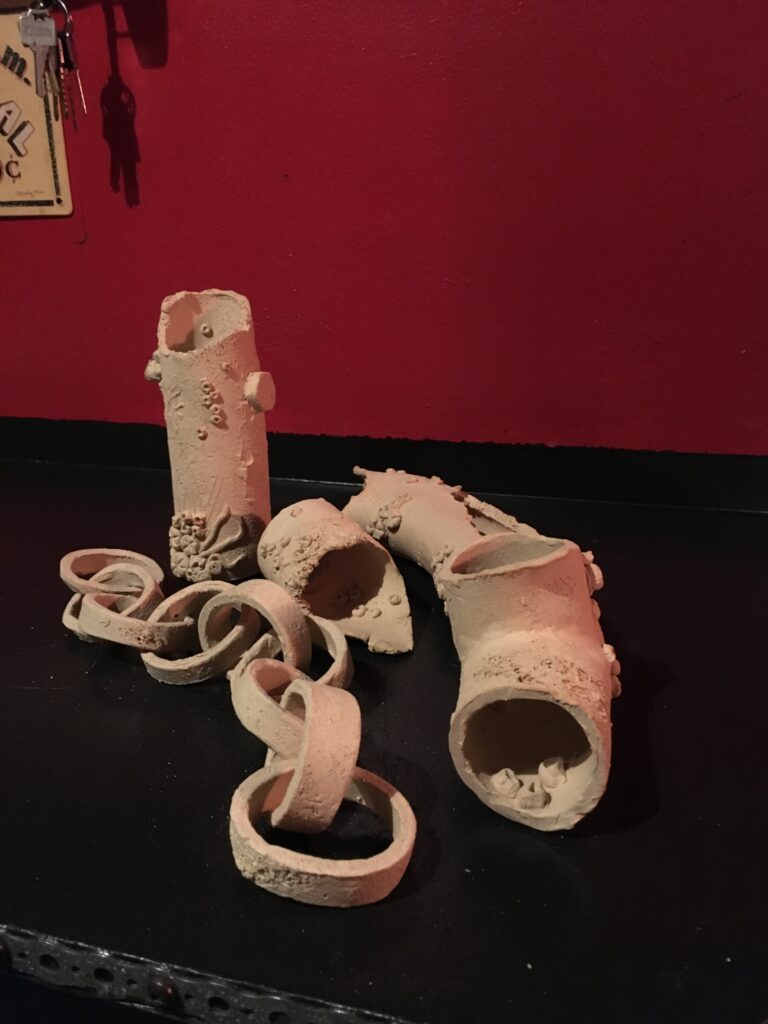
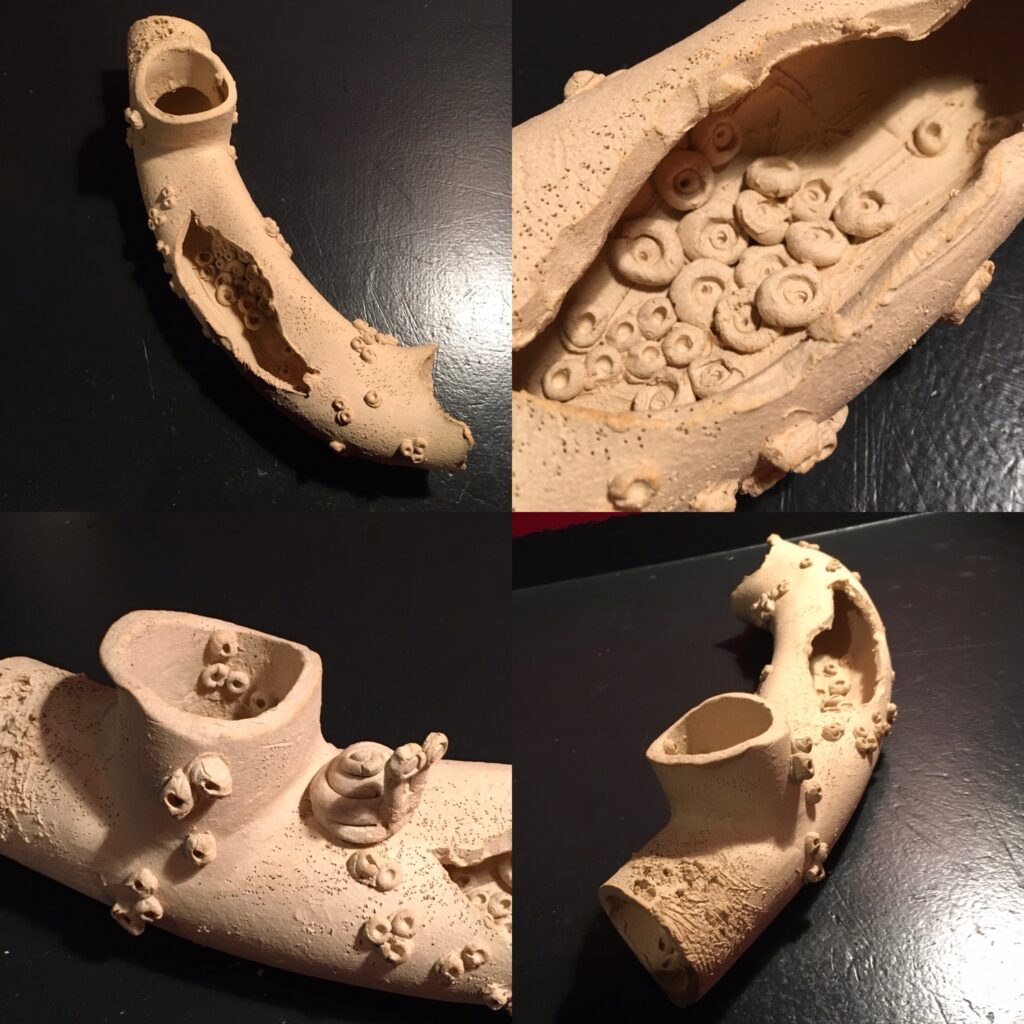
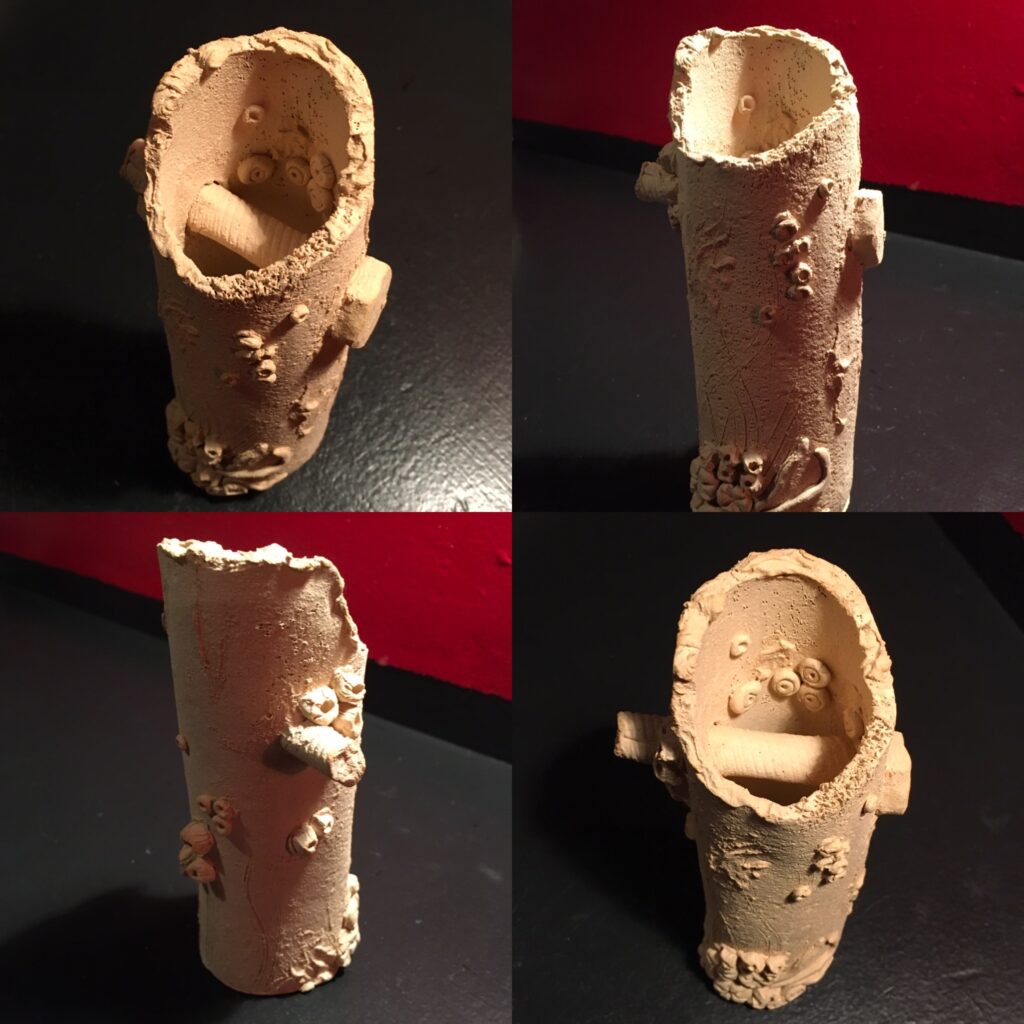
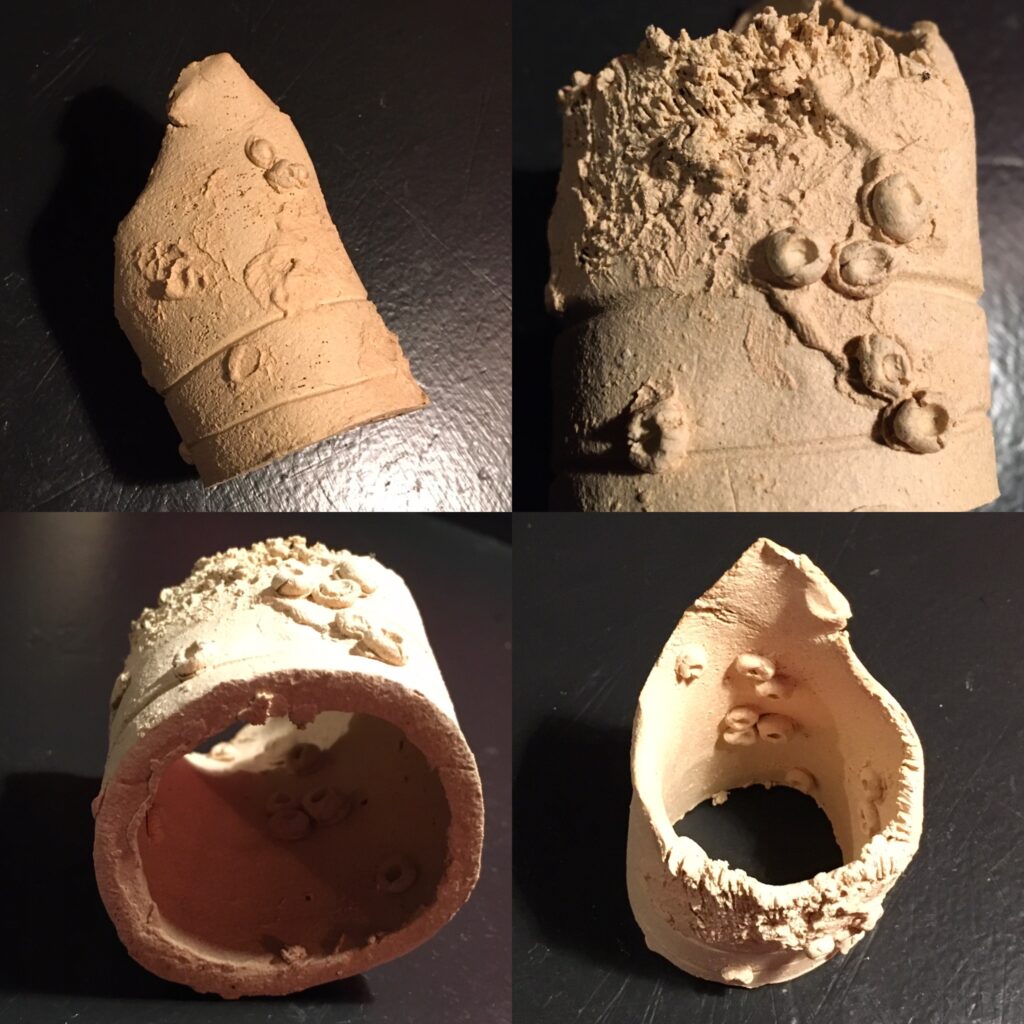
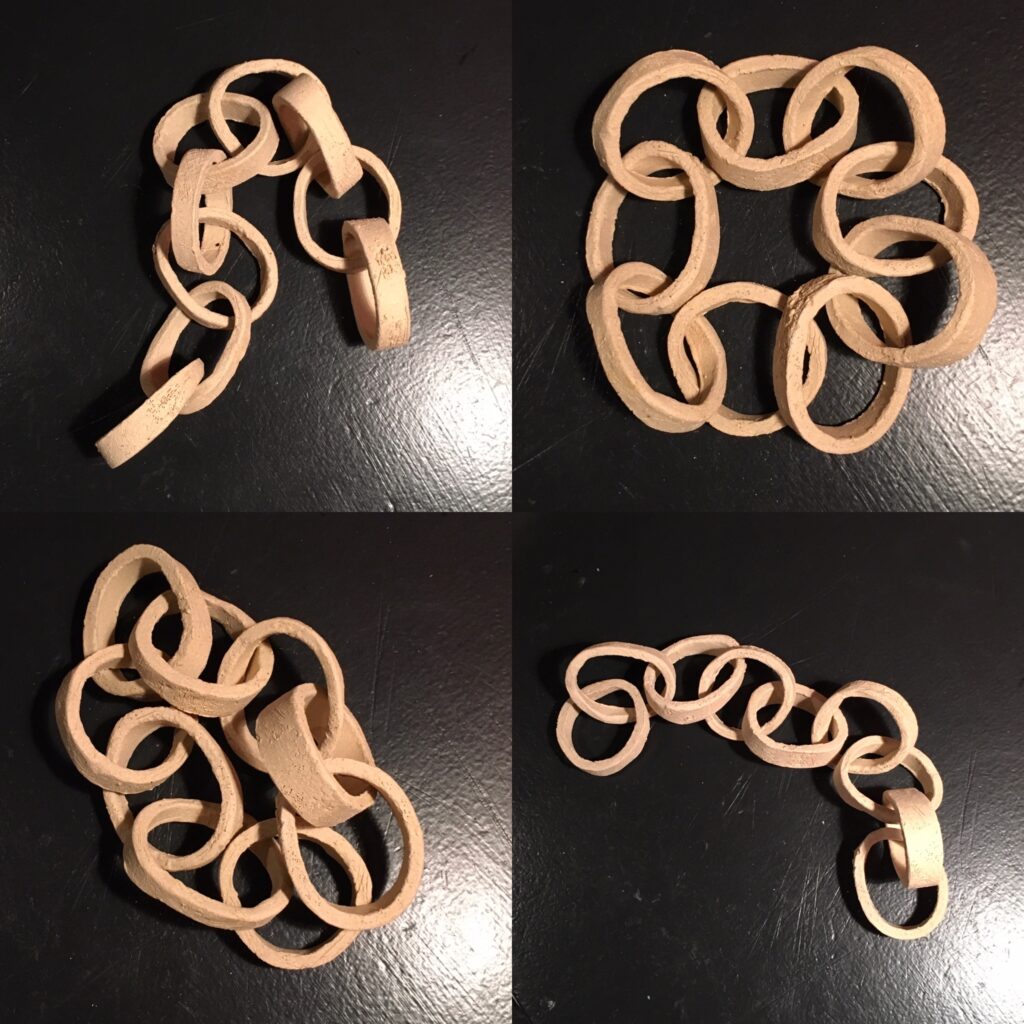
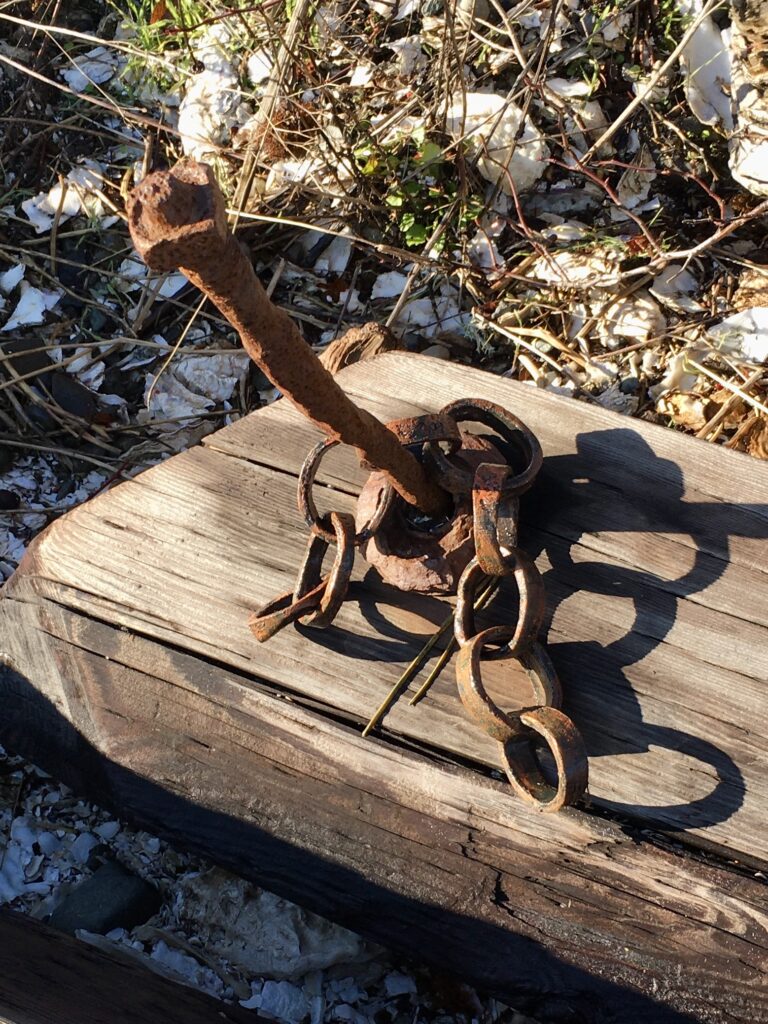
This part involved taking clay and extruding it into square and round pipe shapes. we then deconstructed and reconstructed it into new shapes. when I saw the round pipes of clay sitting on the desk, my mind immediately thought of rusty pipes on the beach. My construction became a literal translation. One of my favorite things to do is to go beach combing and see what treasures the tide has revealed. I made three rusty pipes, and a chain. They are full of corrosion and marine life. After being fired in the kiln, we were then tasked to paint color onto the pieces. I used acrylic paints to give a faux rust finish to the clay. I titled the end piece ‘Tiny Homes’ as everything gets used by the ocean dwellers. iI very much enjoy working with clay. I love manipulating it into shapes. I find clay to be forgiving. you can add and subtract until you get it where you want it to be.
Four pieces of clay for my Tiny Homes installation.Pipe 1Pipe 2Pipe 3Chain.
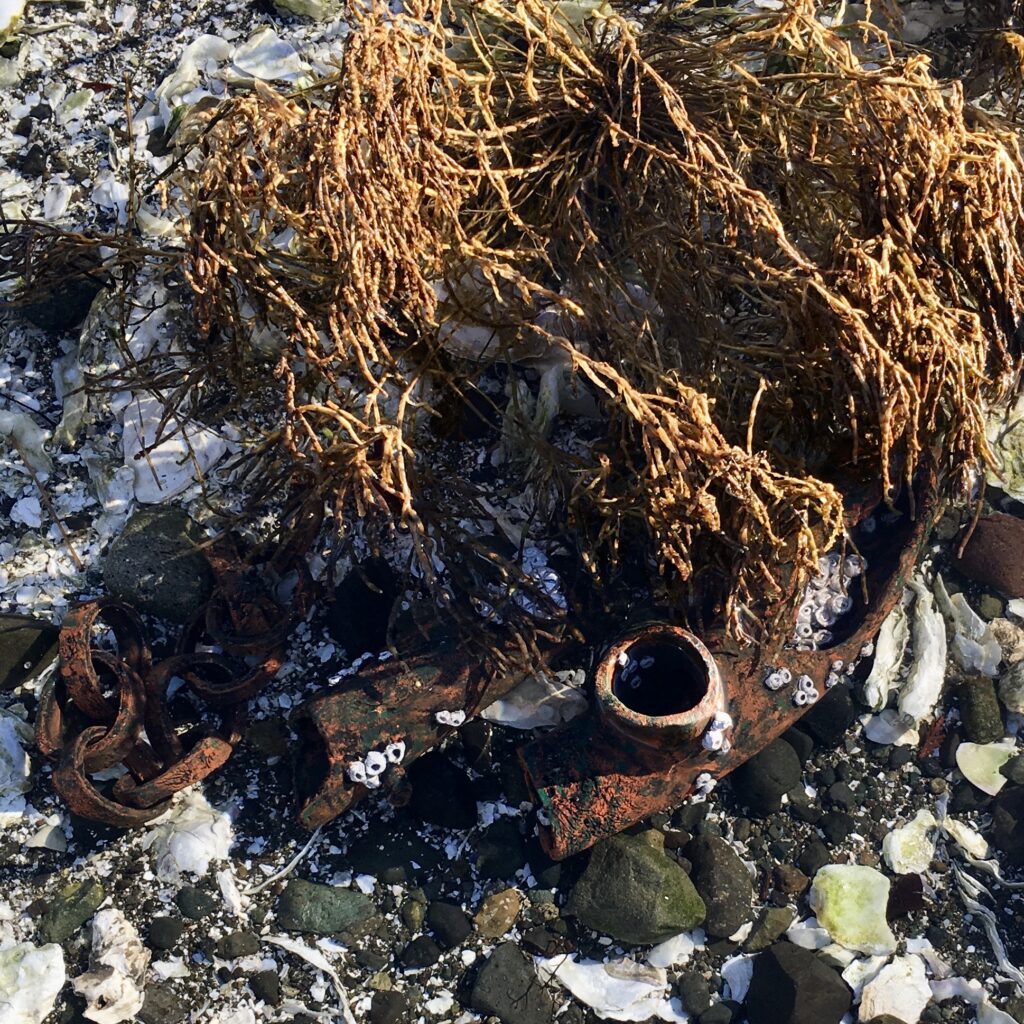
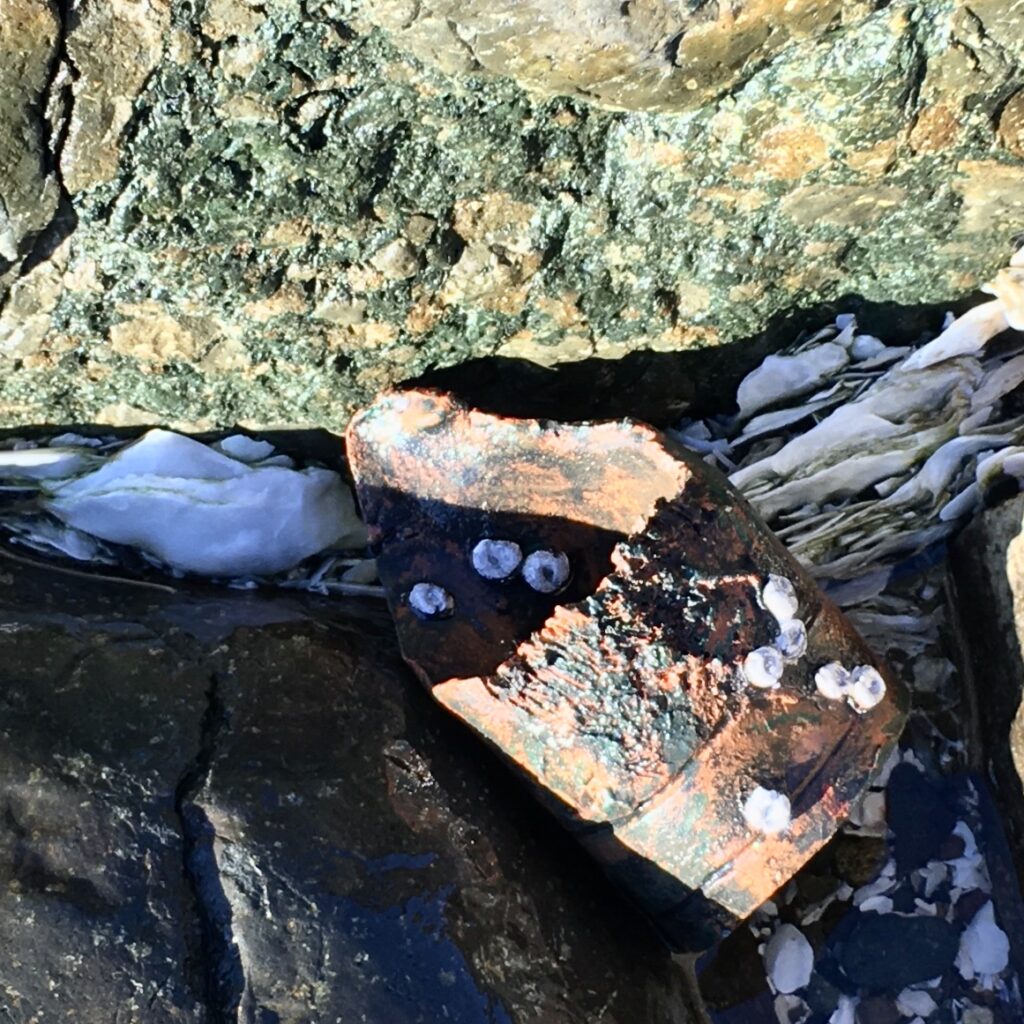
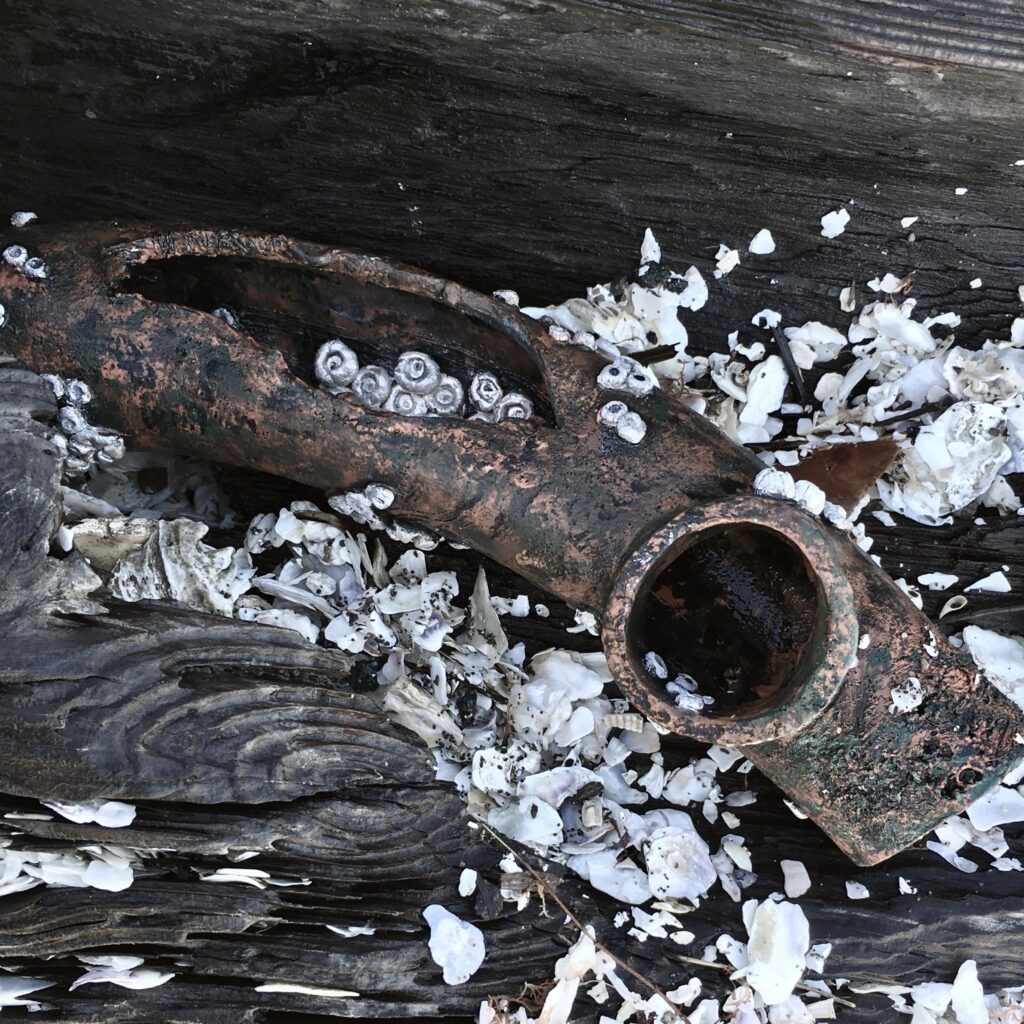
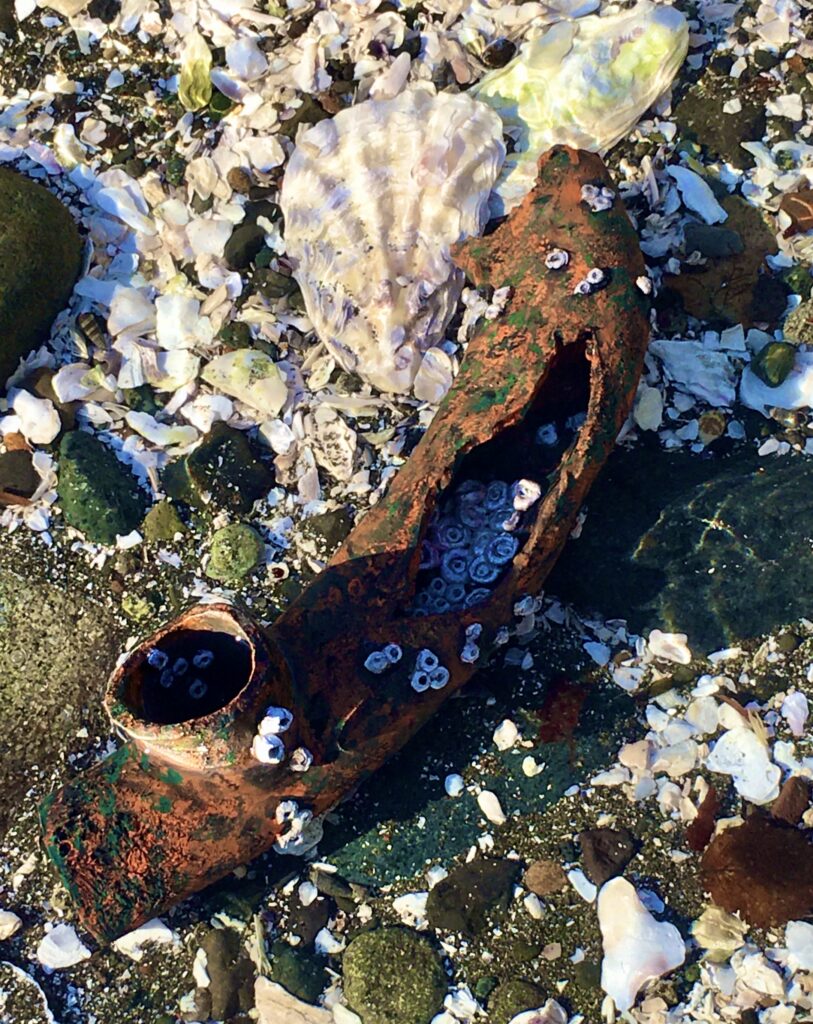
The weather has been very wet and rainy. There was a break in the eye of the storm, so I took the painted pieces down to the ocean for a photo shoot.
Pieces placed into the ocean under water.Beach finds.Old pipe full of marine life.Rusty chain on old wharf.more chains.Tiny Homes.
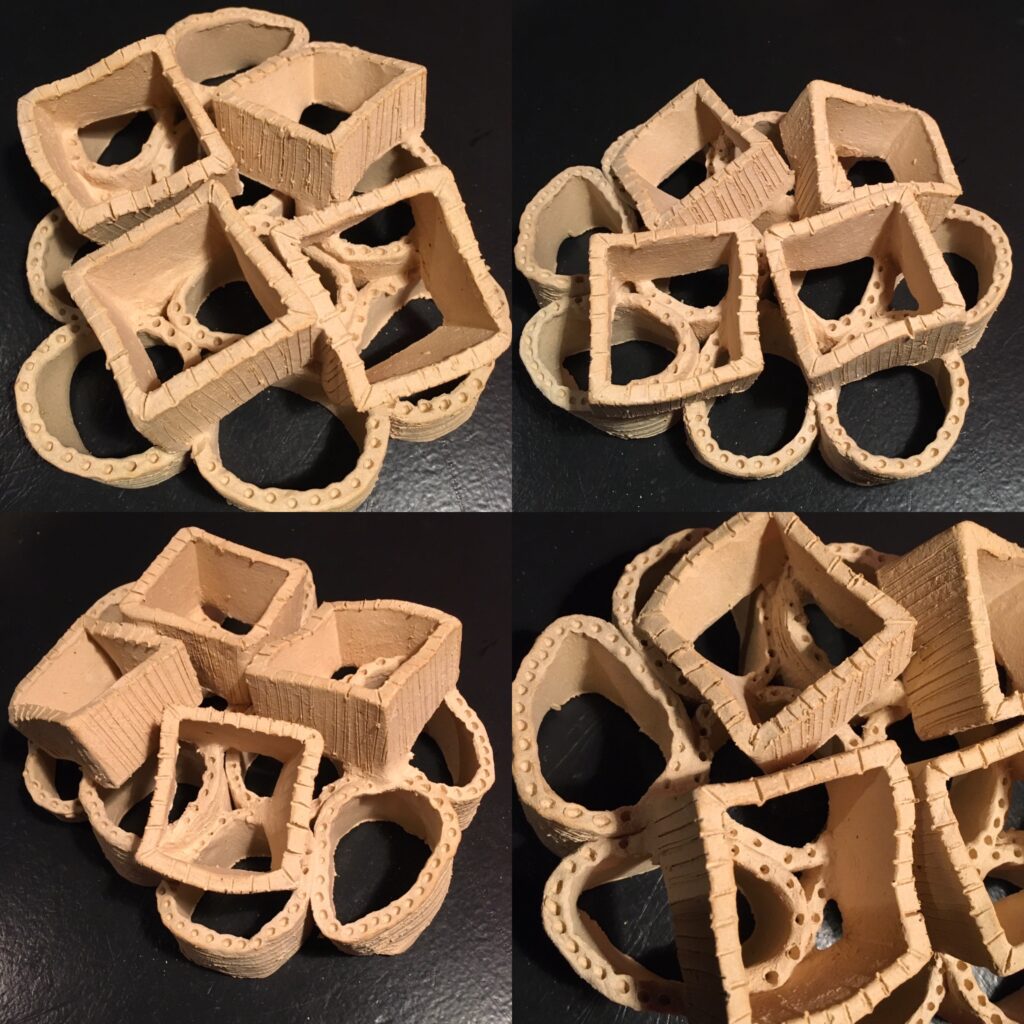
I also created another piece by breaking up the clay into segments and bonding them together. This one is completely abstract and experimental.
Clay conglomerate.
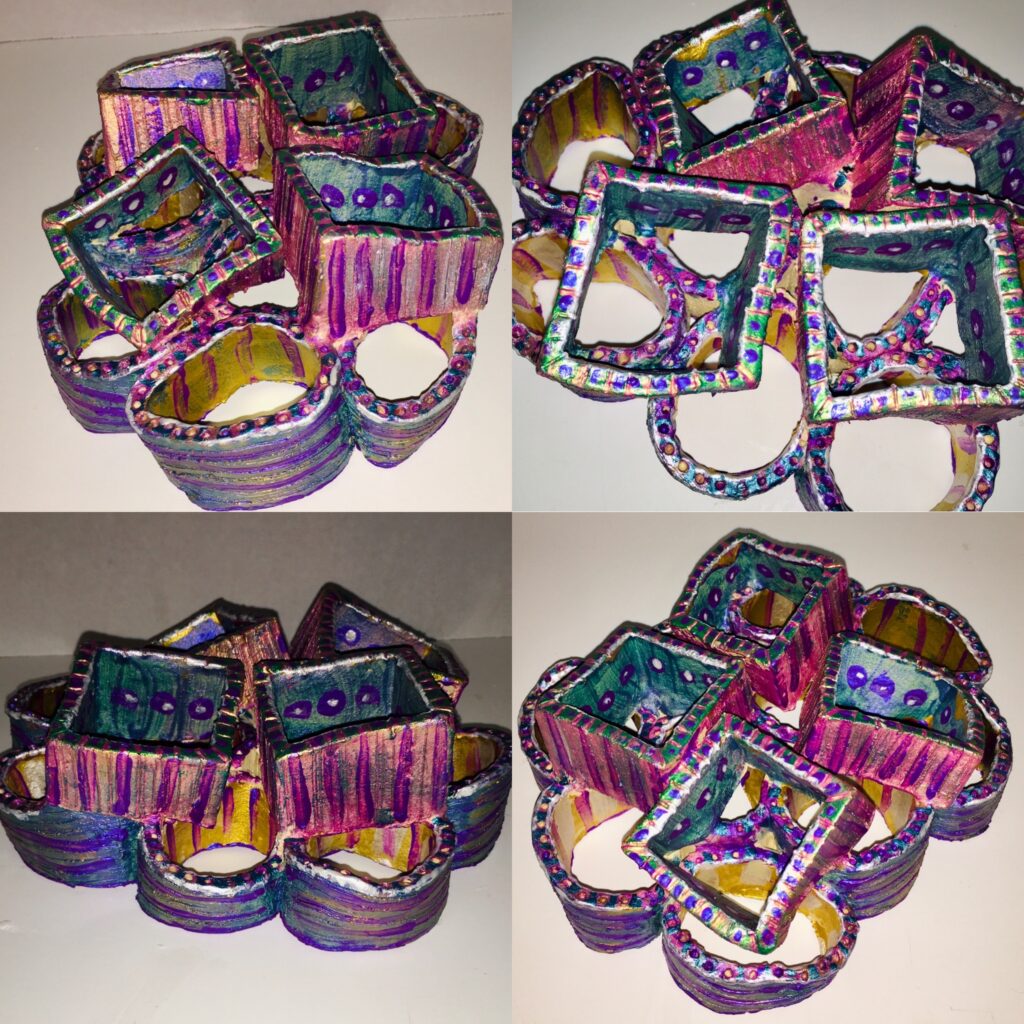
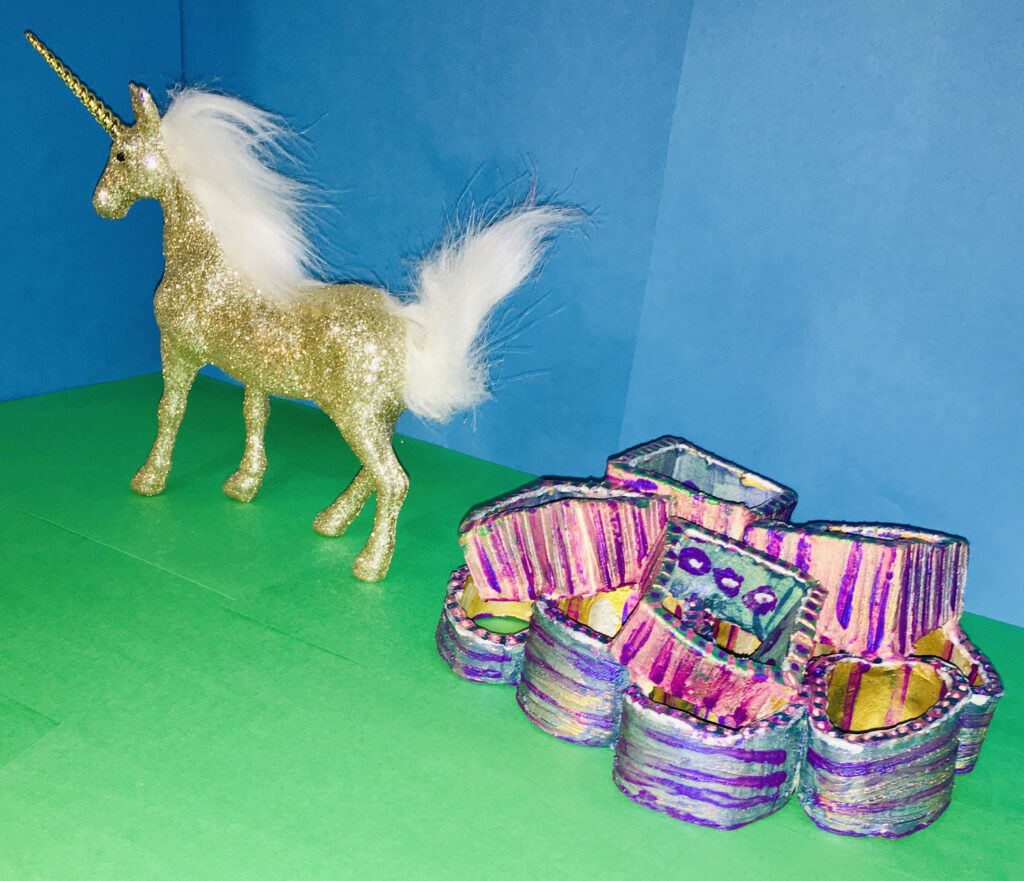
I have some new acrylic paints called color shift. They have micro pigments that shine different colors in the light. I had yet to use them so I decided to give them a try. Well that was a big mistake. This whole thing is looking like a crappy pastel nightmare. I keep painting but nothing I can do will redeem this mess. Maybe I will paint it black and start all over. What fresh new hell is this? Meanwhile… a unicorn was standing over on the corner of my desk (I tend to play with toys a lot and have a huge interior world). Well, it jumped in and became a part of this abomination and Save the Day! The piece is titled ‘Unicorn poop’ and I release it from my mind. It is a dialogue between dreams and reality. How some dreams start off all ‘Glitter and Rainbows’ and somehow end up a pile of excrement after being processed by the realities of life.
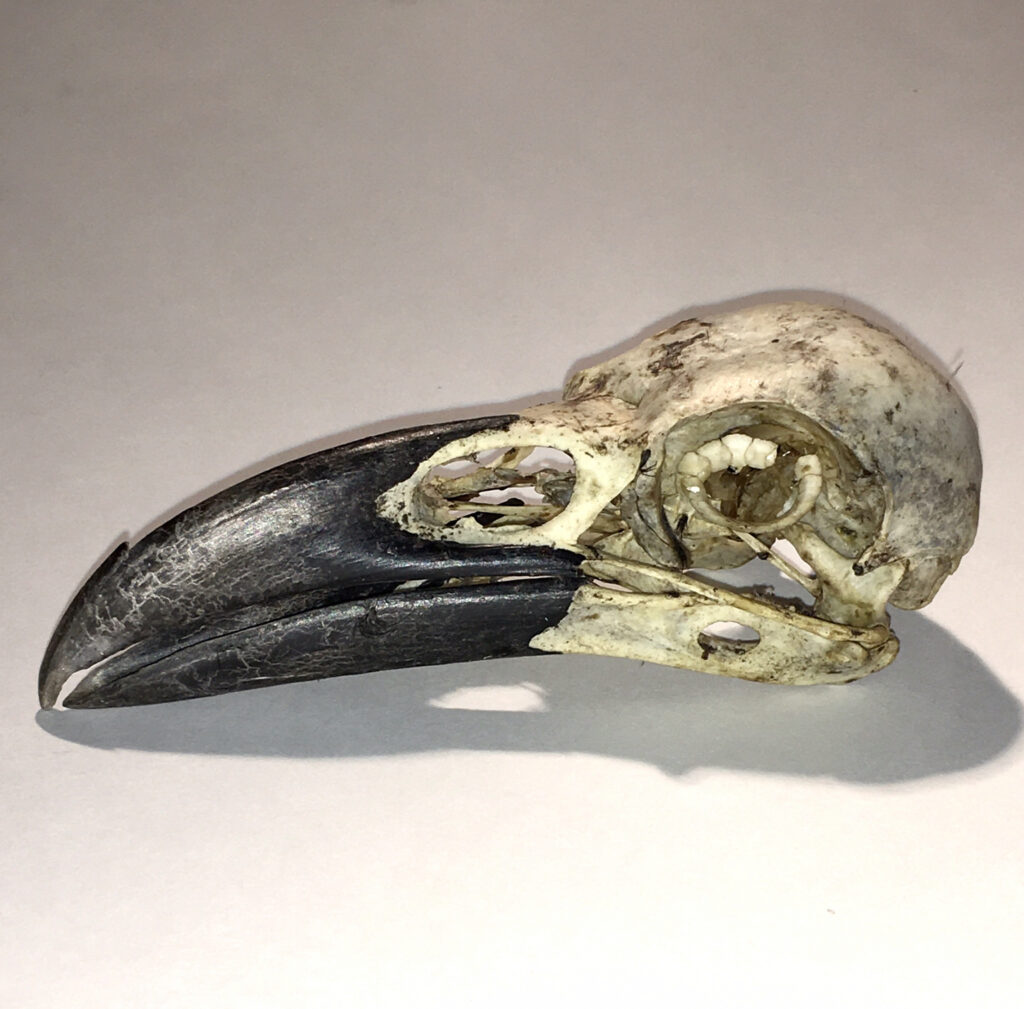
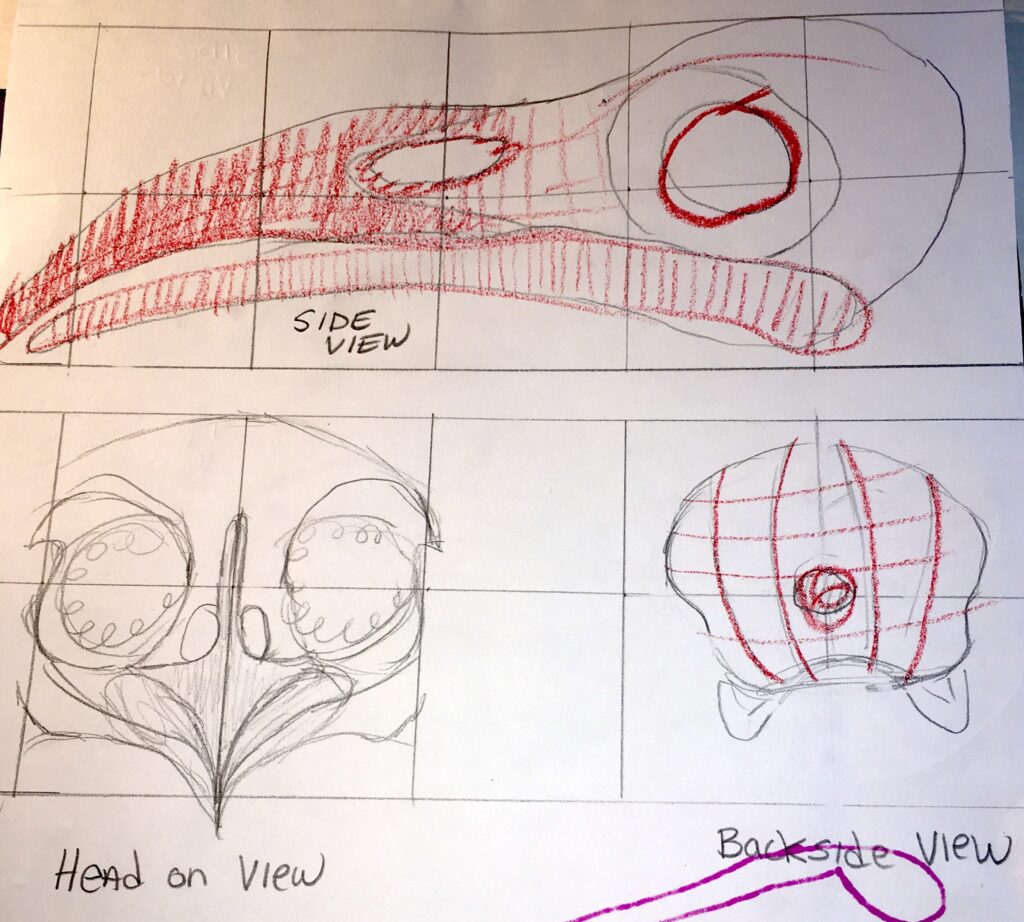
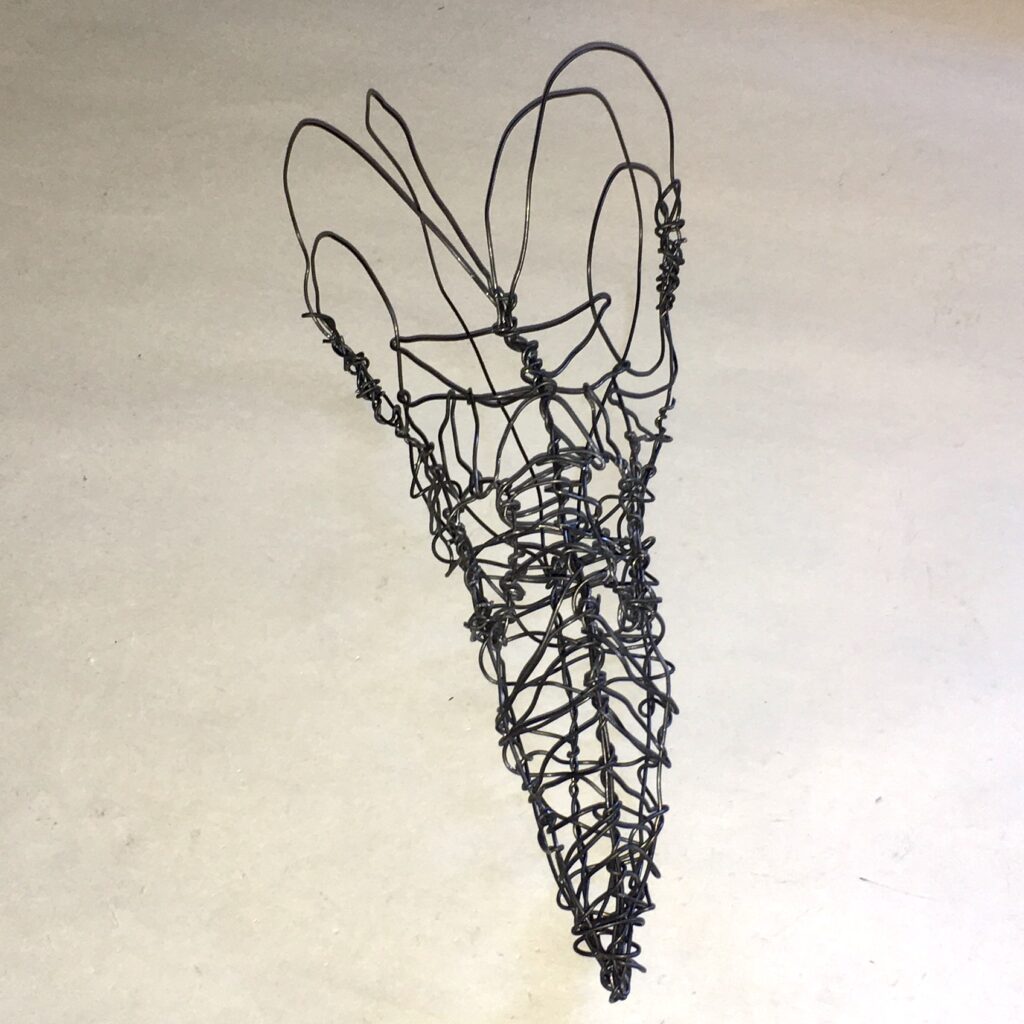
We were asked to look around and find an object that we felt would be interesting to create into a wire form sculpture . I decided on a large raven bird skull I found one day while walking on the beach.
Found Raven Skull, Vancouver Island, Canada
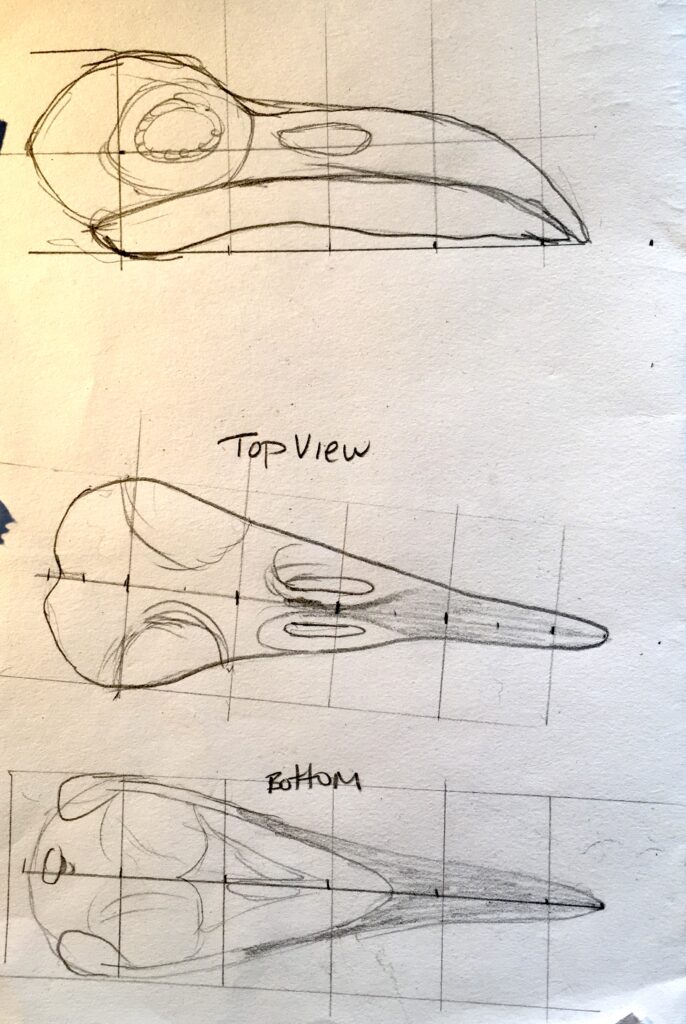
First thing I did was to draw a top, bottom, and side view to scale. One square equals one inch.
Raven skull views to scale.
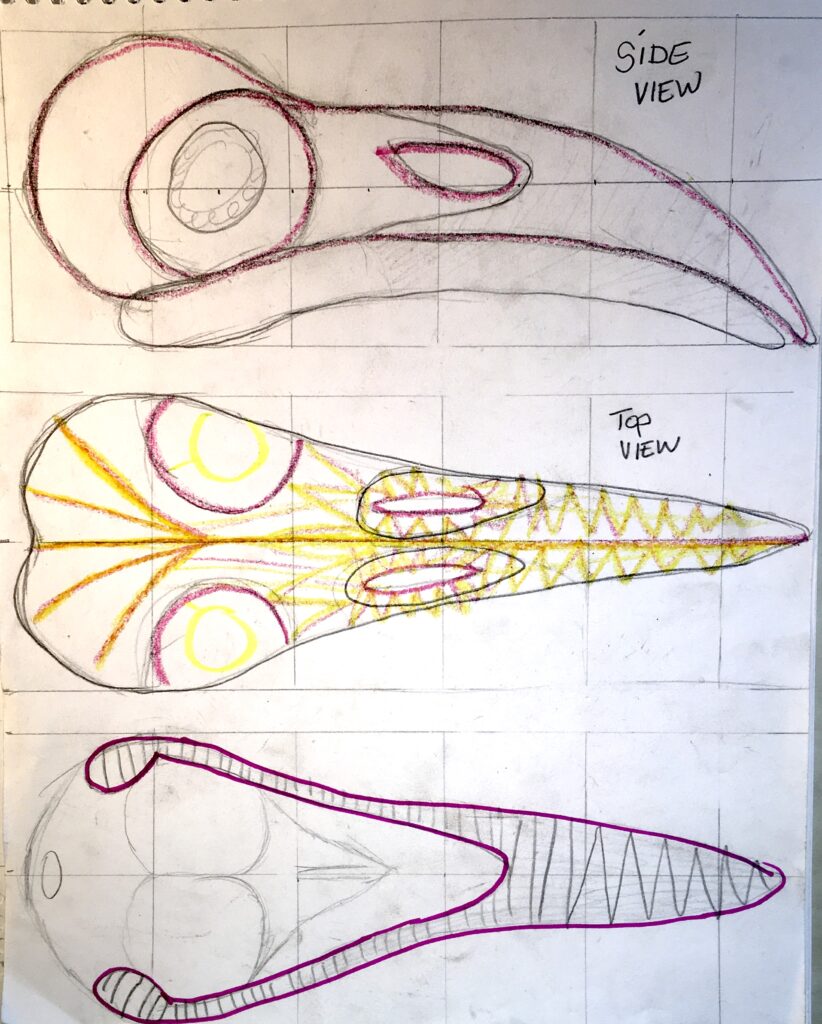
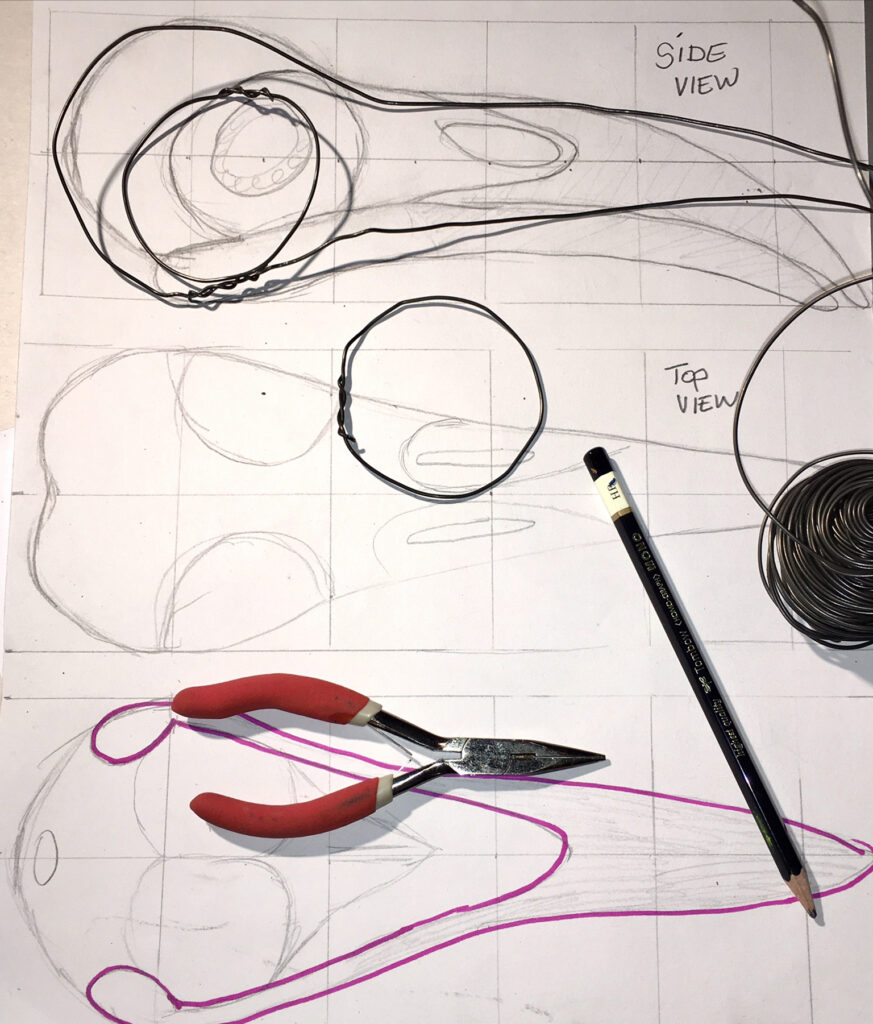
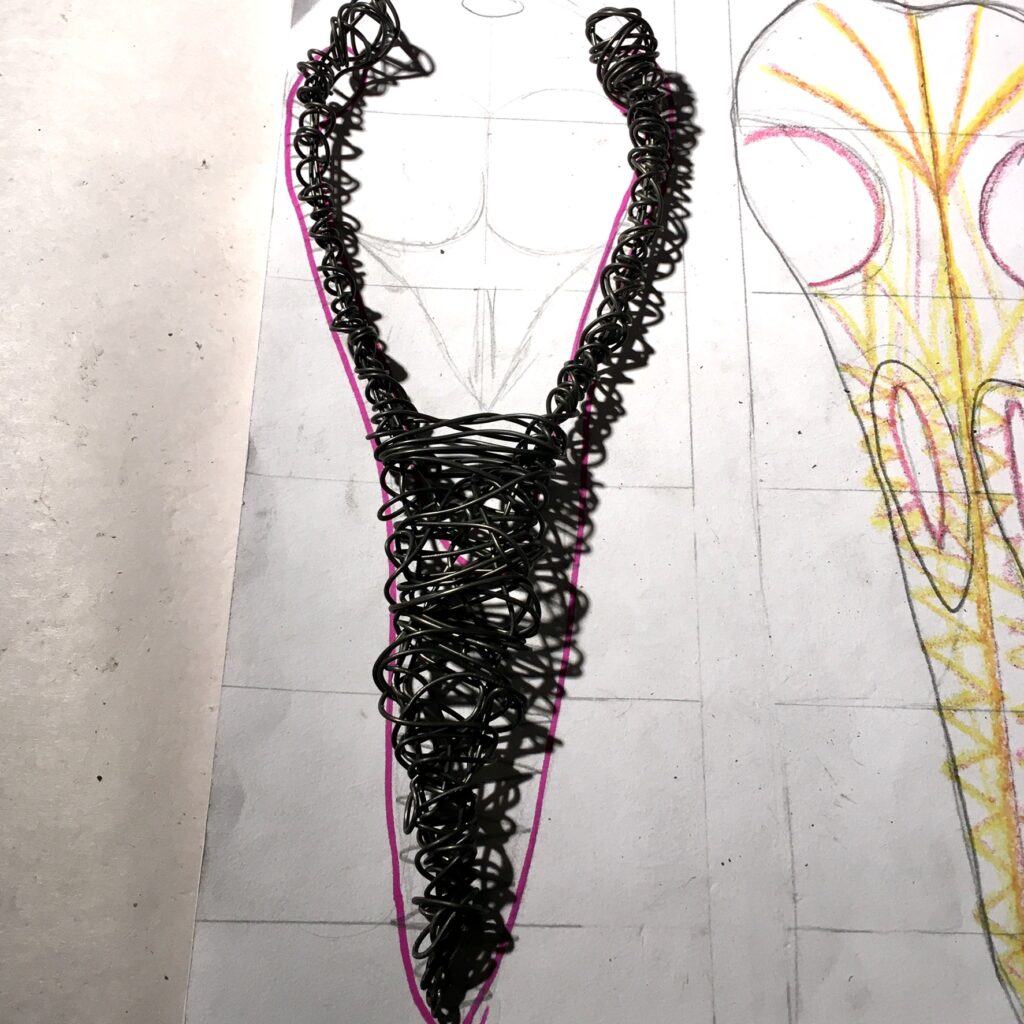
Due to the guage of the wire, it would be too thick to try and get much detail into my design. I will have to enlarge the drawing to match the wire thickness. I made a grid pattern with 2 inch grid squares. I drew in my bird skull views and these became the pattern I worked from. Different colors were used to draw in outlines and contour lines and helped me plan in my head what I wanted to do.
Enlarged to one square equals two inches.Three more enlarged views. One square equals two inches.
Everything was drawn, and materials laid out on my desk. Feeling rather intimidated, I just picked up the plyers and started cutting out shapes to fit my pattern.
Cutting outside shapes and forms.
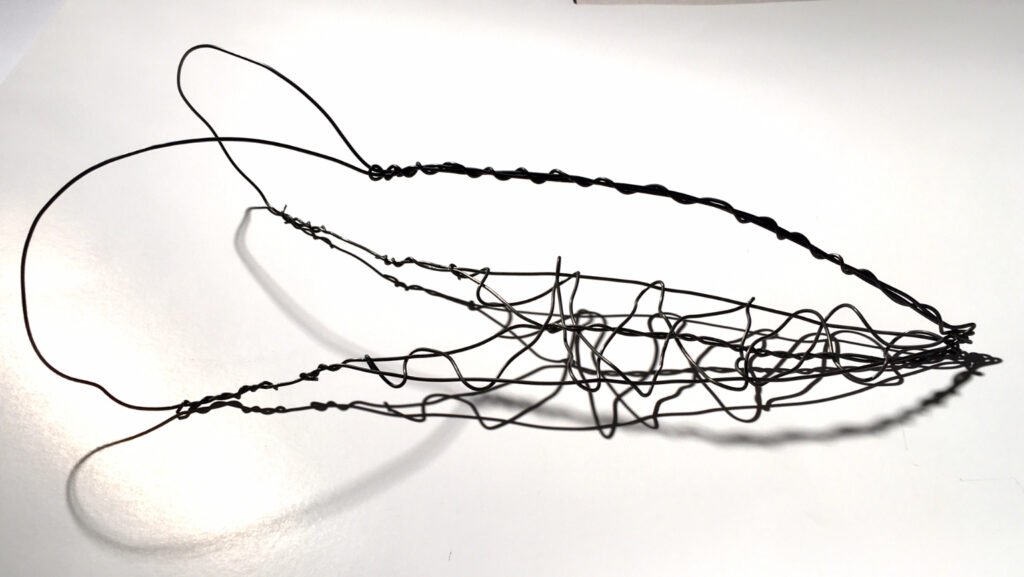
when I had enough pieces, I started wiring them together to create the basic form of the raven’s beak and skull. Kind of reminded me a bit of sewing pattern pieces together.
building the outline.
Once the basic outline was in place, I just started weaving the wire around the form. I had envisioned doing a lovely weave, but my poor arthritic hands said “NO, You will wrap however you can wrap it”.
Eye sockets!
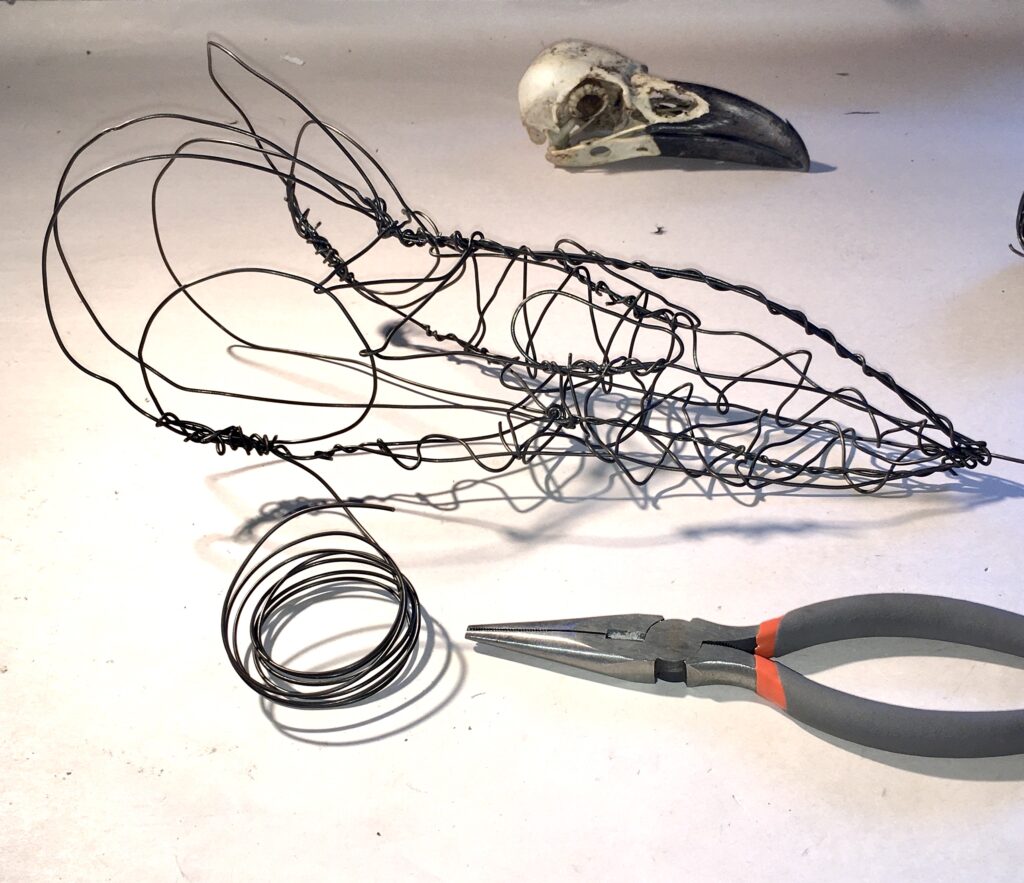
I added in the eye sockets, and more wires to the skull to fill it out and give it more shape. Nasal sockets were wired into the beak. I then proceeded to go into some kind of frenzied trance and twisted wire without stopping for the NEXT FOUR HOURS! Unfortunately, not to many process pictures were taken during this wire fueled event.
last pic before the ‘Where did four hours just go?”
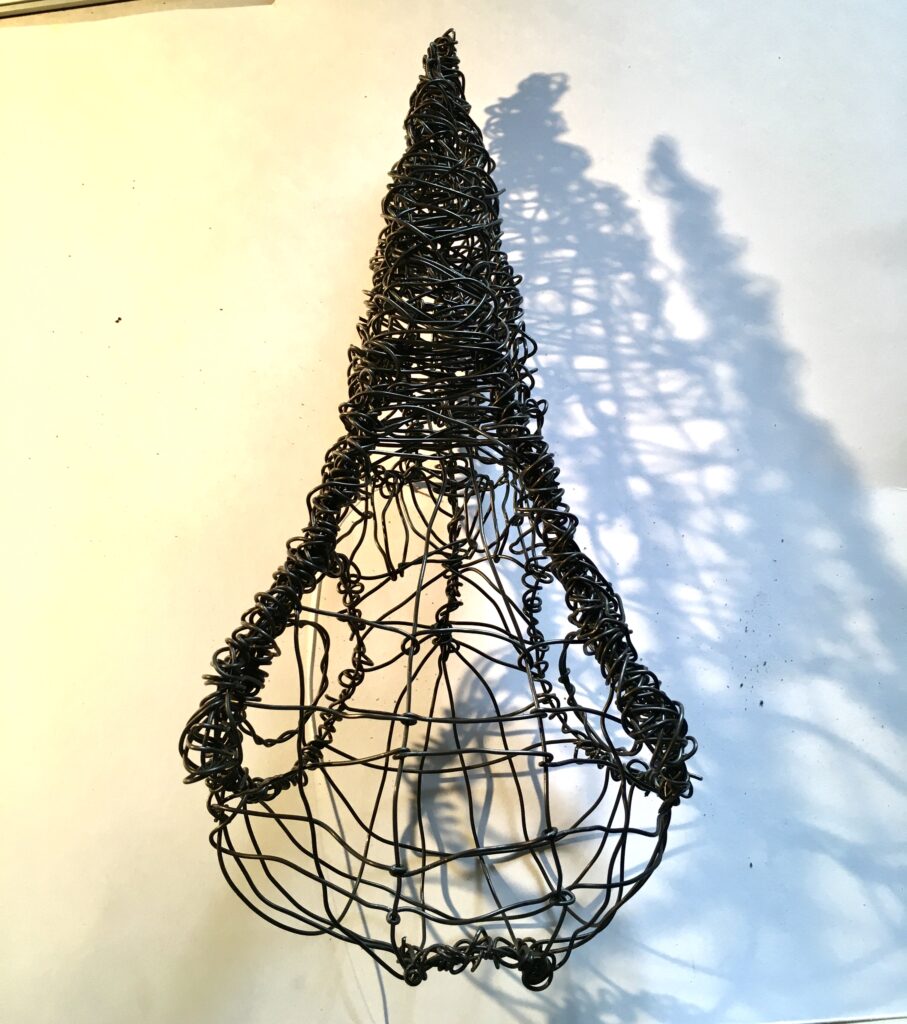
I basket weaved wire in and around the head, and created the Foramen Magnum. I should have placed it a bit lower, but there was no way I was even going to try and Undo All That Wire to appease my OCD. I added more wire around the eye sockets, and attached an inner cornea. The wire was just to hard to add the frilly details I wanted to add.
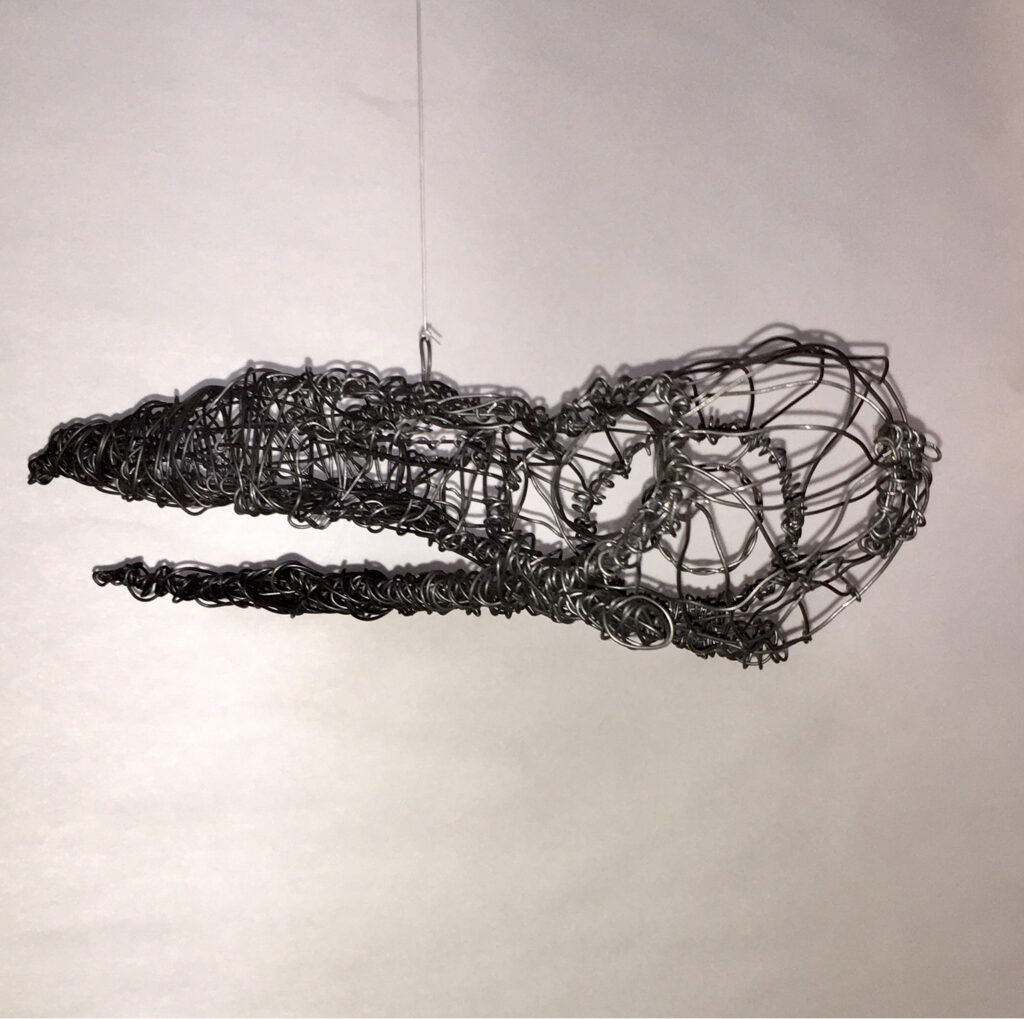
back view of skull looking in all the way to the beak tip.
At some point I put the head down and did the same thing with the bottom beak. I used the drawing and made a wire outline. This was filled in with wire wrapped around and woven to give a bit of bulk. I wrapped the bottom beak heavy so it would look solid and dark.
Bottom Beak
When the bottom beak was finished I wired it onto the skull behind the eye sockets.
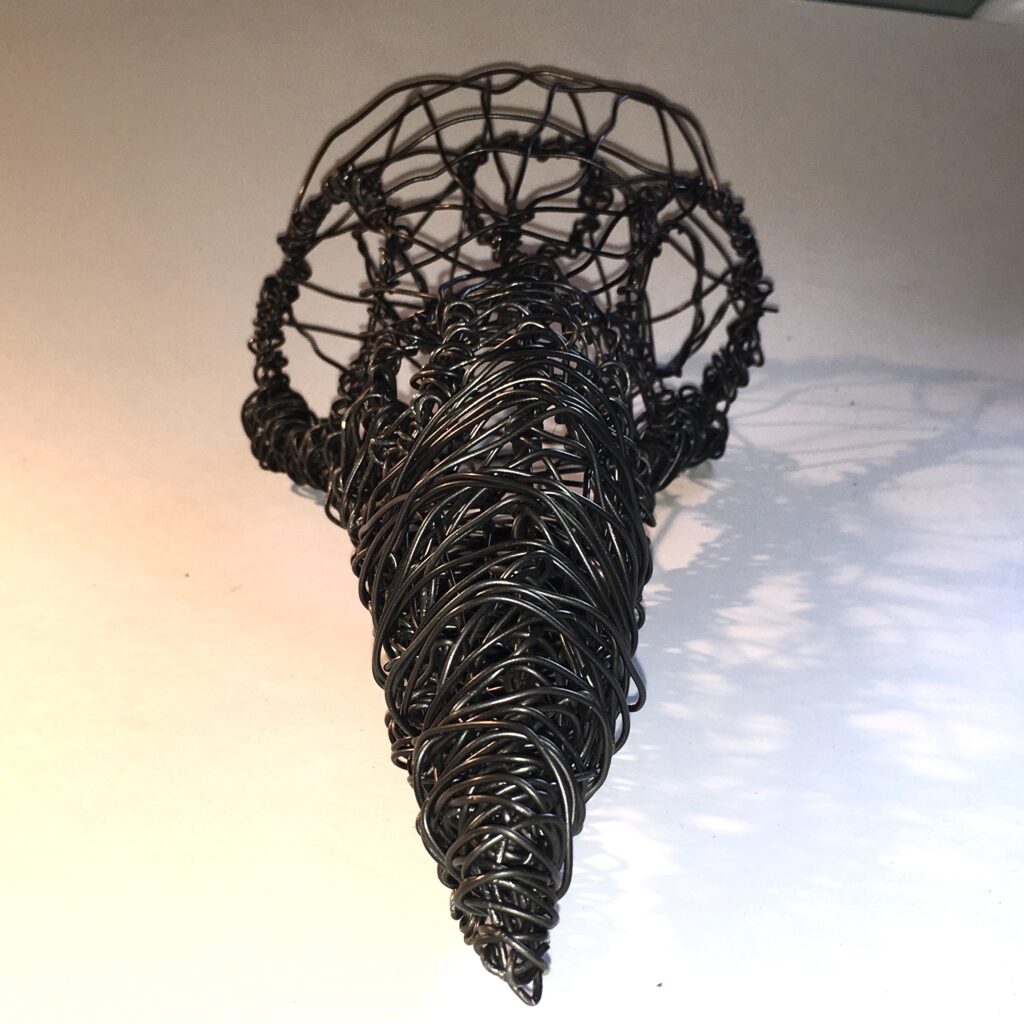
Bottom, Underneath view
Note the heavy amount of wire I wrapped around the top beak. I wanted to capture some of the heavy black that was on the original beak of the raven skull.
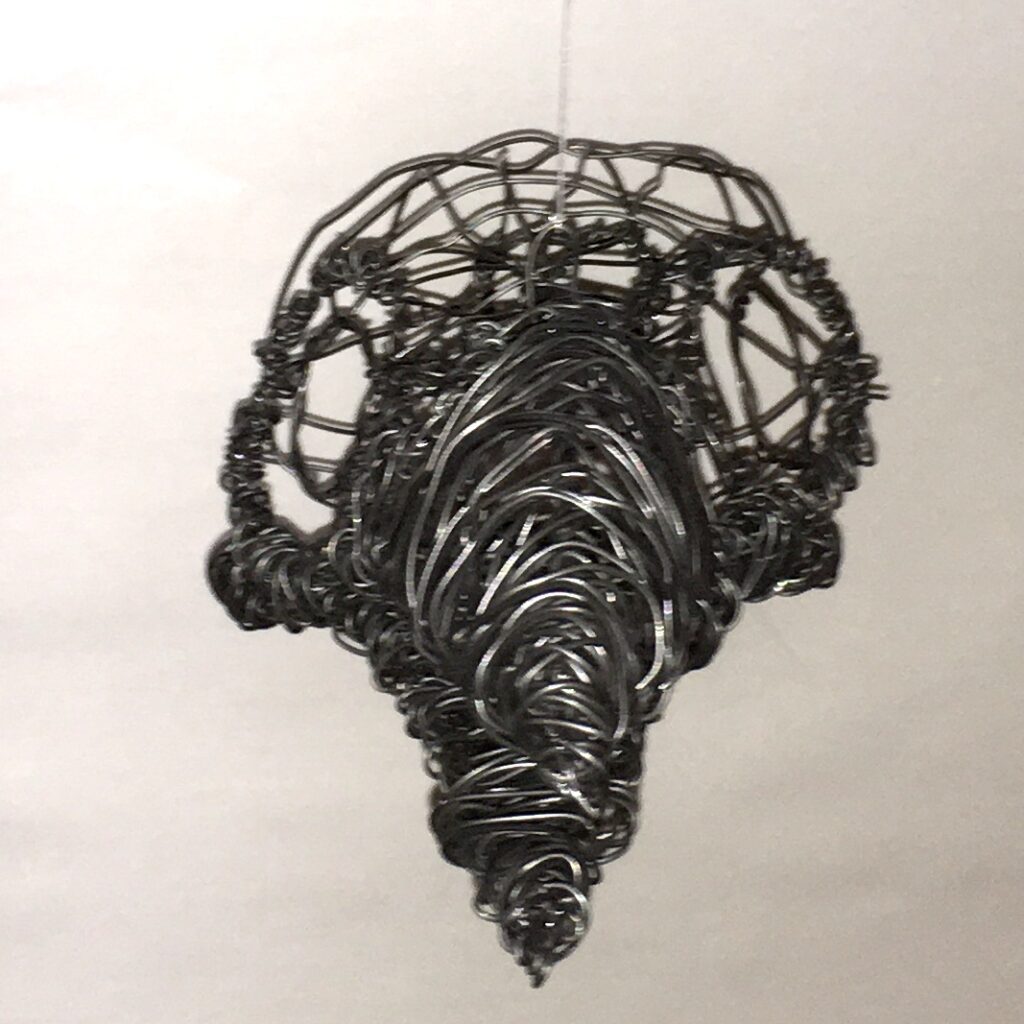
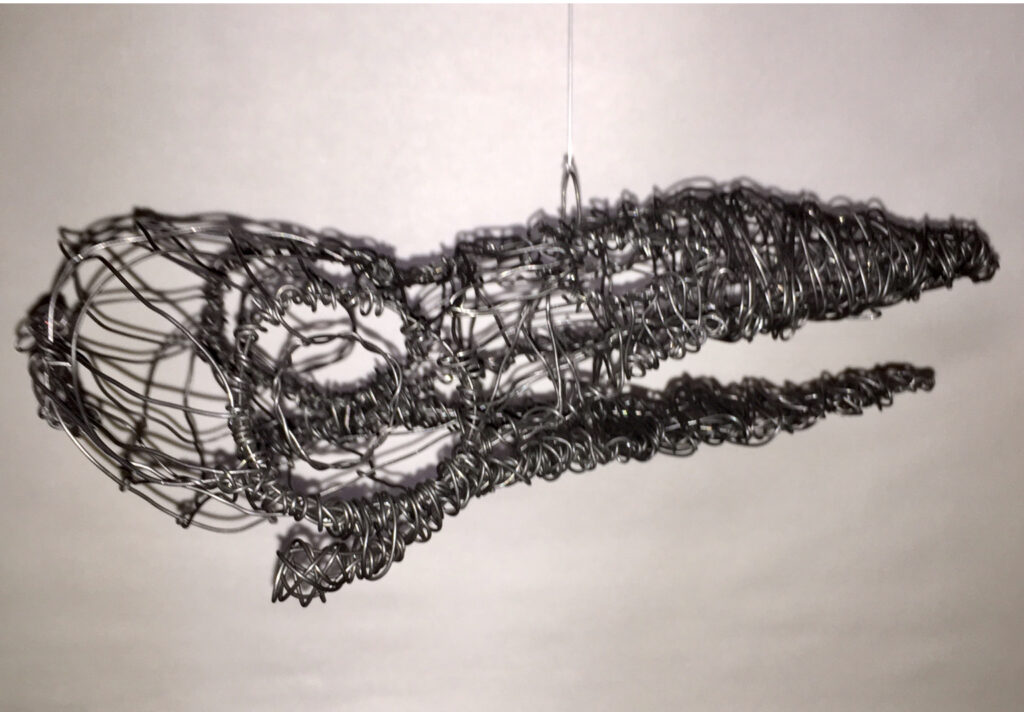
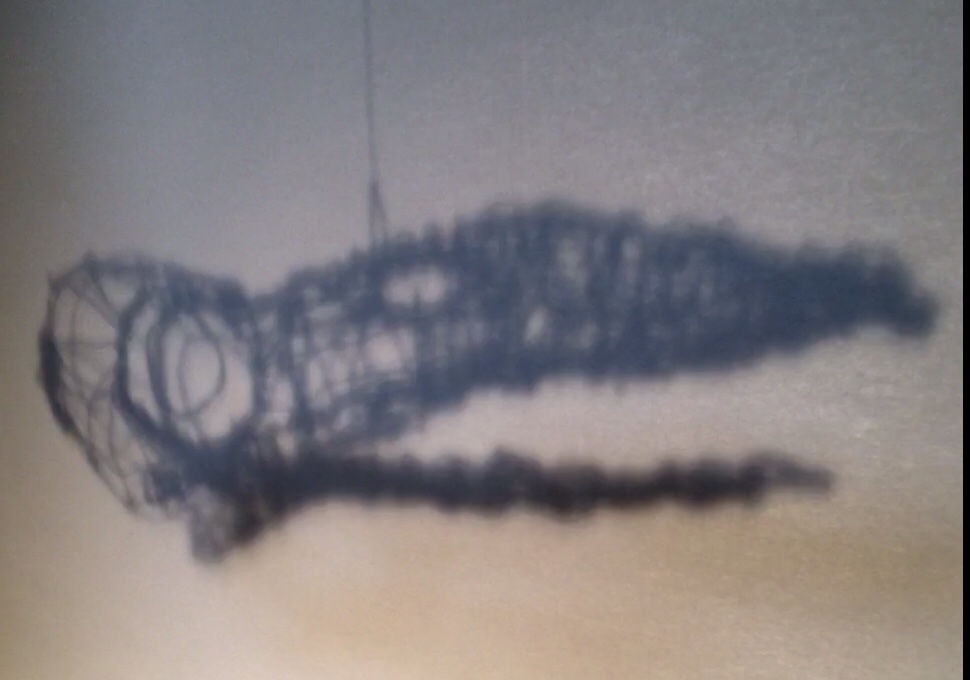
I used the mono filament and suspended my raven sculpture to the ceiling. It was fun to capture different views and angles while it was turning.
Full Frontal ViewRight side profileLeft side profile
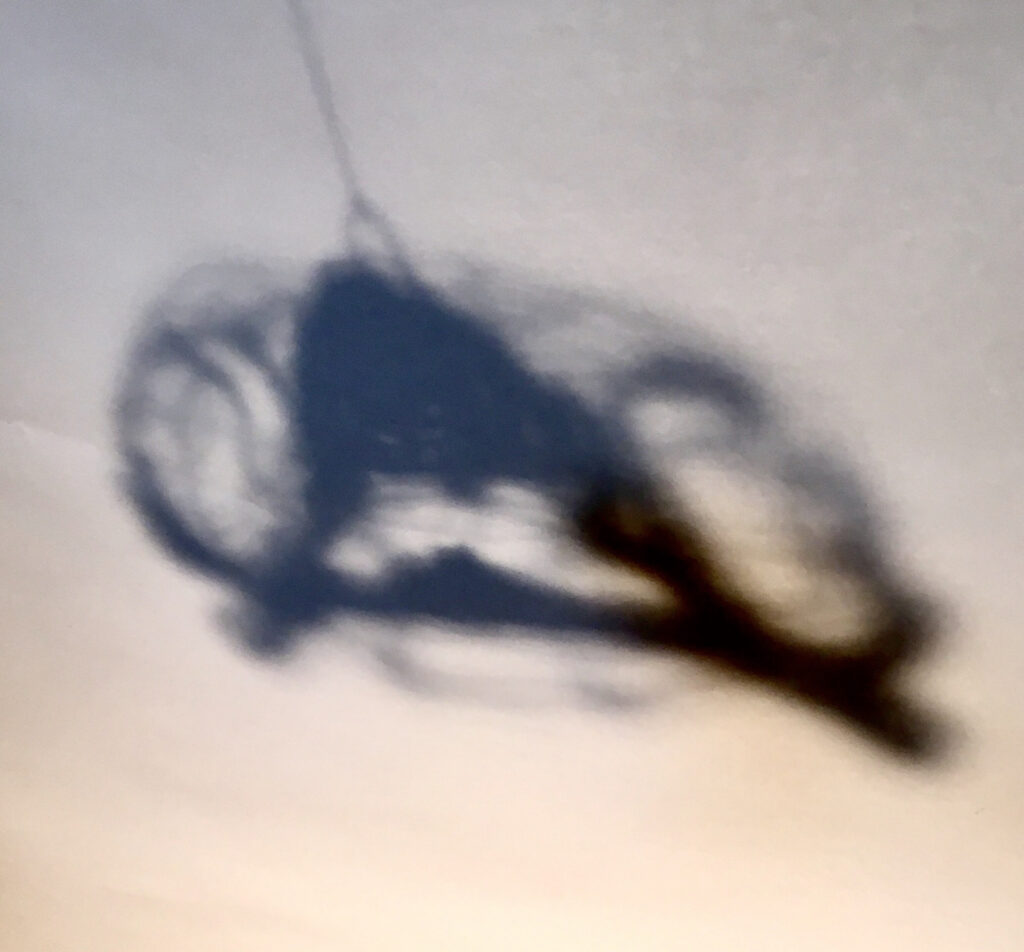
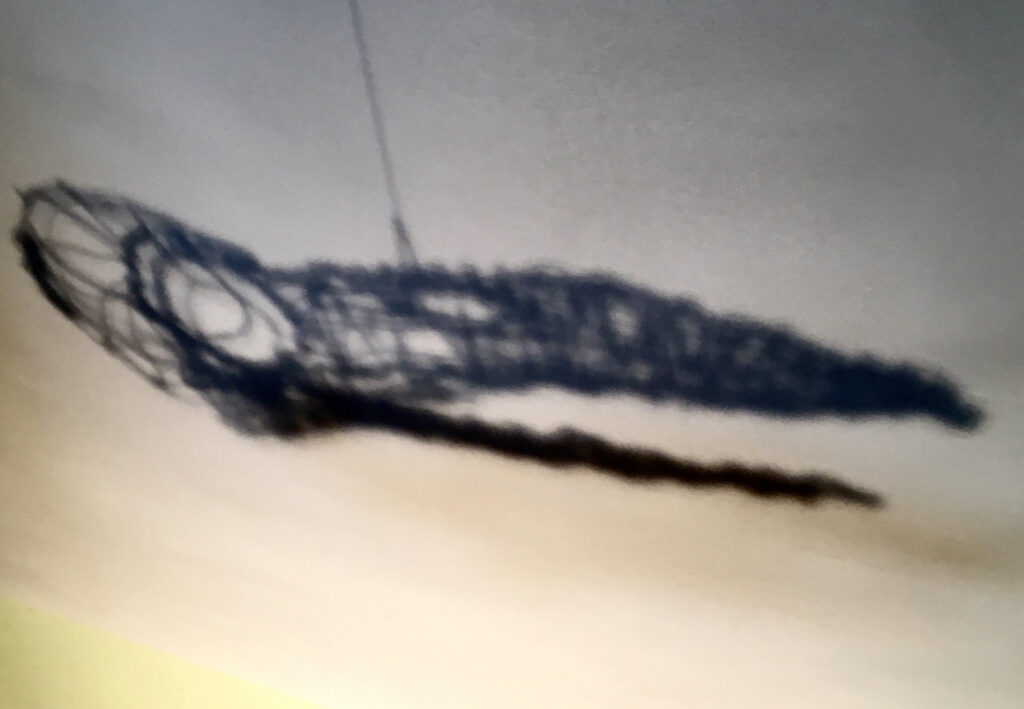
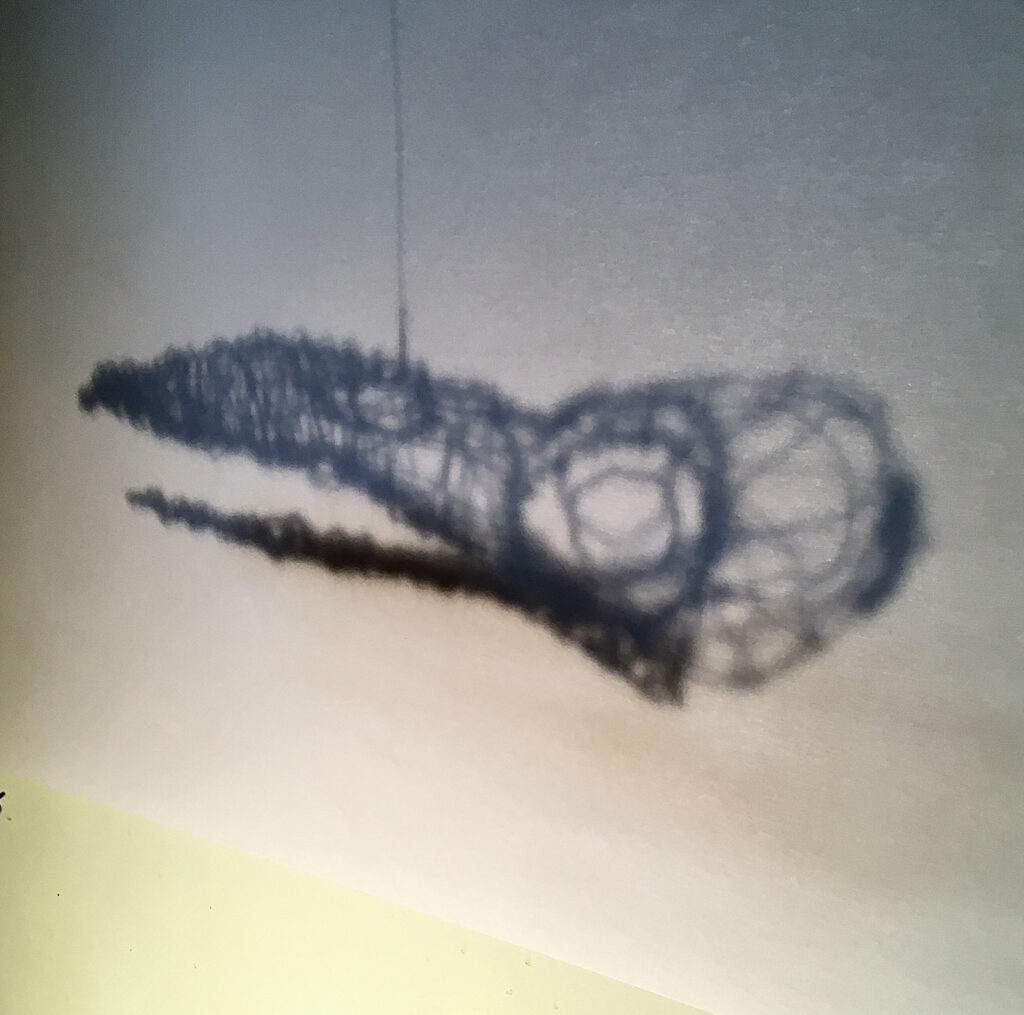
As it was getting dark, I shined a light on the hanging wire sculpture and enjoyed the shadow play on the wall the sculpture cast. An impromptu shadow play was performed for a very exclusive canine audience. When I was young I use tocreate shadow puppet productions for my younger sister when we were suppose to be asleep. This project evoked childhood emotions I had forgotten about.
Raven Rises Again. Shadow Play Sept 17,2021
Still shots.
Raven hears crying and looks for the source. He sees the girl standing out in the cold.Raven asks the girl why she is crying. She says Squirrel has taken her key and hid it in a hole in the tree. Her arms are not long enough to reach in and grab it.Raven tries, but he can not reach it either. He uses his magic to grow his beak longer to reach in and pluck the key out.Raven flys off and girl gets to go inside out of the cold. She notices he stole her blackberries. No tarts for anyone that night.
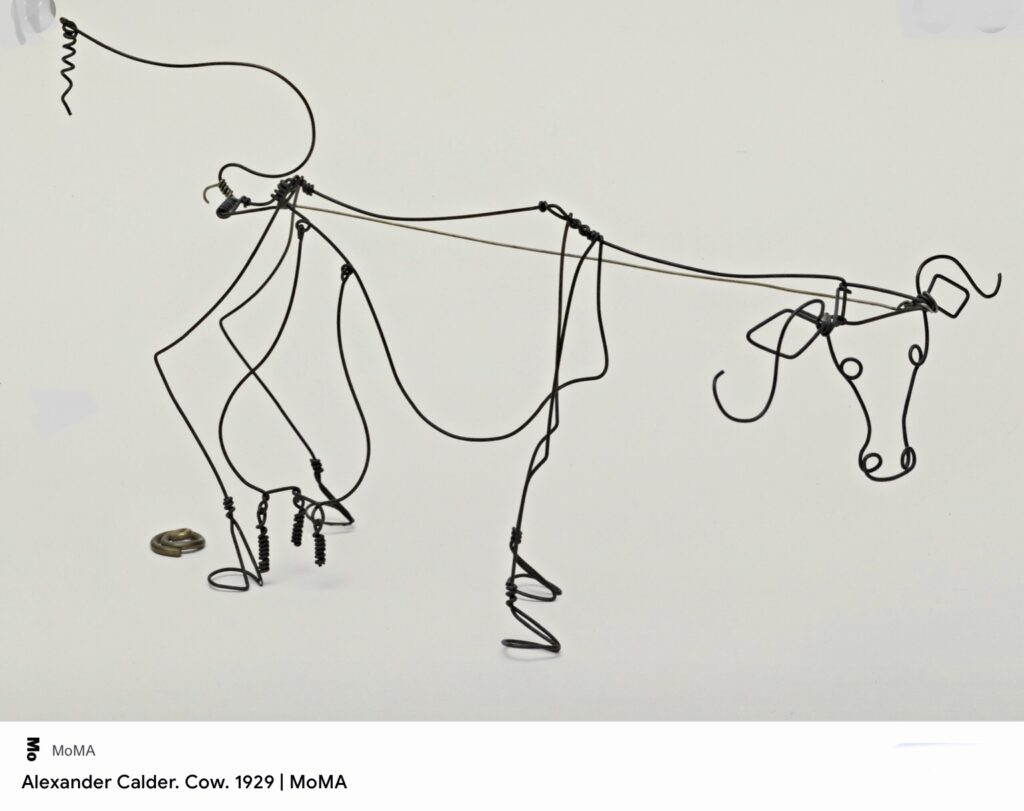
Artist Research
I chose Alexander Calder as the Artist I wanted to look at. and research. I love how his wire sculpture looks like a drawing with a sharpie marker. I remember doing blind contour drawings last year and his work really reminded me of those drawings. He was the first artist to use wire to create 3-D line drawings. He made a miniature circus from wire and found objects. His mobiles moved around and provided further play within the spaces they hung. He invented “Drawing in Space.” His work creates volume without mass.
Material requirements -Acrylic on canvas, wood, or other (Not paper)
Size 24”x36” minimum
Preparatory – 2 sheets minimum
Subject matter parameters
“Turn something that is mundane into something extraordinary”
“Turn something that is extraordinary into something mundane”
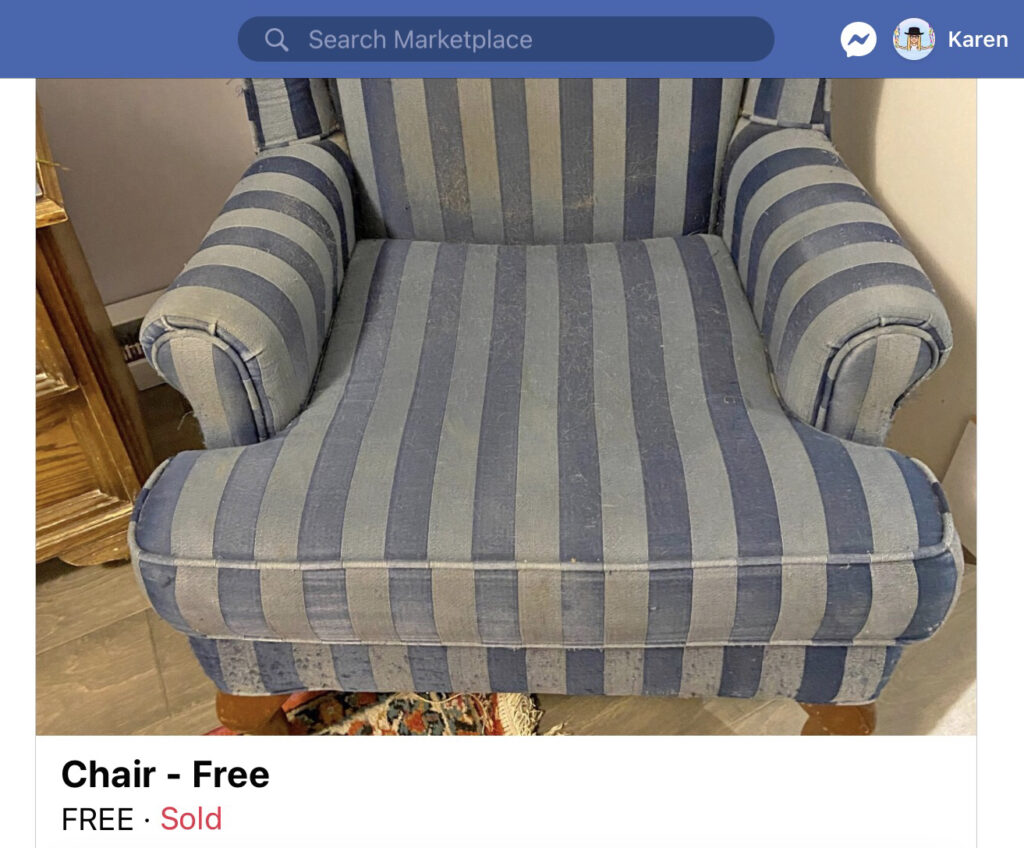
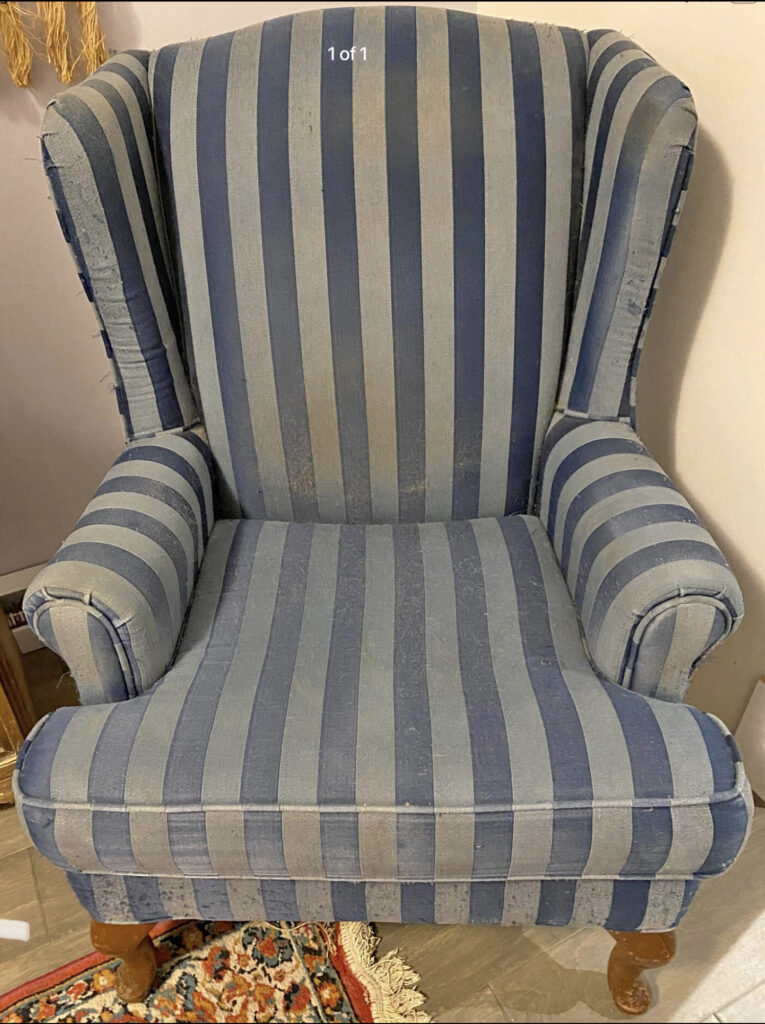
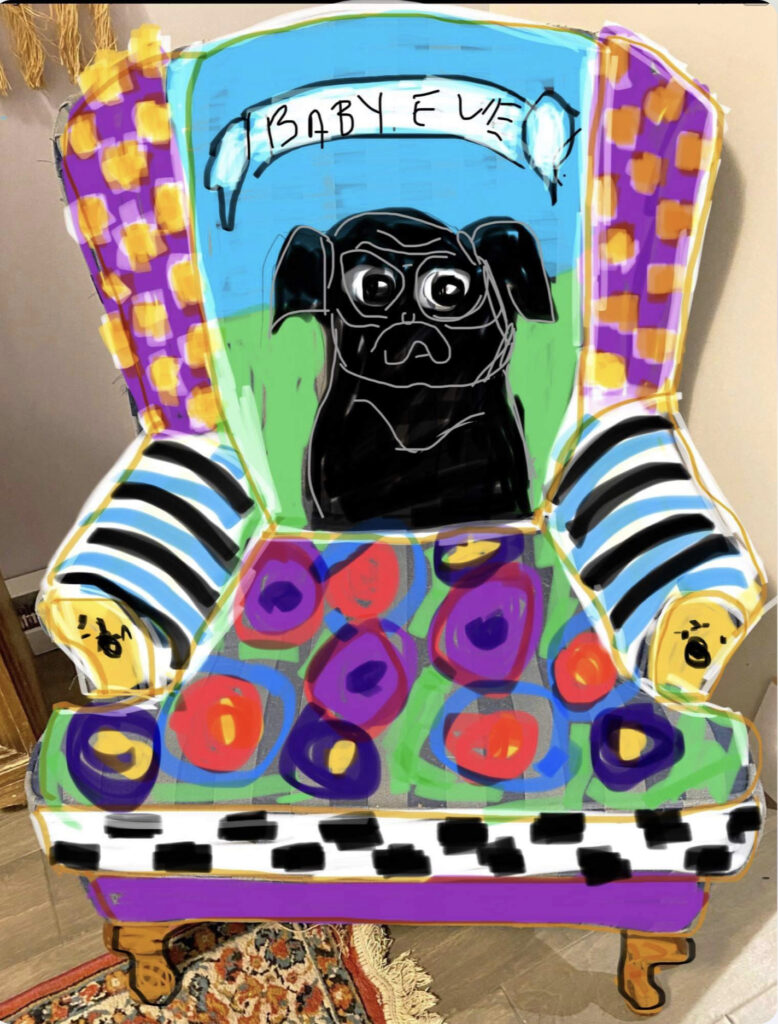
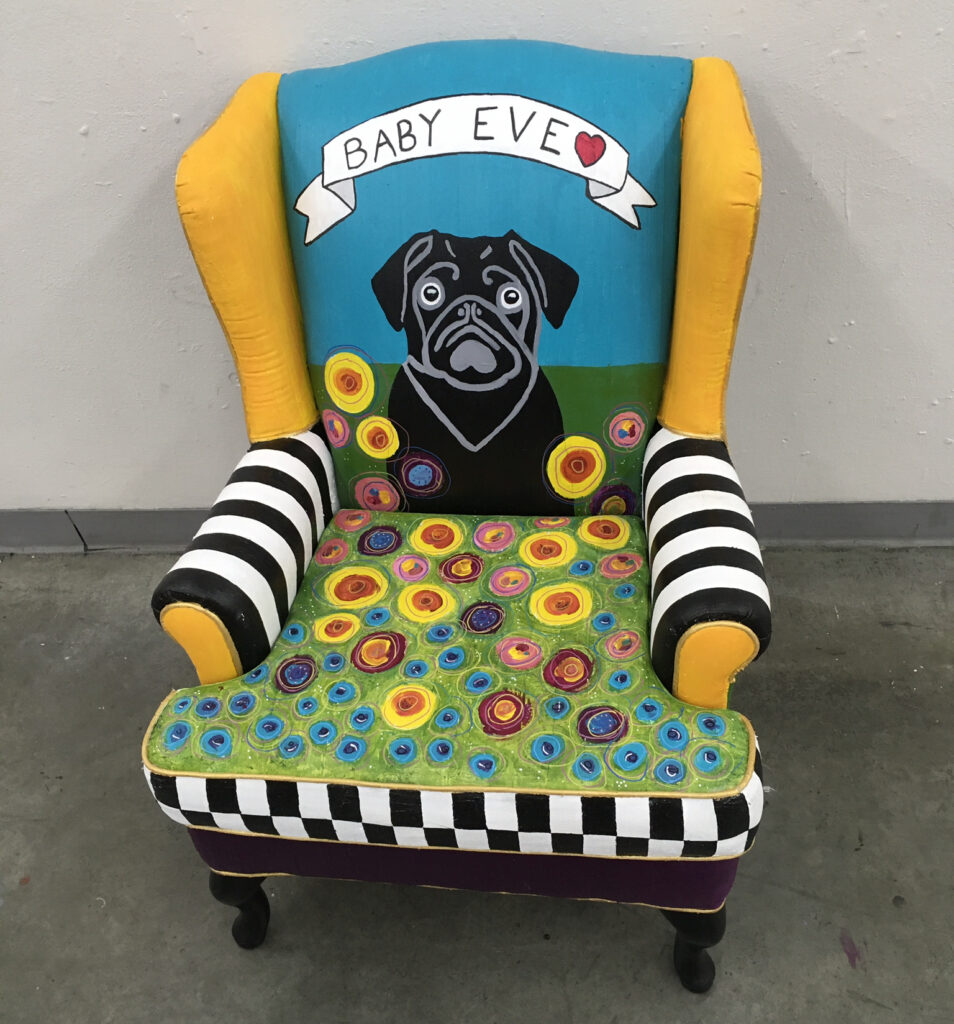
I know what I want to paint for my Final. I envision an ordinary chair painted into an extraordinary chair and I will use a chair as my canvas! Is this allowed? Too weird? Something I should discuss with Instructor Scott? Baby Eve says “move ahead. I am not getting any younger.”
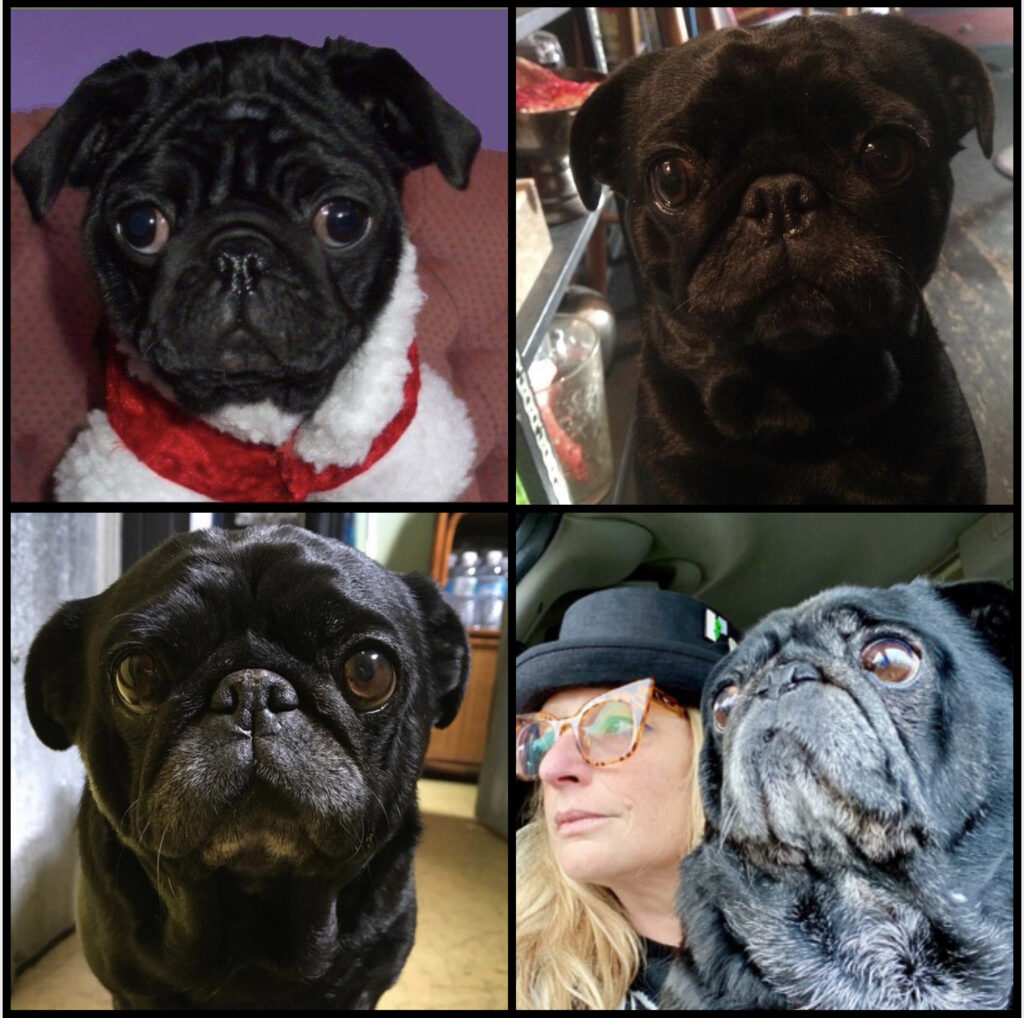
The subject matter will be my dog “Baby Eve”. She was born in my house in 2011 and has been a constant sidekick with me for 12 years. She became a service “Therapy Dog” in 2018 after my PTSD injury. Last Tuesday she became very ill. I missed painting class on Thursday as I was exhausted tending to her medical needs all night and day. She did get better and I hope she will see this summer’s sunshine.
This art work will be a Retablo painting, a Devotional painting and also an Alter for Baby Eve. A place to sleep away the warm sunny days this summer. In the future when she has passed, I may burn this Artwork in the flames. Grief is a hard thing.
So I need a chair. Best place to look for used stuff is on Facebook Marketplace. I type in “Free Chair” and get a match. I drive up to Oyster River and then down a super long road. The chair had great lines for what I wanted I like the form of the winged back. They will frame the sides of the Retablo painting nicely.
Looks pre- loved by a cat.
And some pictures of Baby Eve’s Evolution:
Evangelina Erzulie Frida Aka: Baby Eve
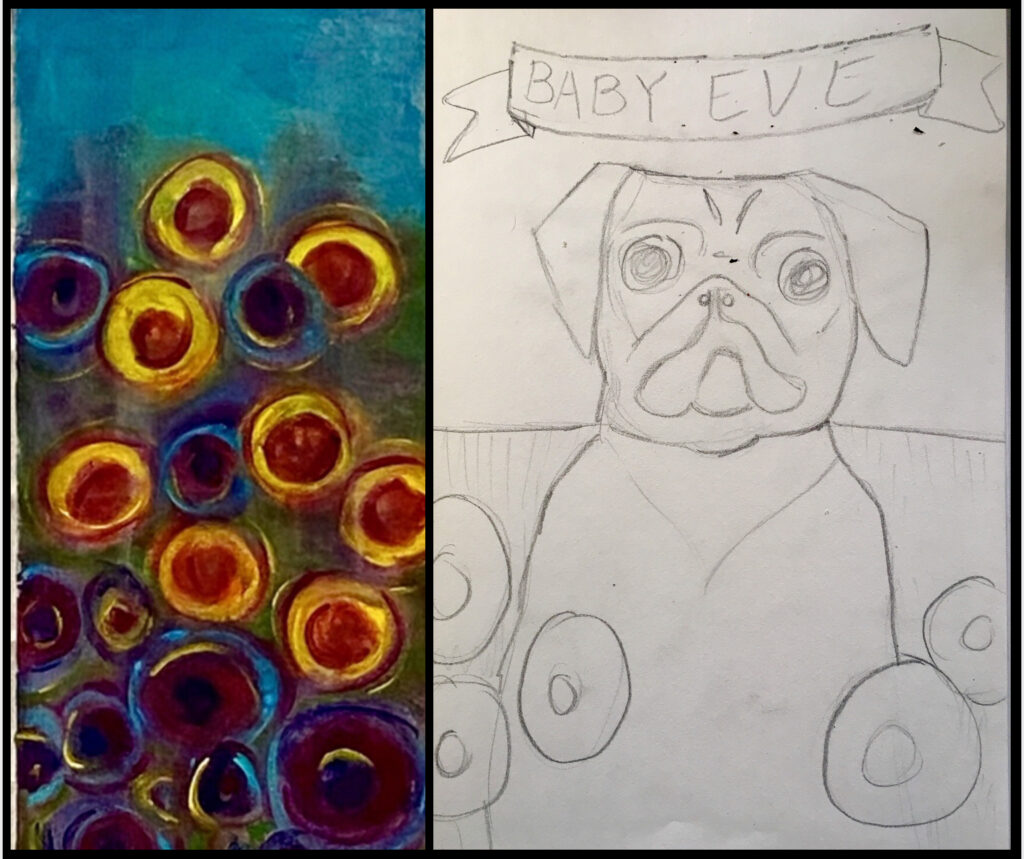
I liked the look of a painting from Unit 2. I had used wet stains and high saturation of colors to create a garden landscape. I wanted to incorporate this into the chair. I also did a sketch of Baby Eve that I will use on the back of the chair.
Painting and Sketchbook.
Using my Ipad and finger, I did a quick digital painting of my color ideas. I am sure It will evolve as I move forward
Quick Digital Mockup
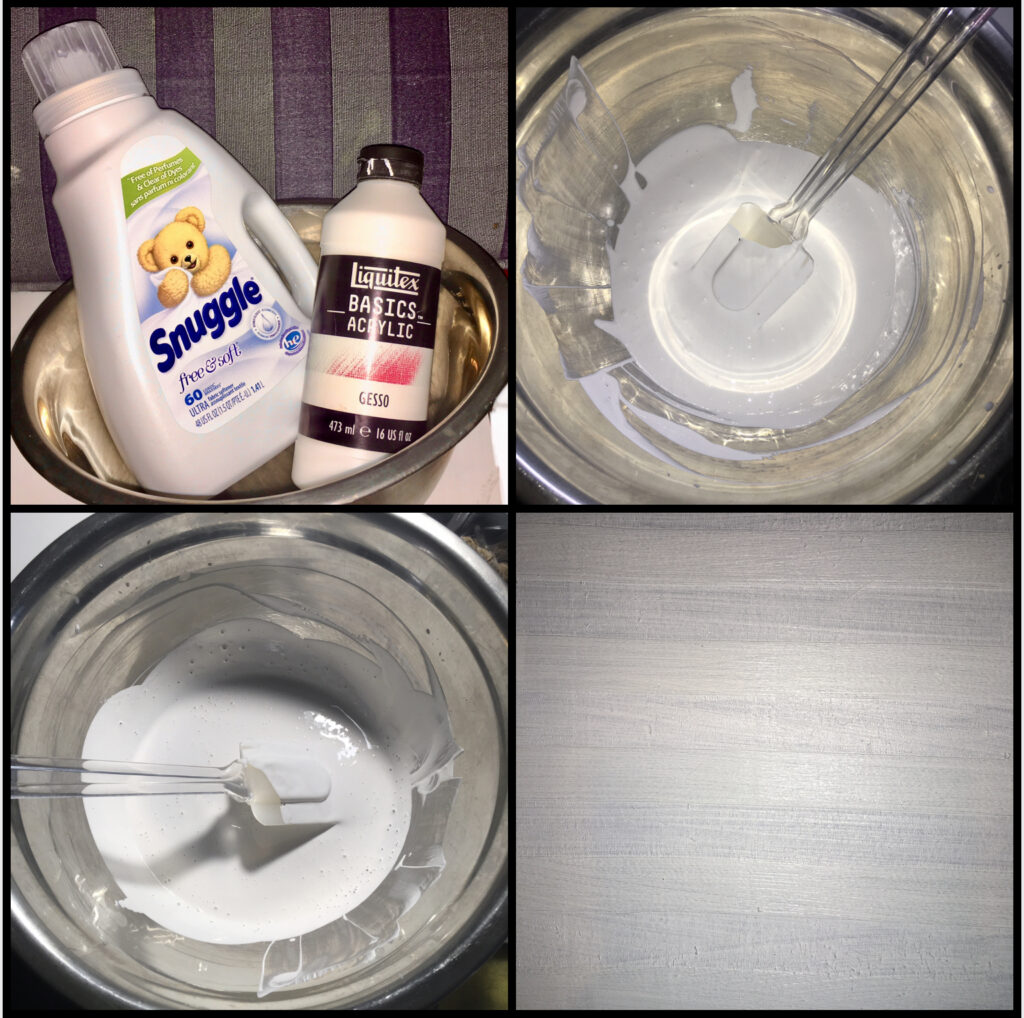
After cleaning the chair it was time for Gesso. I wanted the paint to be a bit flexible and not crack. I know if you add fabric softner to acrylic paint it acts like a textile medium. I painted the chair and the cushion white with this mixture.